24 Stunning Bathroom Sink Ideas That Upgrade Wash Time
Your bathroom sink gets used every day. It deserves more than a crowded counter and a faucet you keep wiping around. These bathroom sink ideas bring together inviting colors, useful storage, and shapes that make your washing area feel thoughtfully planned.
Maybe your powder room barely leaves space for a hand towel. Perhaps a shared vanity turns busy mornings into a shuffle of toothbrushes and toiletries. The right setup starts with those everyday frustrations, then adds the details you love.
Floating Oak Vanity
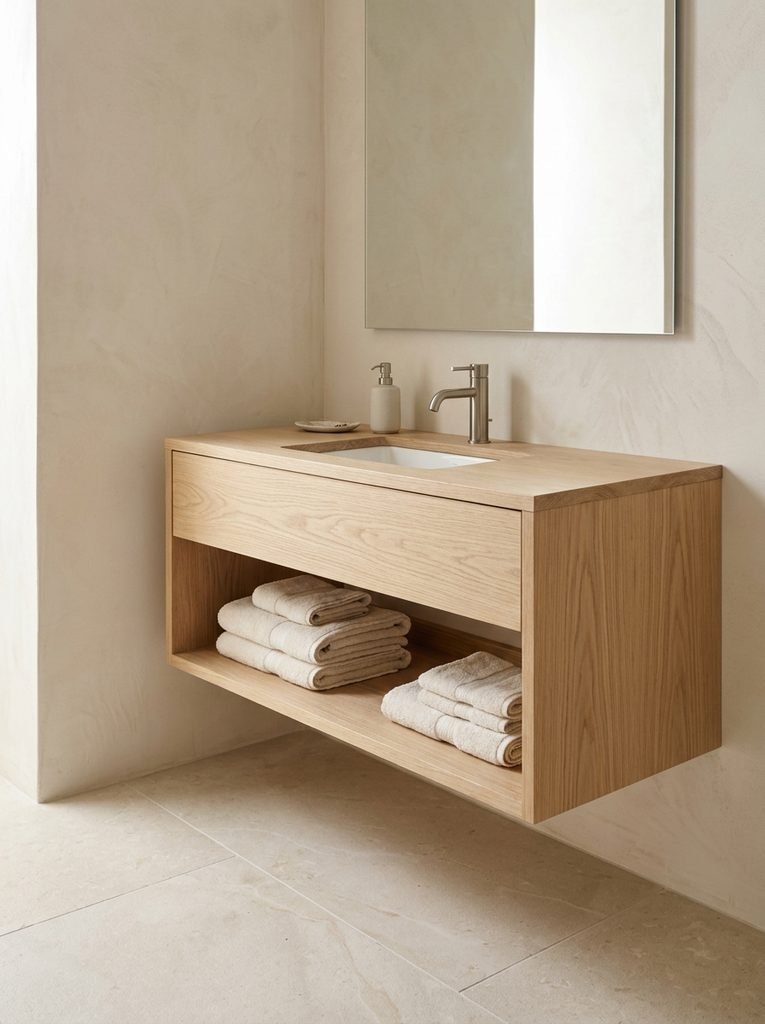
A clear stretch of floor beneath the sink makes a compact bathroom feel less crowded. Among bathroom sink ideas, a floating oak vanity brings warmth without a bulky base. Pair it with a white basin and pale walls so the wood becomes the main visual feature.
Choose drawers that accommodate the plumbing while leaving room for everyday toiletries. Before ordering, have your installer check the wall construction and the manufacturer’s support requirements. Leave enough clearance beneath the cabinet for your cleaning tools, otherwise that attractive open space becomes an awkward dust trap.
Round Ceramic Vessel Sink
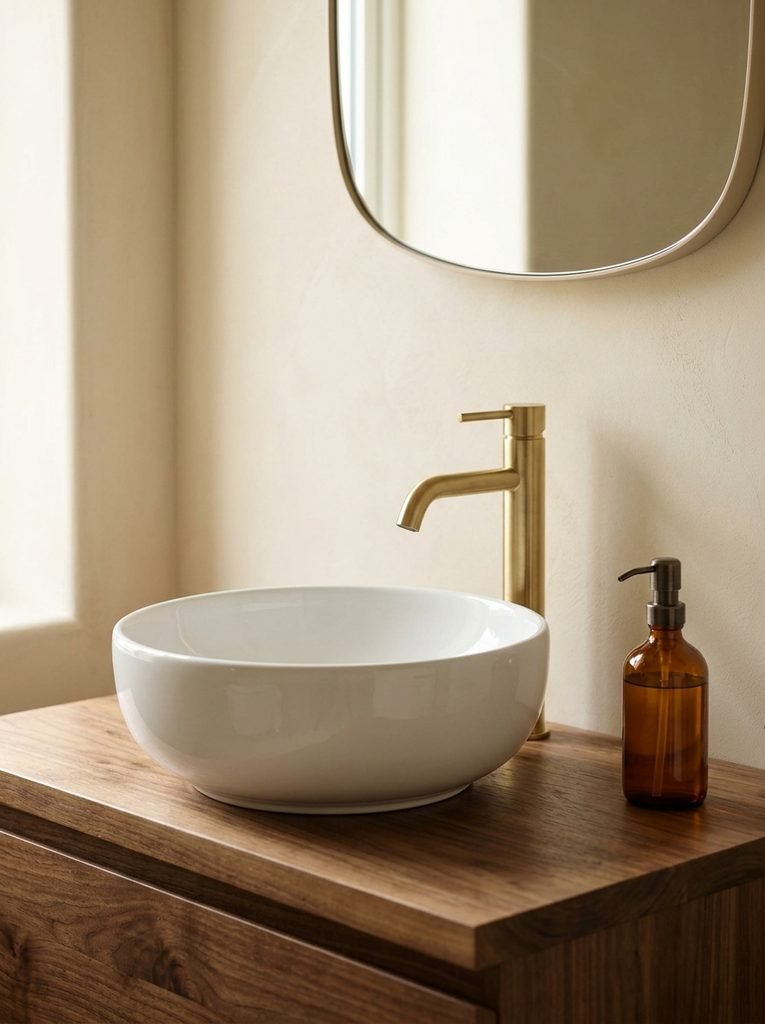
- Give a plain vanity a focal point with a round ceramic bowl. Keep nearby accessories low so its curved silhouette stays visible.
- Calculate the finished height using both the vanity and the basin. A tall bowl on an already high cabinet can make daily washing uncomfortable.
- Match the faucet’s reach to the bowl’s interior dimensions. Check the manufacturer’s pairing guidance before buying either piece.
- Choose a compatible drain for a basin with or without an overflow. The drain needs to match the sink’s design.
- Leave accessible counter space around the bowl. A narrow gap behind it makes wiping up water unnecessarily fiddly.
White ceramic keeps the arrangement crisp against walnut, painted cabinetry, or a patterned countertop. For a bathroom used by children, check that they can comfortably reach over the rim. Wipe around the base regularly, especially on timber counters, where lingering splashes need prompt attention to protect the finish.
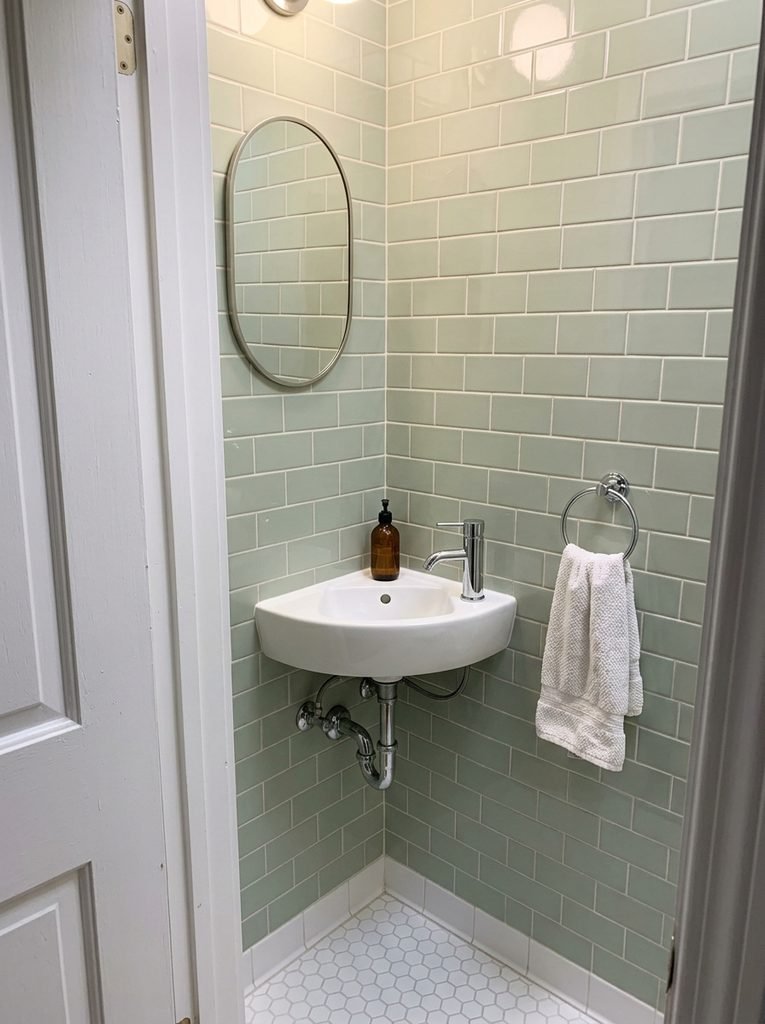
Corner Wall Mount Sink
Quick Tip:
Could the unused corner solve your cramped powder room layout? Mark the proposed basin outline with painter’s tape, then test the door swing and your standing space. Check the selected model’s mounting and plumbing requirements before committing.
A corner basin frees up the middle of a narrow room while keeping handwashing accessible. Choose a model with a small ledge for soap, or mount a dispenser nearby to preserve bowl space. Since there is no vanity storage, reserve this setup for rooms with modest storage needs.
Marble Undermount Sink
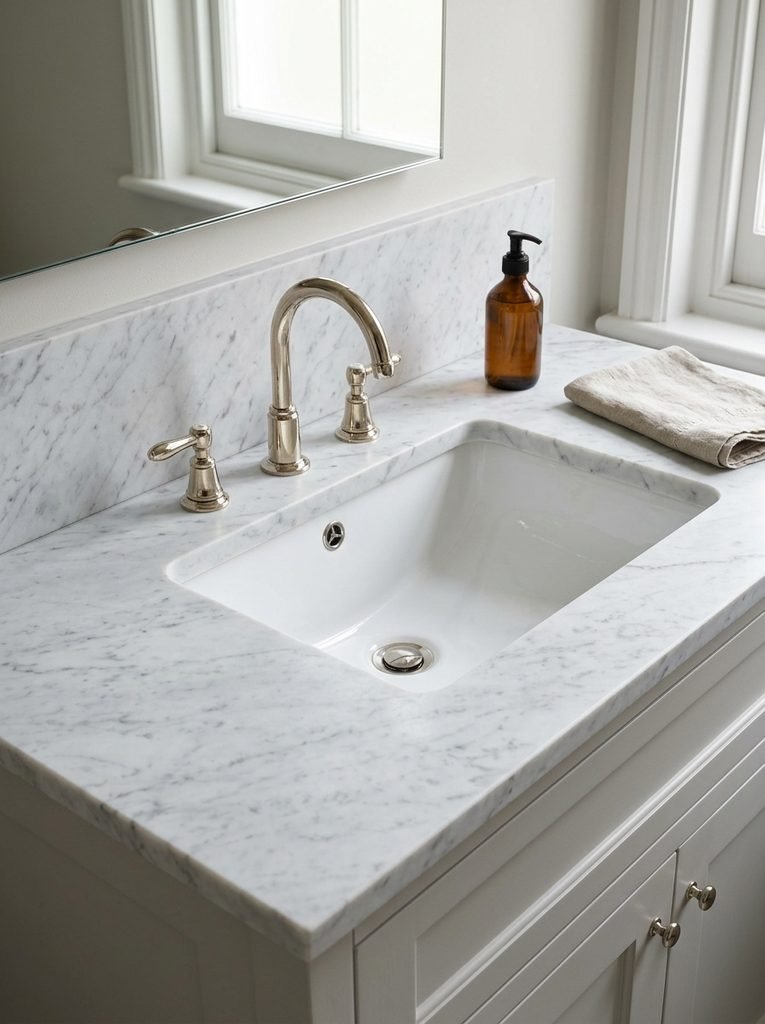
BEFORE: A raised sink rim interrupts the countertop and catches residue around its edges. On a small vanity, that extra outline can also make the surface look busy.
AFTER: An undermount basin leaves the marble edge exposed for a cleaner, continuous outline. Water can be wiped directly into the bowl, although the joint beneath the counter still needs regular cleaning.
Keep the marble practical by choosing a stone-safe cleaner and wiping away toothpaste or cosmetic spills promptly. Ask your fabricator about sealing requirements for the specific slab. Sealing helps resist staining, but it does not prevent acid etching, so avoid vinegar-based cleaners even when the stone has been sealed.
Vintage Dresser Vanity
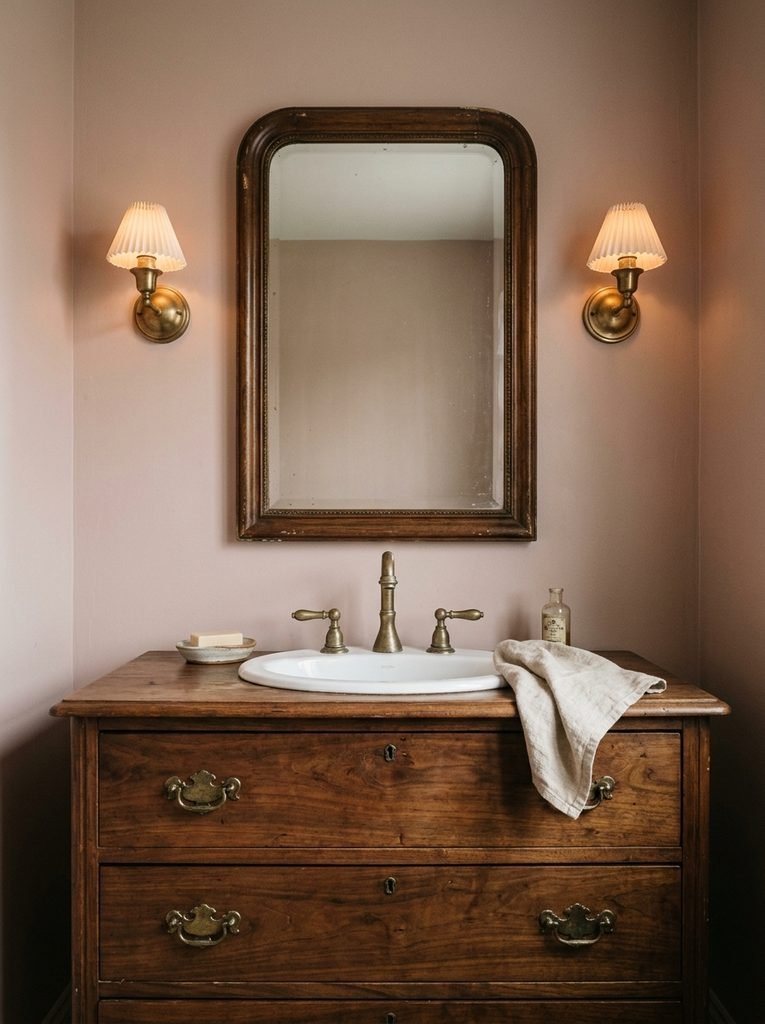
- Start with a dresser worth building the room around. Check for sturdy joints, stable legs, and enough depth to fit your chosen basin.
- Measure the basin, countertop, and dresser together to check the finished height. Confirm that the faucet will fit without crowding the mirror or backsplash.
- Ask a plumber to map the supply lines and drain before any cutting begins. Plan which drawers can remain usable around the plumbing.
- Choose a countertop suited to bathroom splashes, and protect exposed wood with an appropriate finish. Seal cut edges and openings according to the product instructions.
- Secure the converted unit appropriately and have the plumbing connected. Check every connection for leaks before filling the drawers.
The appeal comes from contrast: aged wood, familiar drawer pulls, and a fresh basin in one useful piece. Keep surrounding finishes quiet so the dresser remains the focal point. Conversion costs can exceed the furniture price, so budget for the countertop, plumbing alterations, and joinery before buying a secondhand find.
Integrated Sink Countertop
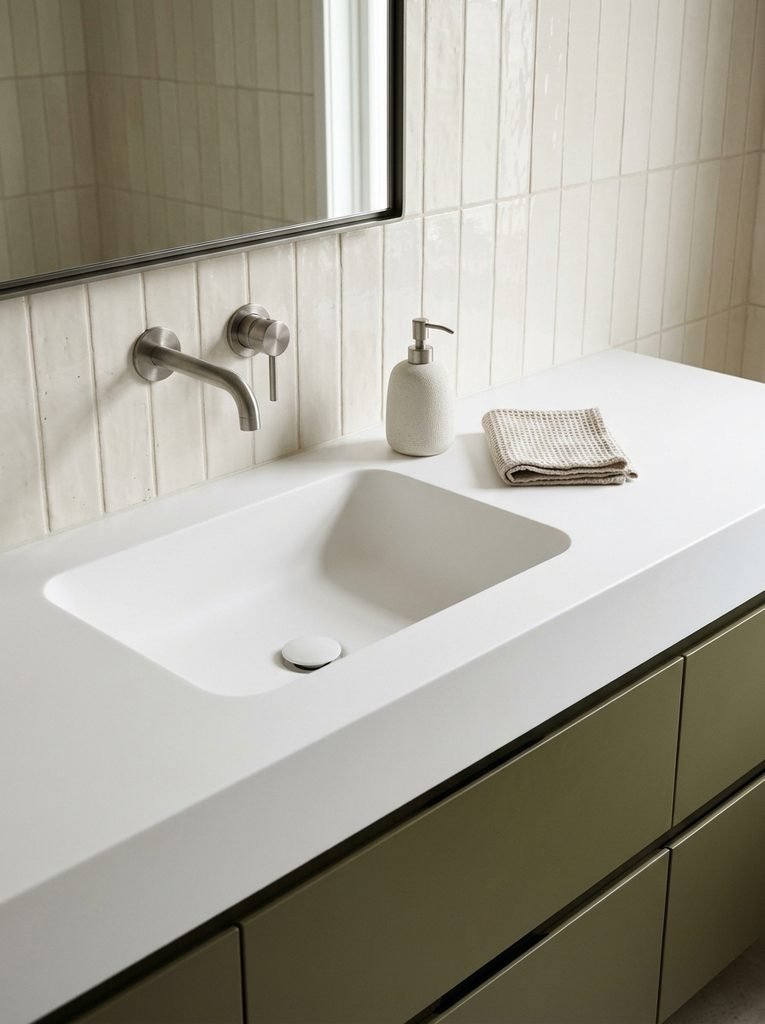
Fewer edges around the basin mean fewer places for toothpaste residue to collect.
| Comparison Point | Separate Inset Basin | Integrated Solid Surface Basin |
| Countertop connection | A visible rim or joint connects two pieces | Basin and counter form a continuous surface |
| Visual effect | Contrasting materials define the sink | Matching material creates a unified appearance |
| Routine cleaning | The rim and surrounding joint need attention | The smooth transition is easier to wipe |
| Future changes | Basin replacement may be possible if sizing allows | Replacement options depend on the complete unit |
Choose gently rounded interior corners if easy cleaning is your priority, and inspect a sample to judge the finish. Solid surface care requirements vary, particularly around heat, dyes, and abrasive products. Before ordering, confirm whether minor marks can be repaired and how the supplier handles damage to the basin.
Fluted Vanity Front
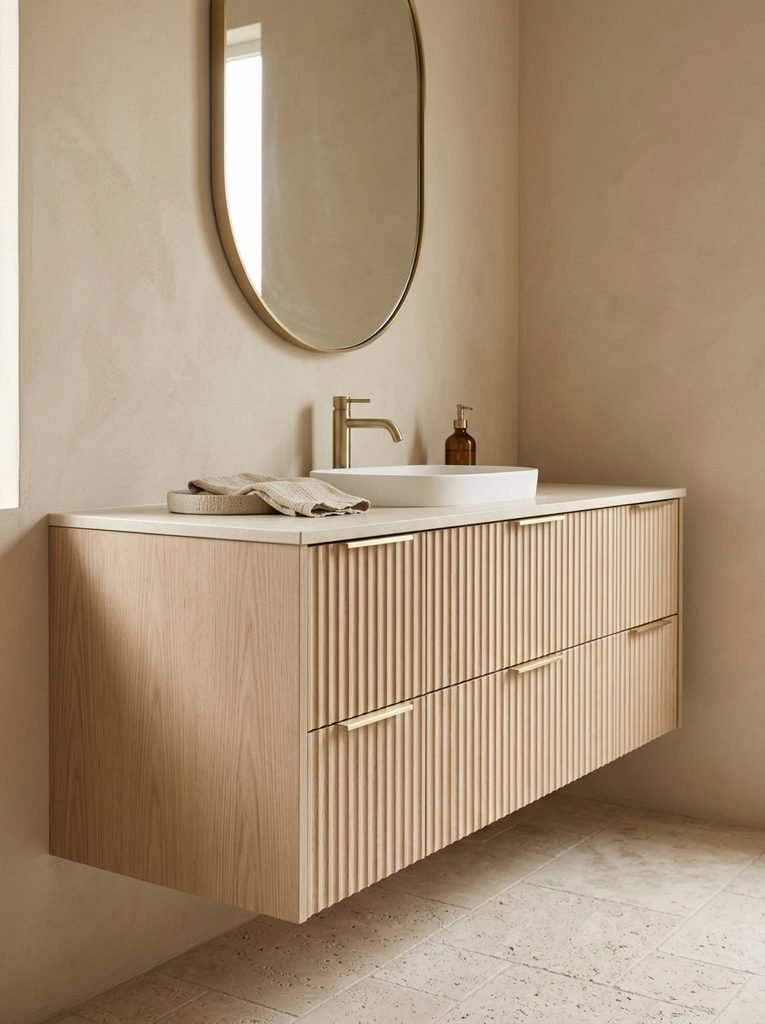
Let the cabinet supply the texture while the sink stays simple.
DO
- Pair fluted fronts with a smooth basin to keep the washing area visually balanced.
- Choose bathroom-suitable cabinetry with protected edges around drawers and doors.
- Check a finish sample under your bathroom lighting before ordering.
- Use a soft cloth to clean along the grooves before dust builds up.
DON’T
- Crowd the countertop with textured containers that compete with the cabinet.
- Leave splashes sitting on timber fronts or exposed panel edges.
- Choose deep, narrow grooves without considering how you will clean them.
- Position projecting handles where they interfere with nearby doors.
Fluting works especially well when the rest of the bathroom feels flat or plain. Repeat the cabinet’s wood tone in one small detail, such as a mirror frame or shelf, to connect the scheme. For a restrained finish, keep wall tiles simple and let side lighting reveal the grooves.
Slim Console Sink
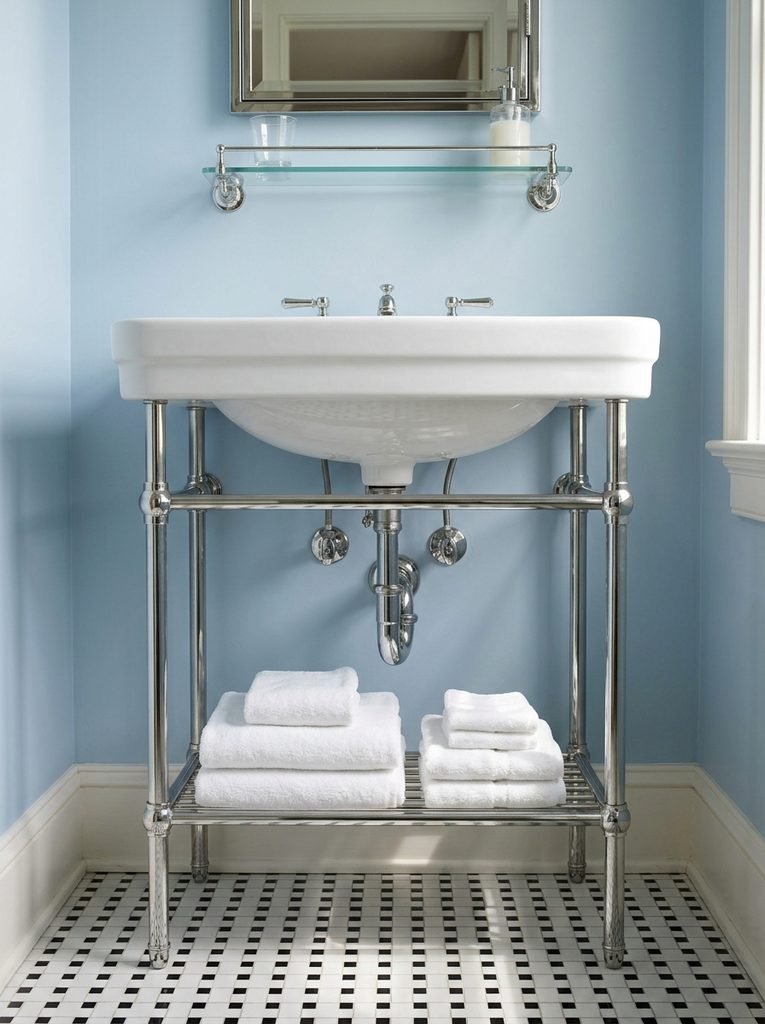
An open console base gives a narrow bathroom breathing room without hiding the basin’s character.
Best For: Guest bathrooms with separate toiletry storage.
Storage: Limited to any built-in ledge, rail, or optional shelf.
Planning Priority: Visible plumbing placement and the manufacturer’s fixing requirements.
Visual Result: An open floor area framed by slender legs.
Match the exposed trap and supply fittings to the leg finish for a considered result. Before buying, check where existing pipes enter the room, since relocating them adds work. Keep a hand towel within easy reach, and store spare products elsewhere so the open base remains visually light.
Terracotta Vessel Basin
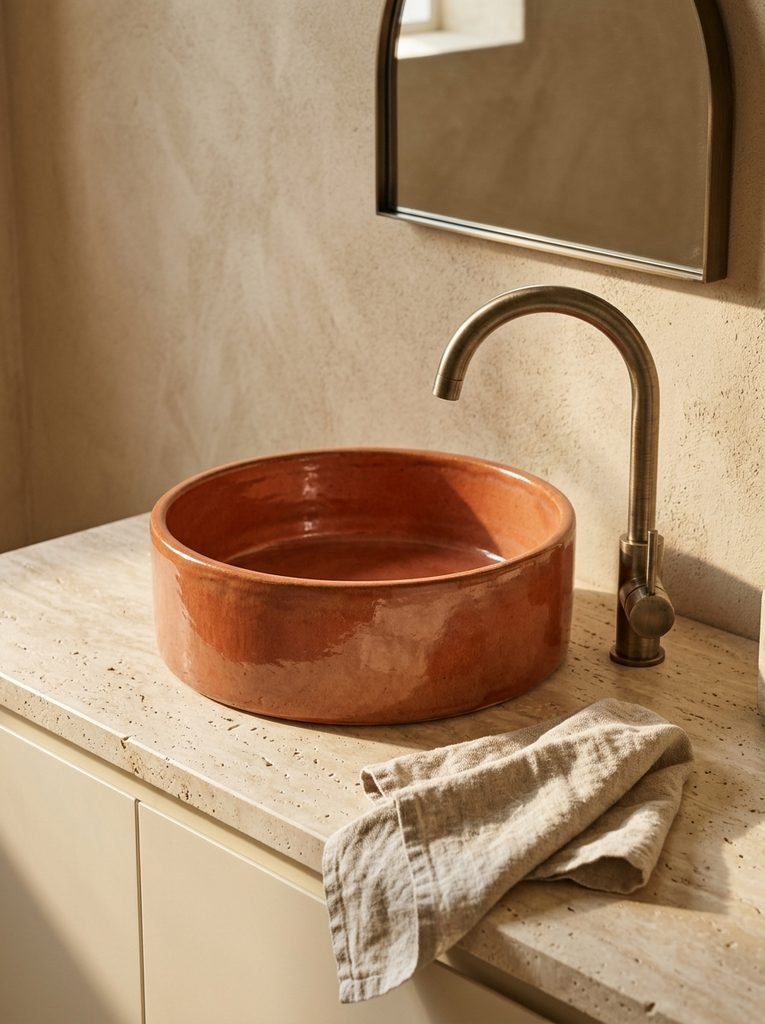
Warm clay color gives a neutral bathroom a stronger focal point without needing patterned walls. Choose a terracotta toned ceramic basin with a glazed surface intended for bathroom use. The earthy shade pairs naturally with cream cabinetry, bronze fittings, and a pale stone or stone-look counter.
Check the actual finish before ordering, since orange, pink, and brown undertones can look different beside your tiles. Keep soap and toothbrush holders in quieter shades so the basin remains prominent. For everyday practicality, confirm the cleaning instructions and choose a faucet proportioned to the bowl’s height and depth.
Double Undermount Sinks
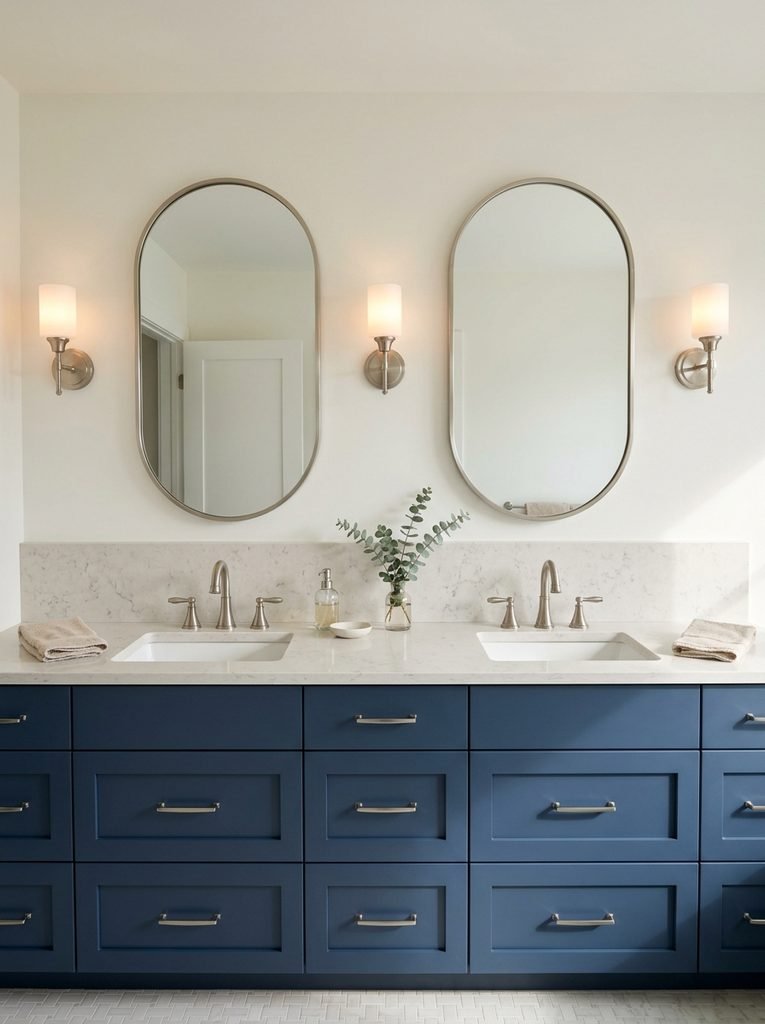
- Give busy mornings two distinct washing spots with a pair of undermount basins. Center each mirror over its sink so both positions feel intentional.
- Measure usable counter space before choosing bowl sizes. Two oversized basins can leave little room for soap or daily toiletries.
- Allocate drawers to each person, keeping shared supplies in the middle. Check how both sets of plumbing affect storage.
- Have your installer confirm the plumbing layout before ordering the cabinet and countertop. A second basin needs more than another opening in the surface.
A double setup earns its space when two people regularly get ready together. In a tighter bathroom, compare the proposed layout with one generous basin and extra counter space. Leave enough elbow room at both washing positions, and check that open drawers will not block the main walkway.
Wall Mounted Faucet
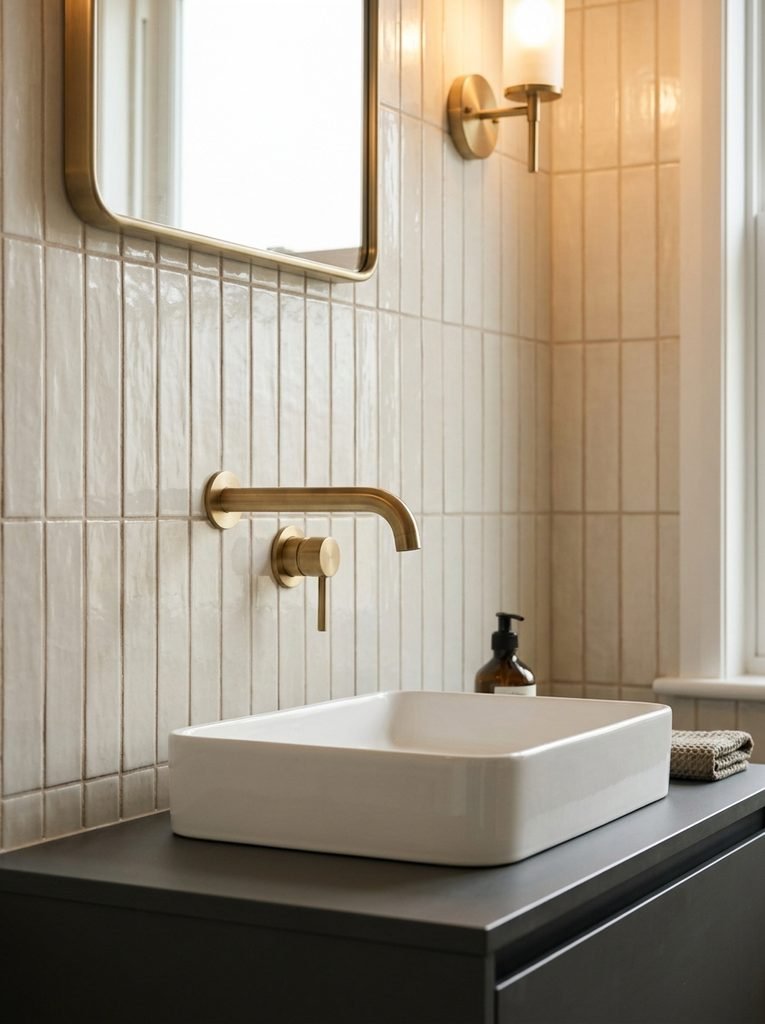
Quick Tip:
Freeing the countertop starts with getting the spout position right. Choose the basin and faucet together, then have the installer check reach, outlet height, and the recommended water landing point before the wall is finished.
With the fittings above the basin, the counter becomes easier to wipe and has more room for a soap dish. However, concealed connections require early planning. Confirm the valve location, wall depth, and future servicing arrangements before tiling, particularly if you are converting an existing deck mounted faucet setup.
Colorful Pedestal Sink
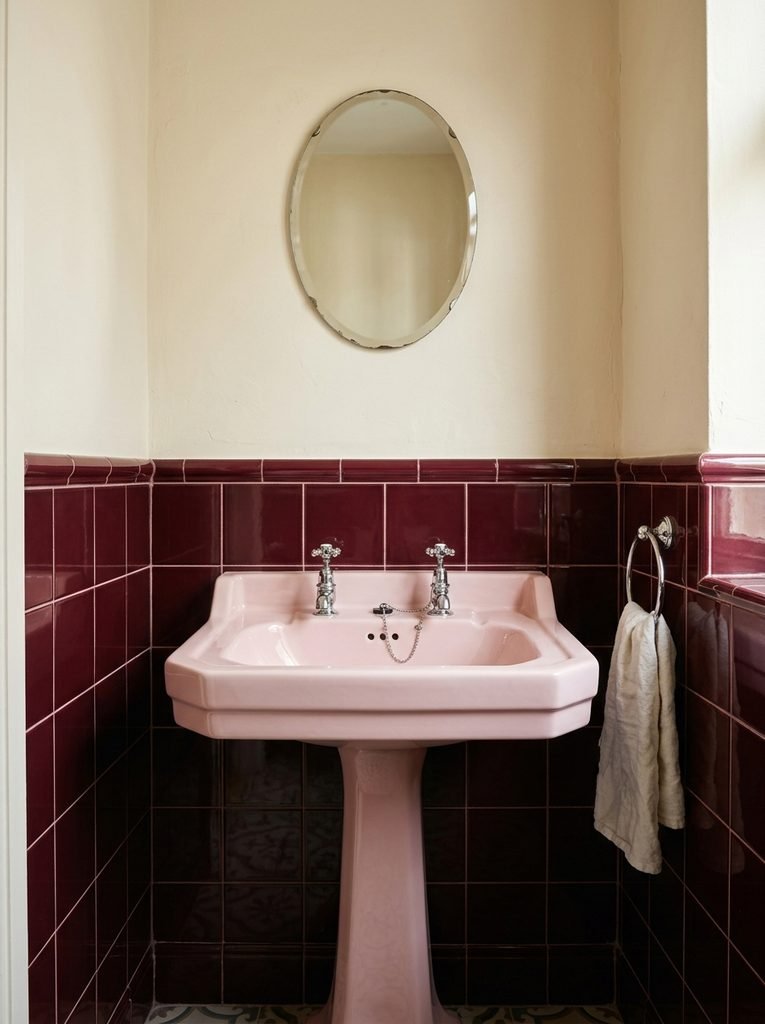
BEFORE: A plain white pedestal disappears against pale walls, leaving the room without a clear focal point. Toiletries collect on its narrow rim because there is nowhere else to put them.
AFTER: A colored pedestal makes the basin the defining feature, whether you choose blush, sage, or powder blue. A nearby wall shelf gives soap and spare essentials a proper home without crowding the ceramic.
Among bathroom sink ideas for small powder rooms, a colored pedestal offers a clear visual change without adding cabinetry. Bring a tile sample when choosing the glaze, since undertones matter in close quarters. Check the basin’s mounting requirements and remember that the pedestal does not automatically replace required wall fixings.
Patterned Tile Backsplash
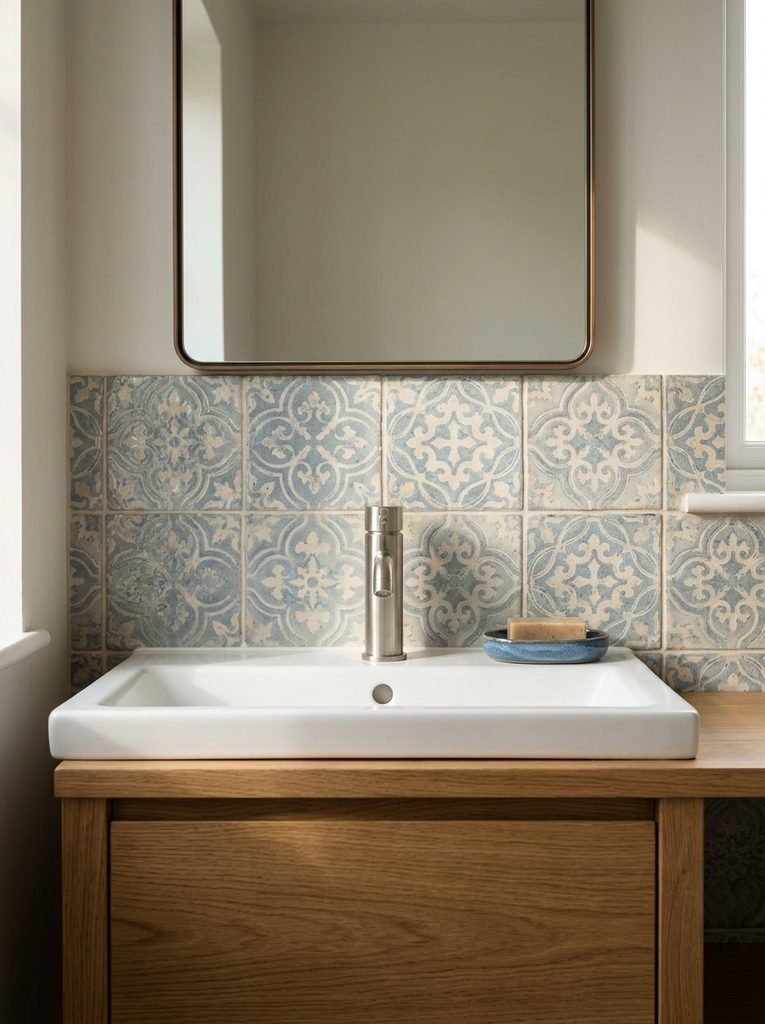
- Make the wall behind a simple basin the focal point with patterned tile. Choose a motif that remains readable within the available backsplash area.
- Lay out the tiles before installation to check the pattern placement. Center the arrangement around the basin and plan cuts near visible edges.
- Compare grout samples beside the tile. A similar shade softens the grid, while a contrasting shade makes each tile more noticeable.
- Have the surface prepared and the tiles installed with products suited to the location. Follow installation guidance for joints where the backsplash meets the countertop.
- Finish with a plain mirror and one coordinating accessory. Leave enough patterned surface visible for the design to register.
Repeating one tile color in a hand towel helps the washing area feel connected without matching every accessory. For a small backsplash, check how much of the pattern the mirror will cover. A large motif may lose its shape behind fittings, while a smaller repeat can remain clearly visible.
Statement Stone Basin
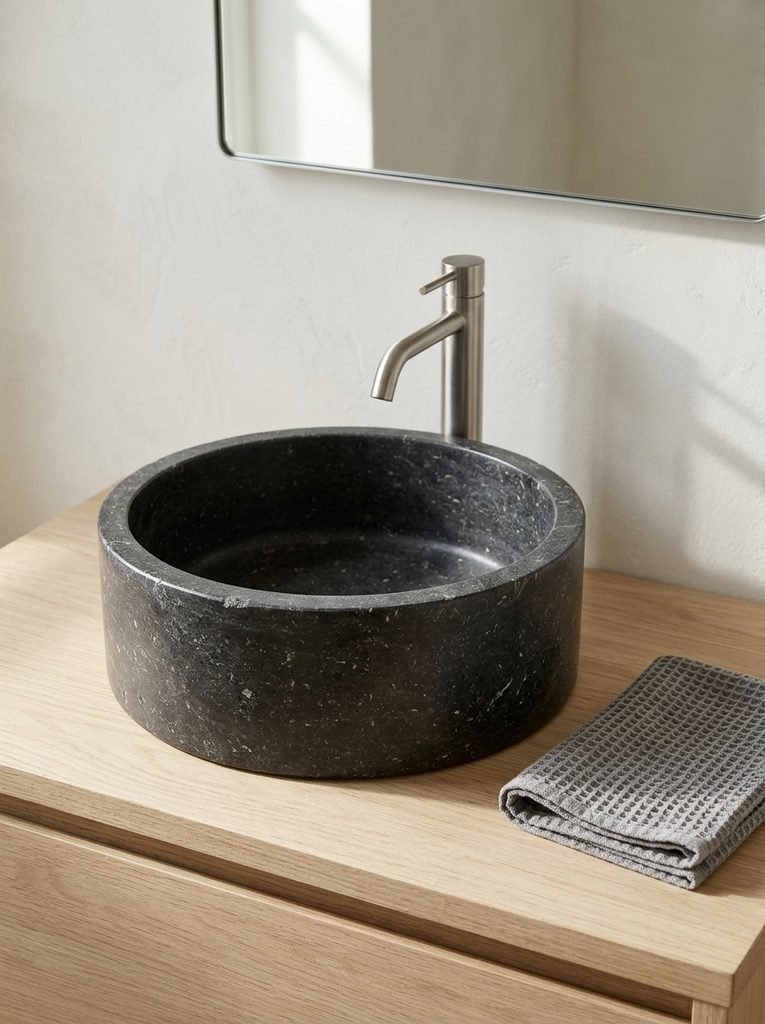
The basin material can carry the whole design, especially when the surrounding finishes stay quiet.
| Comparison Point | Natural Stone Basin | Stone-Look Ceramic Basin |
| Surface character | Mineral markings vary between individual pieces | Pattern and color depend on the manufactured finish |
| Care requirements | May need sealing and stone-specific cleaning | Follow guidance for the ceramic glaze |
| Visual consistency | The delivered basin may differ from display samples | Often more consistent within a product range |
| Planning checks | Verify weight and required countertop support | Verify dimensions, weight, and mounting instructions |
Ask to see photographs of the actual stone basin where possible, particularly if strong veining matters to your scheme. Check whether the supplier recommends sealing inside the bowl as well as outside. Keep the faucet finish understated so the mineral pattern remains the detail your eye notices first.
Compact Semi Recessed Sink
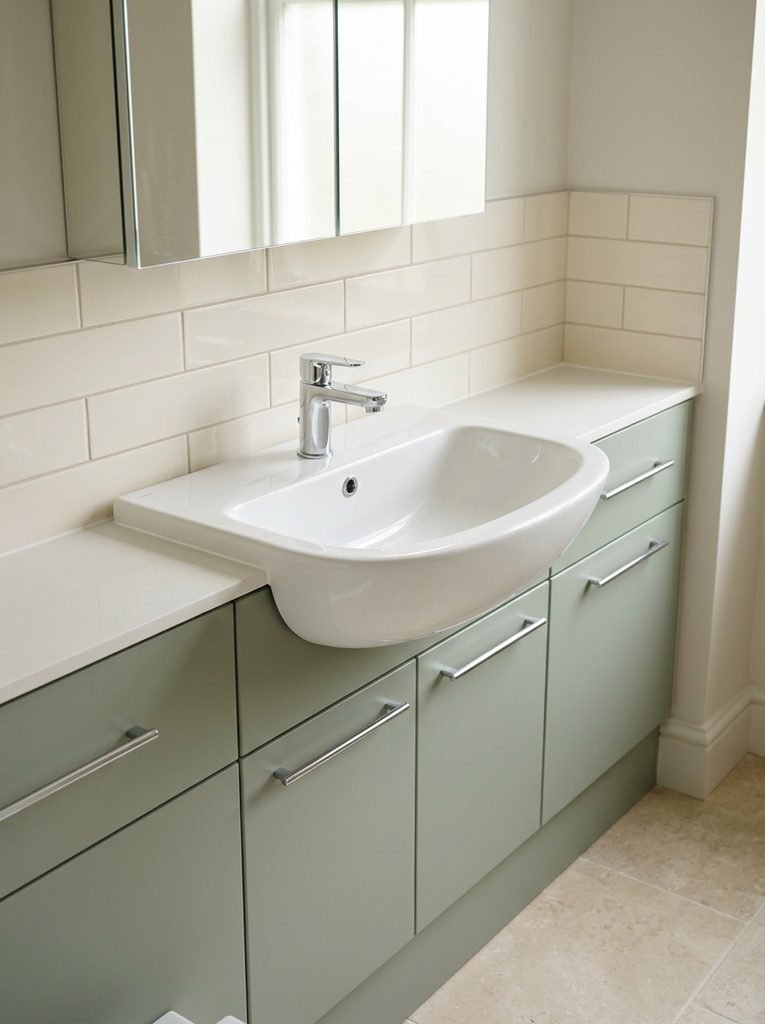
A shallow cabinet can save floor space, but your hands still need a comfortable washing bowl.
DO
- Choose a basin specifically designed for semi recessed installation.
- Check the manufacturer’s cutout template against the cabinet dimensions.
- Measure the projecting front when planning the walkway.
- Confirm that the cabinet still offers useful storage around the plumbing.
DON’T
- Assume a shallow vanity means the entire sink stays close to the wall.
- Position the projecting bowl where it obstructs the door swing.
- Order the countertop before confirming the basin’s installation details.
- Crowd the remaining counter ledge with bottles and decorative trays.
The bowl extends beyond the cabinet, giving you washing space while reducing the depth of the storage below. That balance can suit a narrow bathroom, provided the projection stays out of the main route. Mark both the cabinet and basin outlines on the floor before deciding whether it fits.
Wide Trough Sink
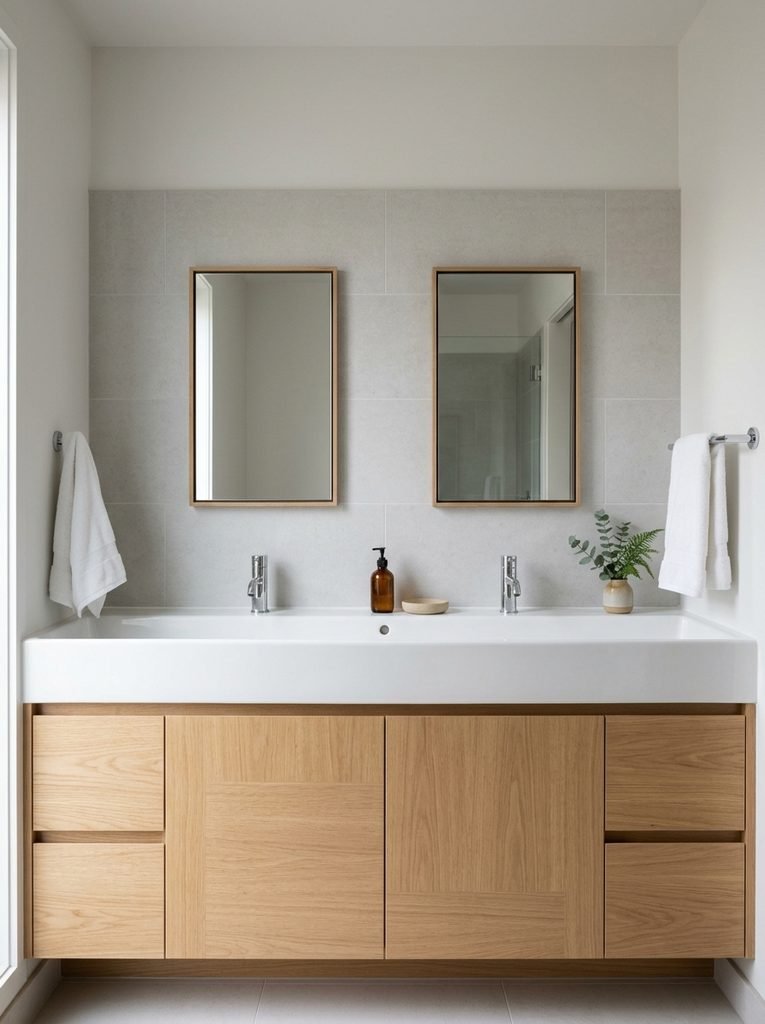
Sharing the sink feels less cramped when the bowl stretches across both washing positions.
Best For: Shared bathrooms with enough width for two users.
Layout: One continuous basin with faucet positions designed for the model.
Storage: Depends on the supporting cabinet and plumbing arrangement.
Planning Priority: Comfortable spacing between users and access to nearby towels.
Choose a trough designed for the number of faucets you intend to install, rather than assuming any wide bowl supports two users. Check its internal slope and cleaning instructions before buying. Give each person a reachable towel hook so wet hands do not have to cross the other washing position.
Scalloped Vanity Detail
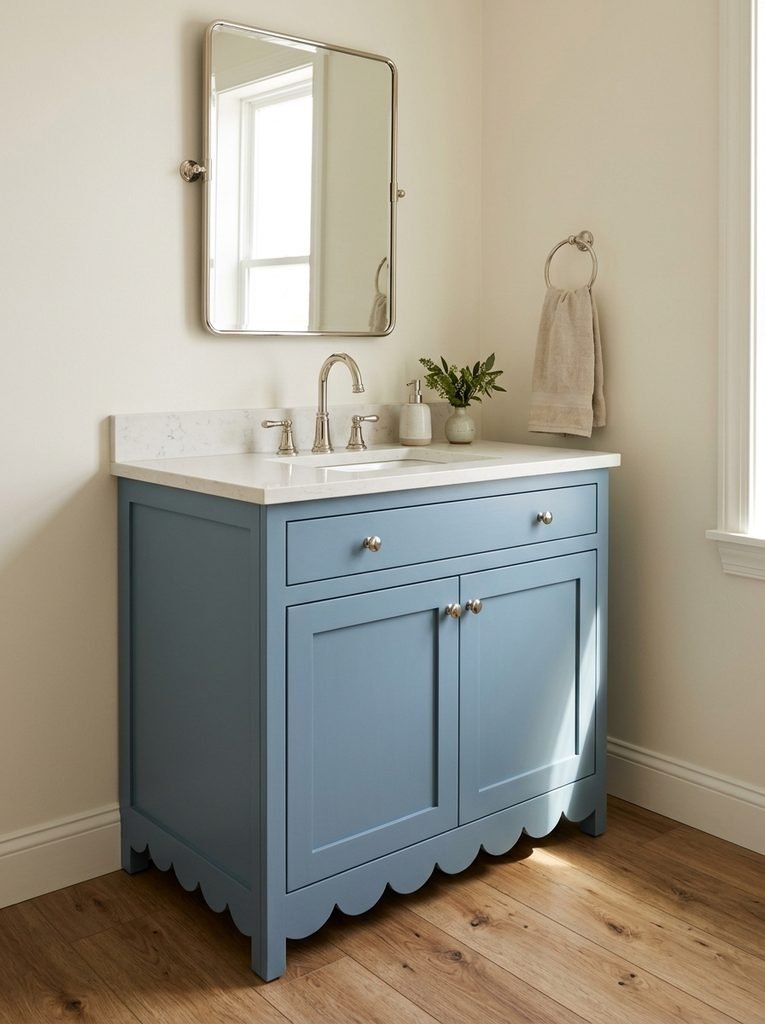
Straight lines can make a small washing area feel rigid. A scalloped vanity apron introduces a softer outline while keeping the basin itself simple. Choose a cabinet with one curved detail along its lower edge, then pair it with plain drawer fronts and a smooth countertop.
Keep the decorative trim away from areas that receive frequent splashes, and choose a finish suitable for bathroom humidity. Before ordering, check that the apron leaves drawers, doors, and cleaning access unobstructed. The result feels playful without requiring a themed room, especially in muted blue, cream, or pale green.
Matte Black Basin
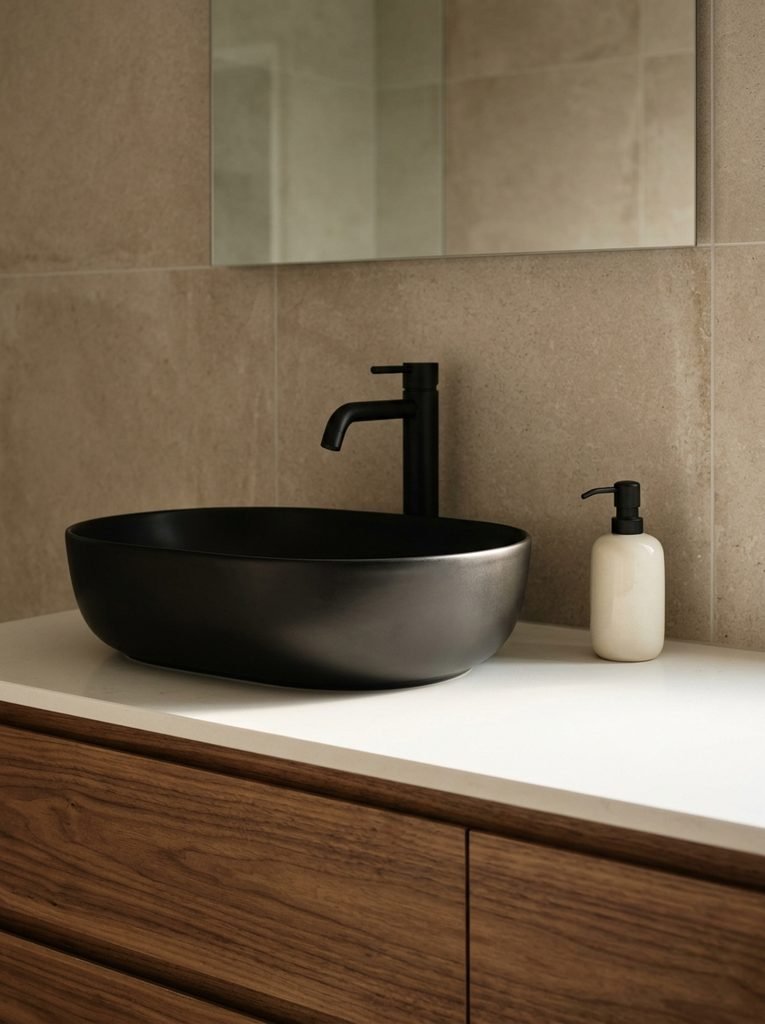
- Anchor a pale bathroom with a matte black basin that gives the eye somewhere to settle. Warm wood nearby keeps the palette from feeling stark.
- Check the material beneath the finish, since black basins may be ceramic, composite, or another material. Follow care instructions for the exact product.
- Look at the basin under bright light before buying. Water spots and dried toothpaste can be noticeable against a dark surface.
- Choose a faucet finish that complements the bowl without assuming all blacks match. Compare samples if a close match matters to you.
- Keep a soft cleaning cloth nearby for quick wipe downs. Avoid abrasive products unless the manufacturer specifically permits them.
Balance the dark bowl with a light counter so its outline stays visible. In a bathroom with hard water, consider whether regular drying fits your routine before committing. A black basin delivers strong contrast, but its everyday appeal depends as much on manageable upkeep as on the initial photograph.
Apron Front Bathroom Sink
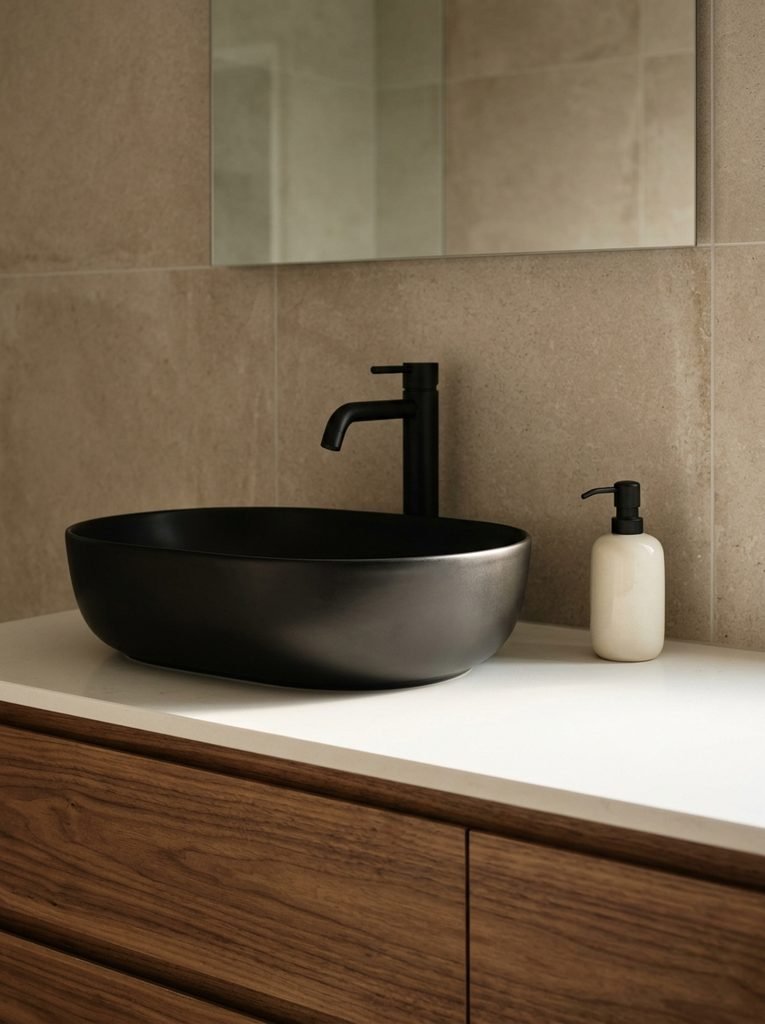
Quick Tip:
Bring cottage character to the washing area with an exposed ceramic apron. Choose a model intended for bathroom use, then confirm its cabinet support and cutout requirements before ordering the vanity. Check the finished projection so the front edge leaves comfortable standing room.
The visible front gives a plain cabinet a stronger identity without relying on decorative accessories. Pair it with simple hardware and a restrained backsplash to keep the ceramic outline clear. Because apron dimensions vary, buy the basin and supporting cabinet as a compatible combination or have the joinery planned around it.
Offset Basin Countertop
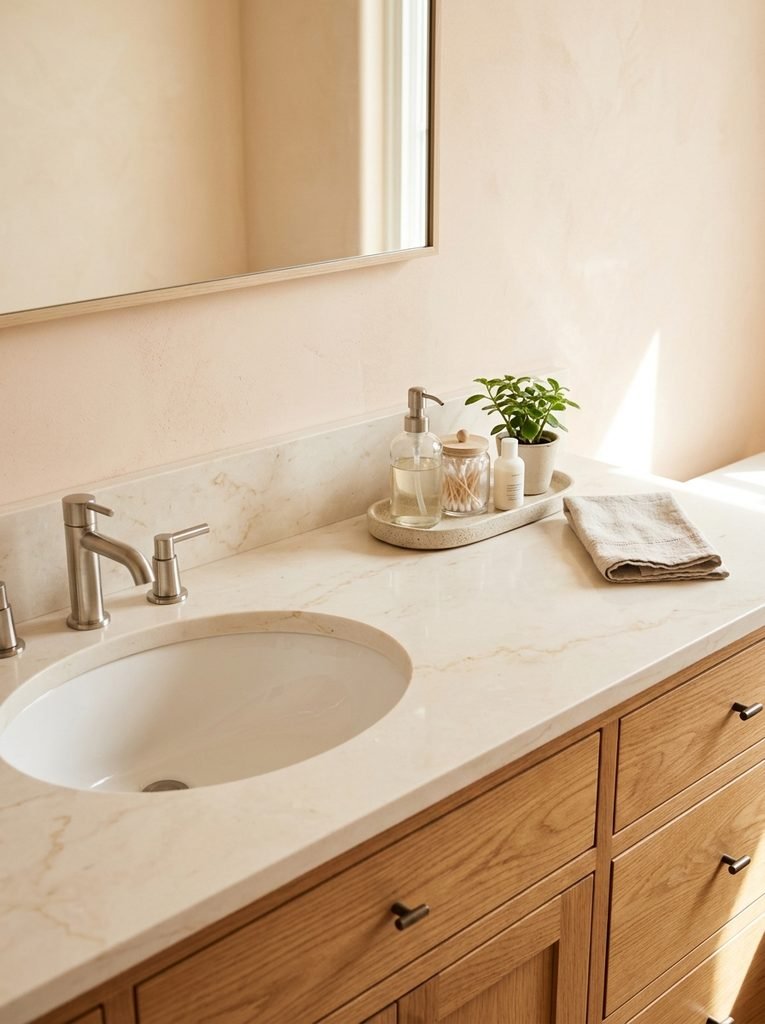
BEFORE: A centered bowl divides a modest countertop into two narrow strips. Daily essentials crowd the faucet because neither side provides enough usable space.
AFTER: Moving the basin to one side creates a continuous landing area for toiletries or a grooming tray. The washing position stays distinct from the section used for getting ready.
Choose the basin position around your routine and the room’s clearances, rather than shifting it as far as possible. Leave usable space beside the bowl and confirm that the plumbing fits below. Before ordering a custom counter, place your everyday items on a paper template to test the arrangement.
Sink Skirt Storage
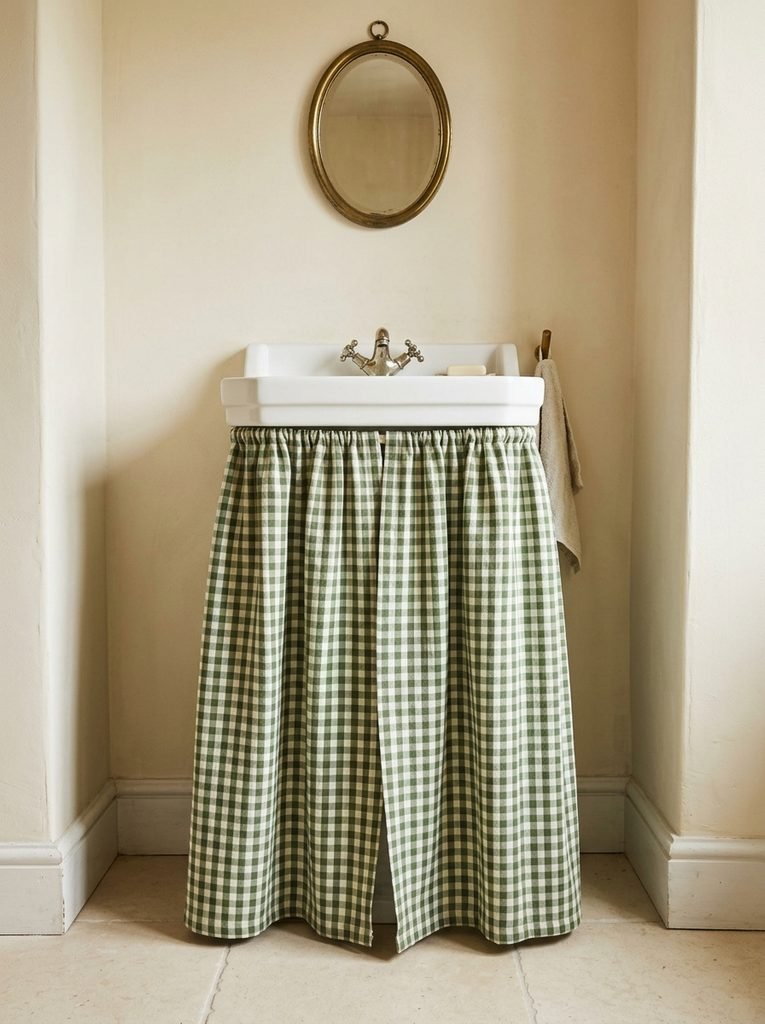
- Give exposed under-sink storage a softer outline with a washable fabric skirt. Choose a small pattern or solid color that complements the walls.
- Measure the attachment edge and the drop to just above the floor. Allow enough fabric for overlapping panels that open easily.
- Hem the fabric and attach it with a removable fastening method suited to the sink surface. Keep the attachment clear of the bowl and wet rim.
- Place a compact washable bin underneath for spare toilet rolls or cleaning supplies. Keep stored items away from pipes and preserve access to shutoff valves.
- Check that the fabric stays clear of damp flooring. Remove it for washing whenever splashes or dust leave visible marks.
A skirt adds concealed storage without requiring a full vanity replacement, making it useful in a small guest bathroom. Choose fabric you can remove without tools, and test any adhesive fastening in a discreet spot first. Where children visit, keep cleaning products in secure storage rather than behind the fabric.
Copper Vessel Sink
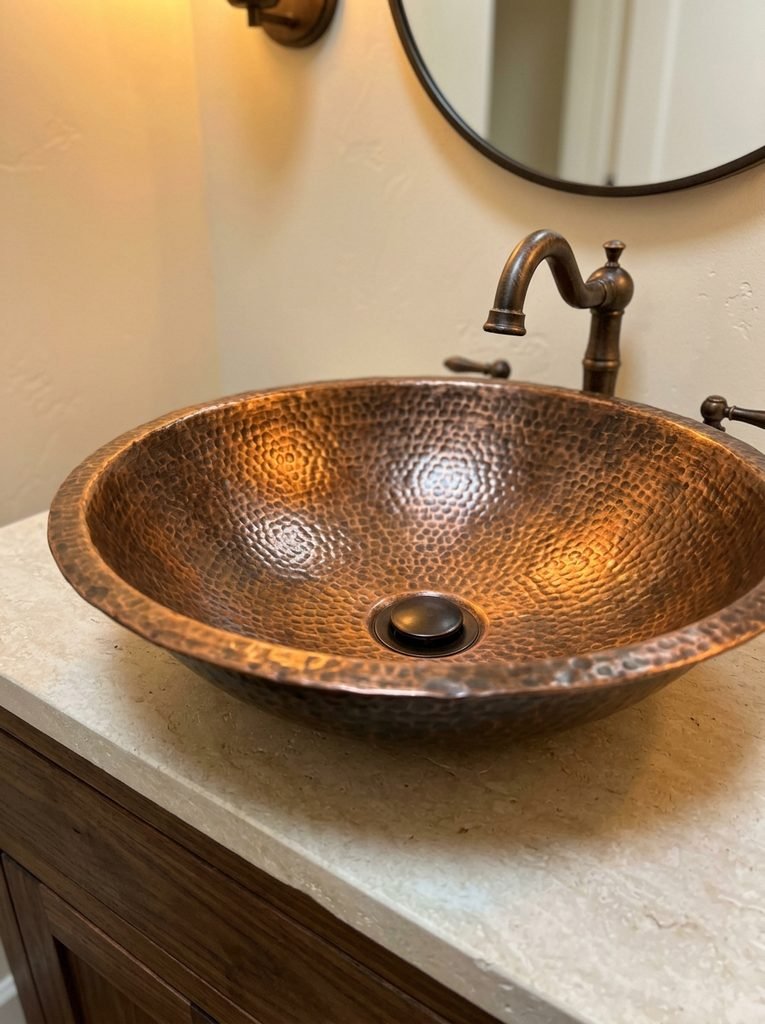
Copper brings a warm metallic focal point to a bathroom filled with pale, quiet finishes.
| Comparison Point | Hammered Copper Basin | Smooth Copper Basin |
| Surface texture | Small indentations create a textured appearance | An even surface emphasizes the bowl’s shape |
| Light reflection | Highlights break across the hammered pattern | Reflections appear broader and more continuous |
| Visual character | Suits rustic wood and handmade details | Pairs naturally with simpler cabinet fronts |
| Buying checks | Confirm the coating and recommended cleaning method | Confirm the coating and recommended cleaning method |
Ask whether the copper is sealed or intended to develop a changing patina, since that affects both appearance and care. Follow the maker’s cleaning guidance rather than using a general metal polish. Keep nearby finishes restrained, allowing the basin’s warm color and surface variation to provide the decorative detail.
Open Shelf Vanity
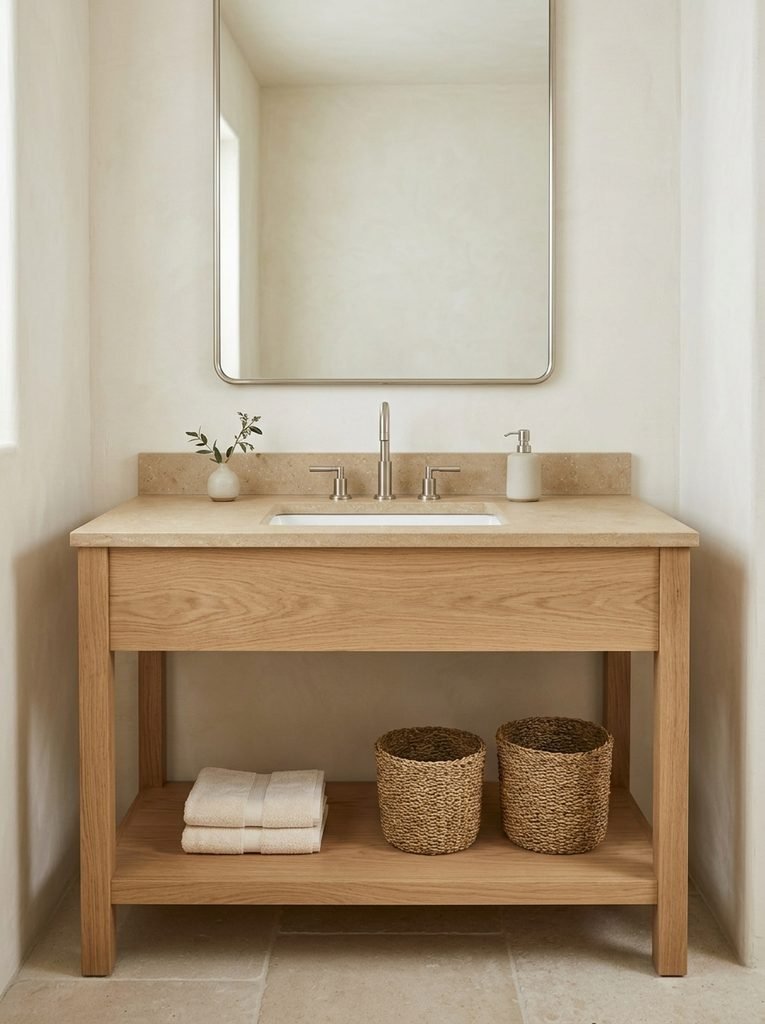
Put the spare towels where you can reach them without opening a drawer.
DO
- Measure the shelf openings before buying baskets or storage bins.
- Keep frequently used items toward the front of the shelf.
- Choose bathroom-suitable cabinetry and wipe splashes promptly.
- Leave plumbing connections accessible behind or between stored items.
DON’T
- Pack the shelf so tightly that towels catch on nearby pipes.
- Store damp towels in enclosed baskets beneath the basin.
- Assume woven baskets protect their contents from water.
- Place items against shutoff valves or removable plumbing fittings.
An open shelf works best when the contents are part of the design: a few folded towels, matching containers, and visible gaps between them. Keep less attractive daily products in a drawer or mirrored cabinet. For a busy family bathroom, washable bins can make the arrangement easier to maintain.
Terrazzo Vessel Basin
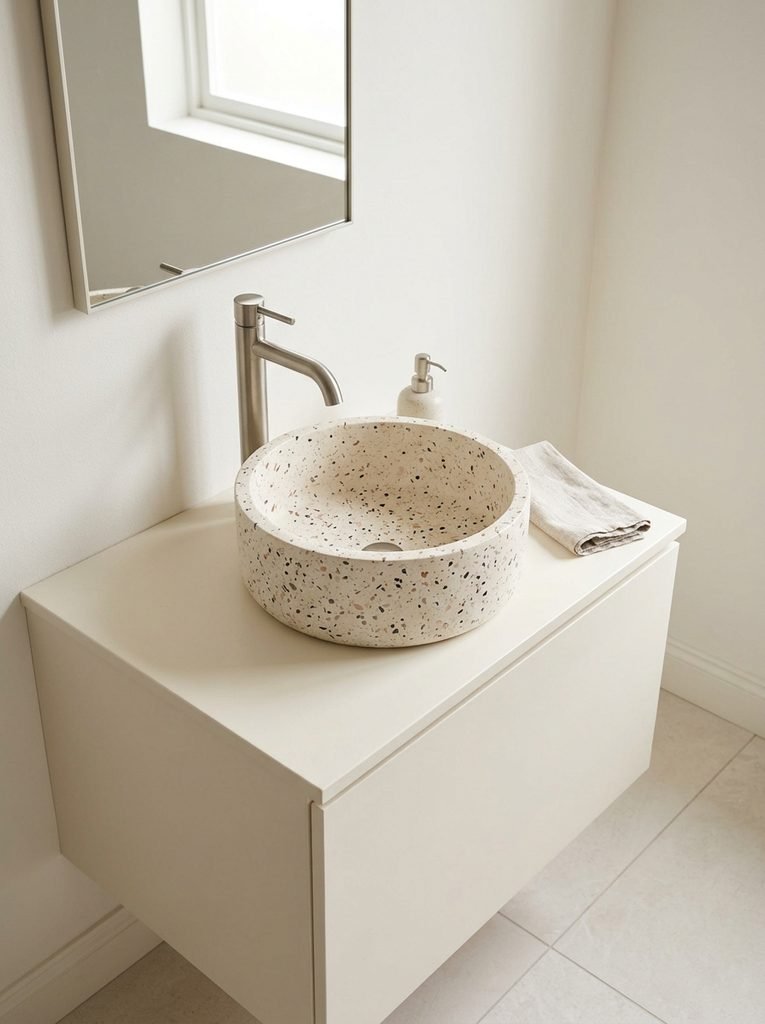
Small flecks of color give the basin its own pattern without covering the bathroom in decorative tile.
Palette: A light base with two or three recurring chip colors.
Best Pairing: Plain cabinetry and a quiet countertop.
Material Check: Confirm whether the product is cement-based, resin-based, or terrazzo-look ceramic.
Care Priority: Follow the specific basin’s cleaning and sealing guidance.
For bathroom sink ideas that connect several colors, use the terrazzo chips as a small palette guide. Repeat one shade in a towel and another in cabinet paint, leaving the walls quiet. View a physical sample where possible, because chip size and color distribution can differ from the product photograph.
Conclusion
A better washing area starts with understanding what your current setup lacks: storage, counter space, easier cleaning, or a little personality. These bathroom sink ideas give you ways to address those needs while choosing colors and materials you enjoy seeing every day.
Pick one favorite, measure your space, and check the practical details before buying. Even a planned backsplash update or smarter storage arrangement can make the area feel more considered.
Save this post on Pinterest so your shortlist stays handy, and share it with someone planning a bathroom refresh. Choose one idea and take your first step toward making it yours.