21 Clever DIY Halloween Bedroom Decor Ideas Under $10
A few paper bats. A glowing ghost jar. Suddenly, your bedroom has a little Halloween magic without a cart full of decorations.
If you’re searching for “diy halloween bedroom decor cheap,” these 21 ideas give you simple ways to start with what you already have.
Think fabric pumpkins on a shelf, tiny potion bottles beside your books, and a playful monster face on a dresser drawer. Each project is designed around a materials budget below $10, with savings depending on the supplies you can reuse. Check your craft drawer before shopping, especially for glue, paper, and fabric scraps.
You’ll find clear instructions, styling tips, and small details that help handmade decorations look intentional. Choose one corner, pick your favorite idea, and let the spooky decorating begin.
Paper Bat Headboard
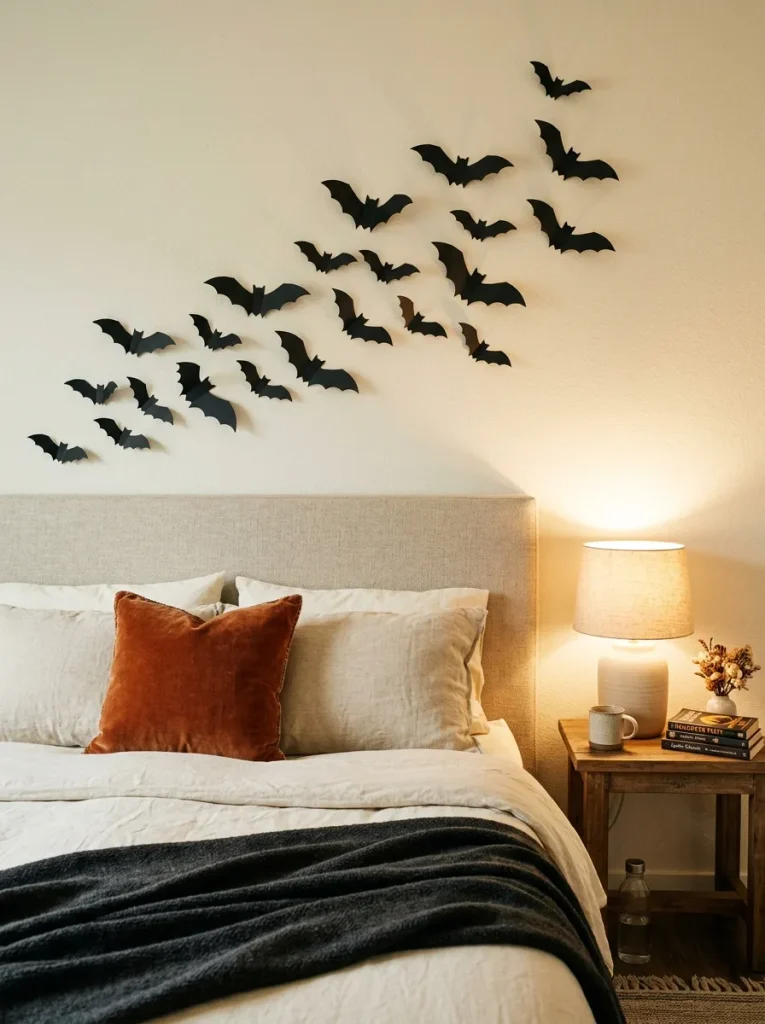
A bare wall above your bed can become a Halloween focal point with just black cardstock and a few folded wings. Cut twelve bats in three sizes, then crease each down the center. Arrange them diagonally, starting with larger shapes near the headboard and smaller ones higher up.
Set a $5 materials budget, reusing scissors and a pencil you already own. Test removable adhesive on a hidden patch first, since even gentle products can lift paint. Keep the arrangement within the width of your bed so the flying shapes feel connected to the furniture below.
Ghost Jar Lanterns
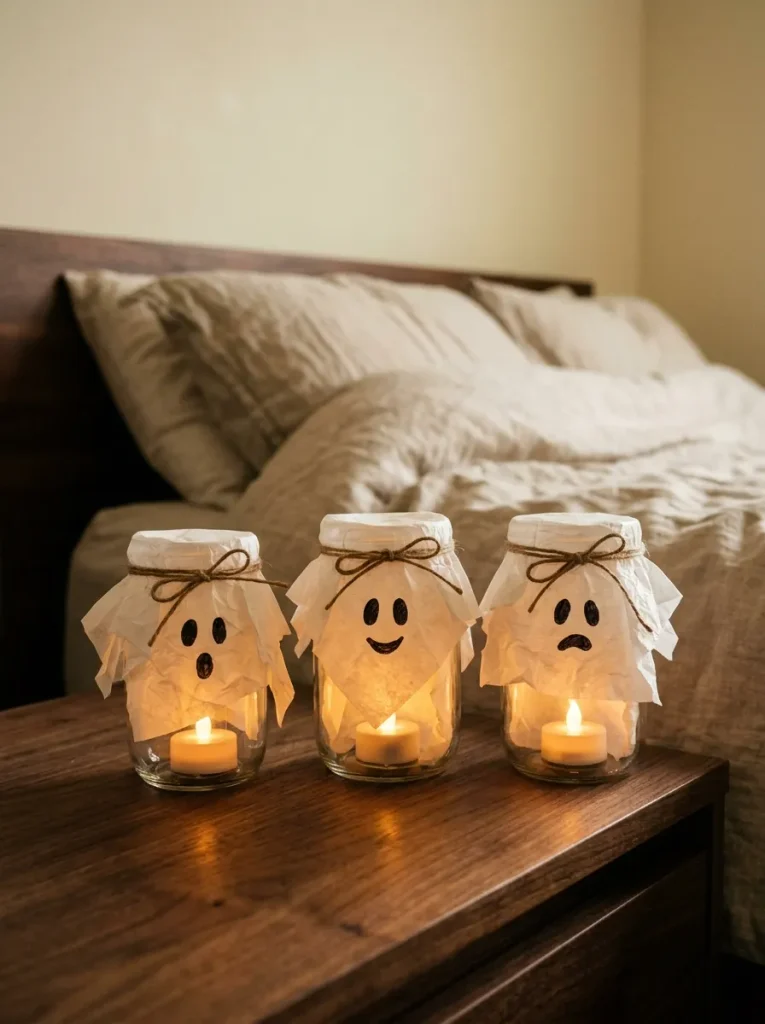
- Who needs expensive Halloween lighting when an empty jam jar can become a glowing ghost? Wash and dry three jars, removing labels before decorating.
- Brush a thin layer of craft glue onto the outside, then smooth white tissue over the glass. One layer lets more light through than several overlapping sheets.
- Cut oval eyes and small mouths from black paper. Glue them onto the tissue, placing each face at a slightly different height.
- Let everything dry before inserting battery tea lights. Keep this project within a $7 spending cap by reusing jars and checking your existing craft supplies first.
Group the lanterns on a tray so you can move them when your nightstand needs clearing. Different jar heights create a layered display without taking much space. Use battery lights only, never real candles inside paper-covered jars, and leave your charging area clear of the decorations.
Ribbon Spiderweb Mirror
Quick Tip:
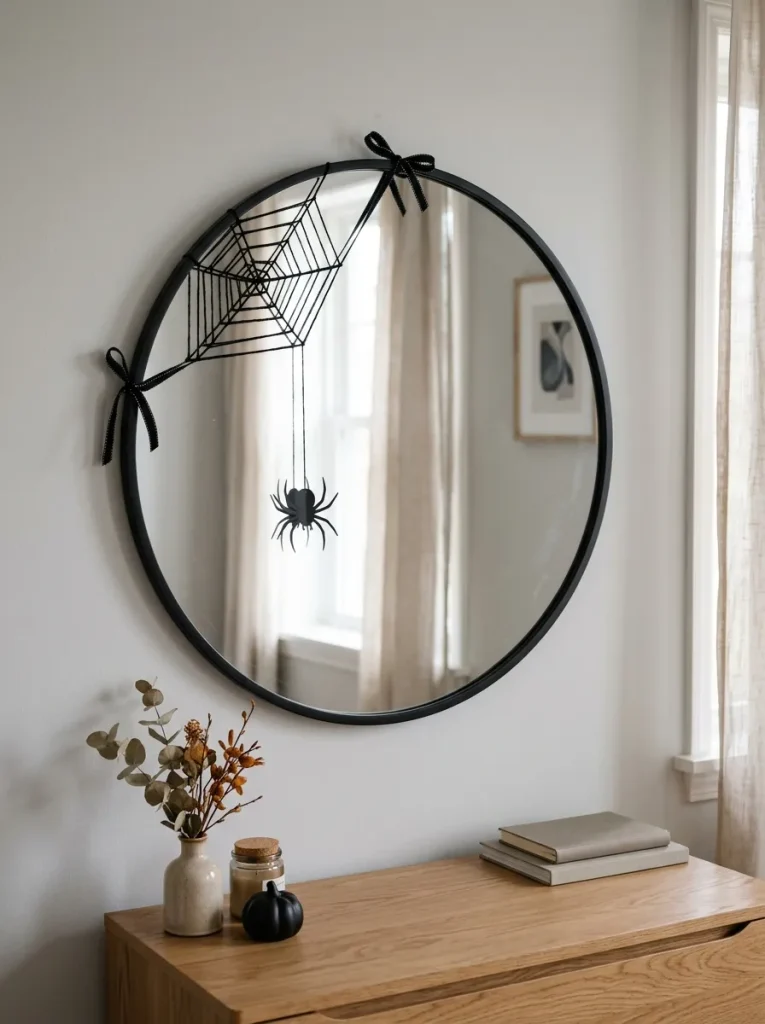
Give your everyday mirror a spooky corner without hiding your reflection. Tie three black yarn strands across the upper frame to form intersecting spokes, then knot shorter connecting strands between them. Secure the ends with narrow ribbon ties wherever the frame offers a firm attachment point.
Keep the web within one upper quarter of the mirror so the glass stays useful for getting ready. Reuse yarn and ribbon scraps, with a $4 spending limit for missing supplies. Attach a paper spider at an intersection, keeping everything lightweight to avoid pulling the mirror out of position.
Haunted Book Covers
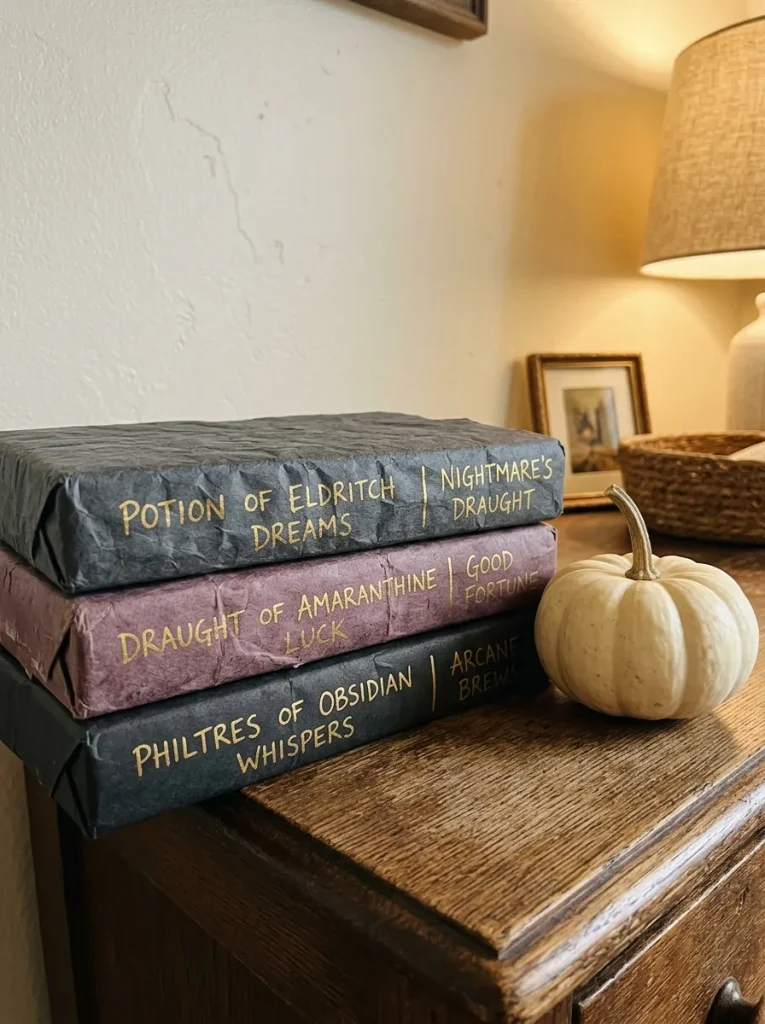
BEFORE: Bright book jackets can interrupt a moody Halloween display. A stack beside your bed may look more like unfinished homework than seasonal decor.
AFTER: Removable paper covers turn those same books into a tiny spellbook collection. Charcoal paper, gold lettering, and titles such as “Moon Spells” give the stack a coordinated look.
Wrap closed books with paper cut two inches taller than their covers, folding the excess inward before tucking flaps around each cover. Tape paper to paper, never to the book. Reuse shopping bags and an existing marker to keep spending below $5, leaving the pages untouched.
Floating Paper Witch Hats
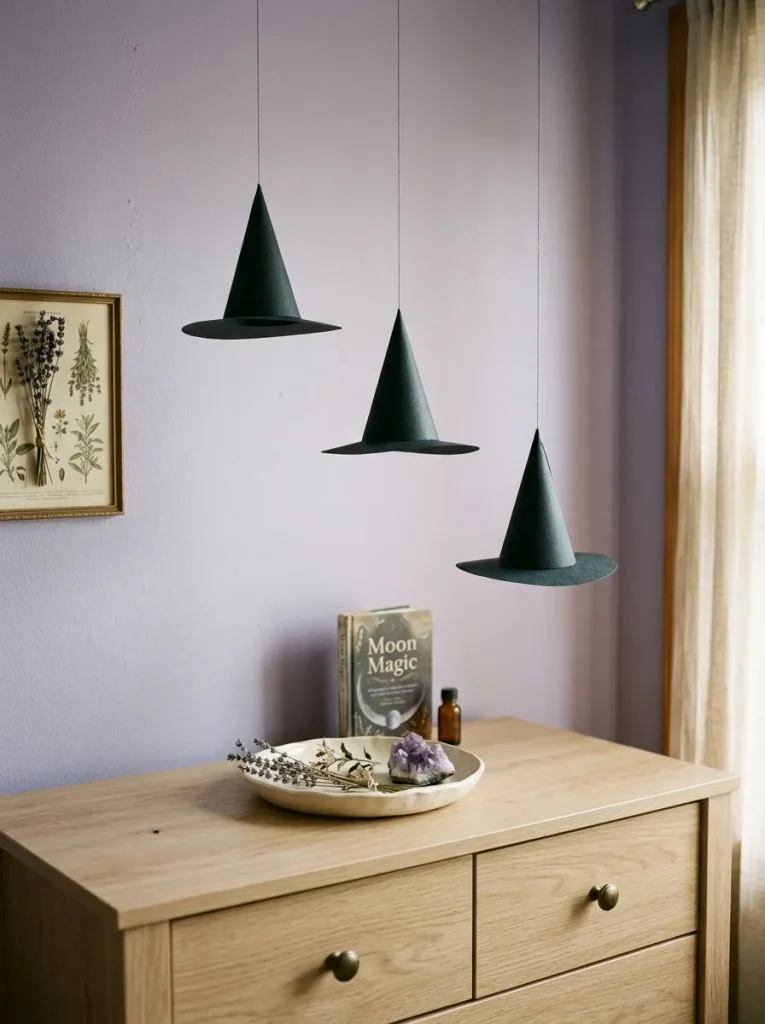
- Turn an empty dresser corner into a floating witch hat display. Draw and cut three cardstock circles, each about six inches across, for the brims.
- Cut a separate cardstock circle in half, then roll one half into a cone. Adjust the overlap until its base fits comfortably inside the brim.
- Thread a hanging string through the cone’s tip, securing it inside with tape. Fold small tabs around the cone’s base and glue them onto the brim.
- Repeat for the remaining hats, then suspend them from suitable hooks at different heights. Keep them away from fans, lights, and anywhere someone could catch the strings.
Black cardstock and leftover thread keep this cheap Halloween bedroom decoration compact and easy to store. Plan a maximum $8 materials spend, including suitable hooks if needed. Hang the lowest hat above standing head height, and check the adhesive instructions before attaching anything to a painted ceiling.
Fabric Scrap Pumpkins
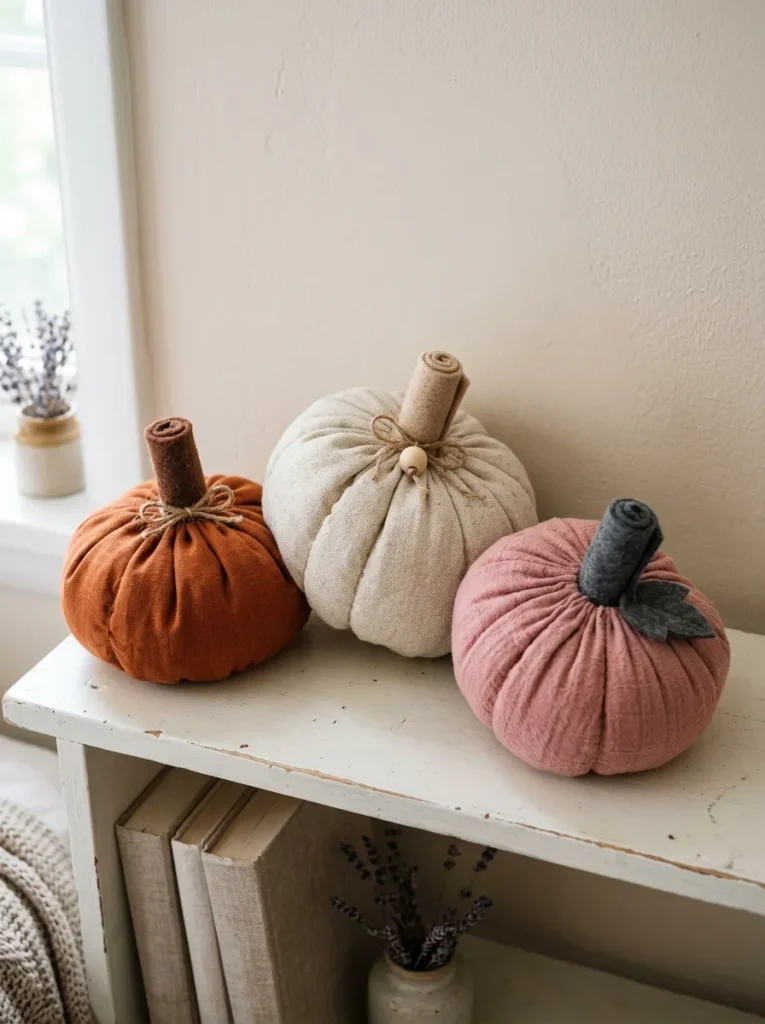
A leftover fabric square can become the softest pumpkin on your bedroom shelf.
| Detail | Tied Fabric Pumpkin | Sewn Fabric Pumpkin |
| Fabric | One large circle from an old shirt | One circle from leftover cotton |
| Filling | Reusable fabric scraps | Reusable fabric scraps |
| Closure | Gather and tie tightly with string | Run a gathering stitch around the edge |
| Stem | Cover the tied neck with brown felt | Tuck rolled felt into the opening |
| Best fit | Beginners without sewing supplies | Crafters with a needle and thread |
Start with a dinner plate as your circle template, then add small handfuls of filling until the pumpkin holds its shape. Close the top using your chosen method. Aim to spend under $5 by reusing fabric and stuffing, making the finished pumpkins small enough for a narrow shelf.
Black Cat Window Silhouettes
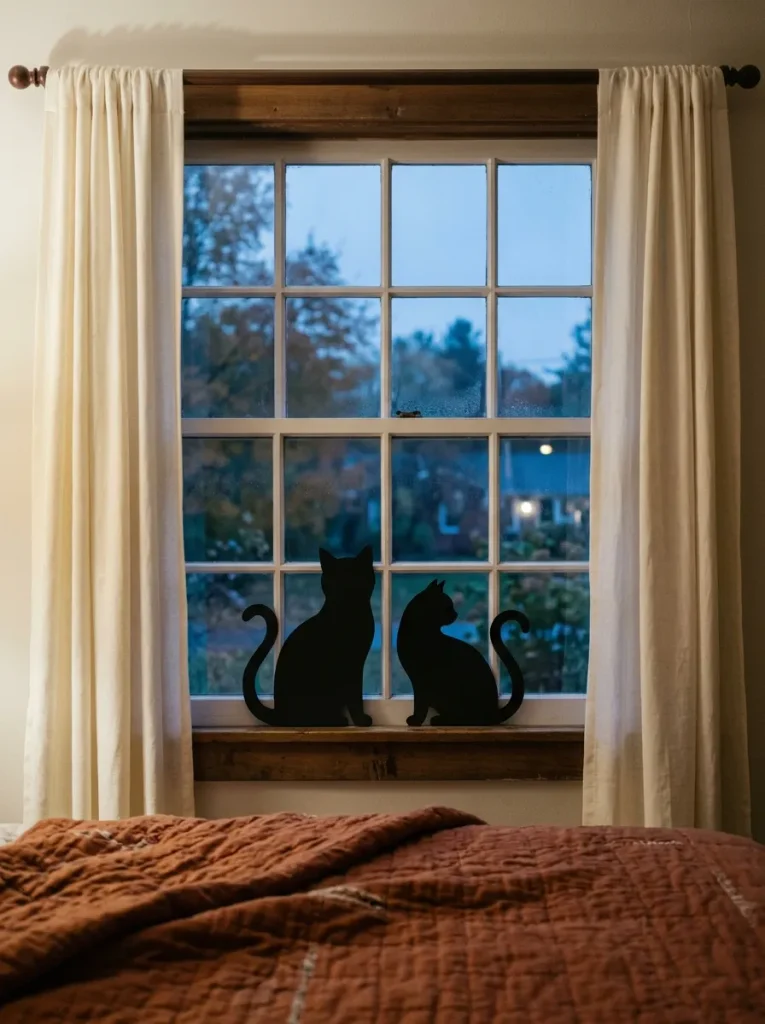
Let the window provide the backdrop for a pair of watchful Halloween cats.
DO
- Draw one sitting cat and one stretching cat on scrap paper before tracing onto black cardstock.
- Keep each silhouette within a single pane so the shapes remain recognizable.
- Attach the cutouts with small pieces of removable tape suitable for glass.
DON’T
- Cover window locks, handles, or ventilation openings.
- Cut whiskers too thin, since narrow paper strips tear easily.
- Place cardstock where condensation regularly collects.
Start with two cats about eight inches tall, leaving open glass around their ears and tails. Their outlines show clearly against daylight without extra lighting. Set a $4 supply budget and reuse cardstock offcuts for smaller details. Remove the paper before cleaning the window to prevent soggy edges.
Mini Potion Bottle Display
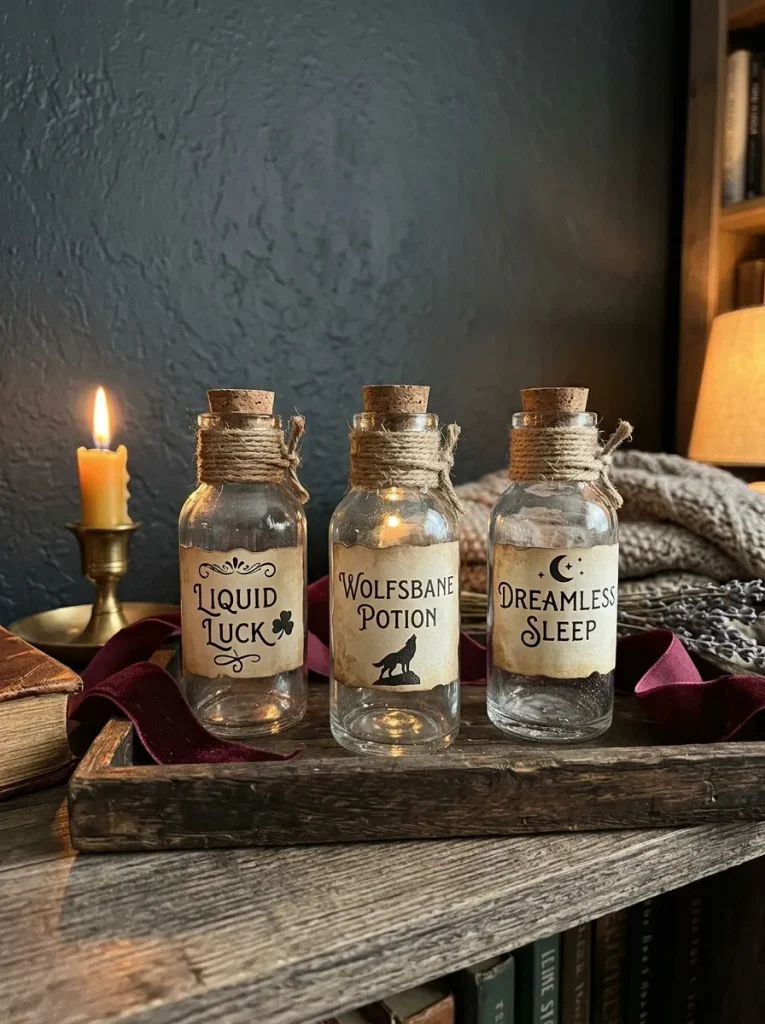
An empty vanilla bottle already has the shape of a tiny apothecary treasure.
Budget: Allow up to $5 for missing supplies, reusing bottles and paper.
Time: About 25 minutes with clean, dry bottles.
Skill Level: Beginner, with scissors, a pen, and glue.
Best For: A dresser tray or a stable bedroom shelf.
Wash empty food extract bottles thoroughly and let them dry, then glue on torn paper labels reading “Moon Dust” or “Midnight Mist.” Leave the bottles empty for easy storage. Wrap their necks with leftover twine and group three together, keeping the display separate from medicines and everyday toiletries.
Scrap Fabric Ghost Garland
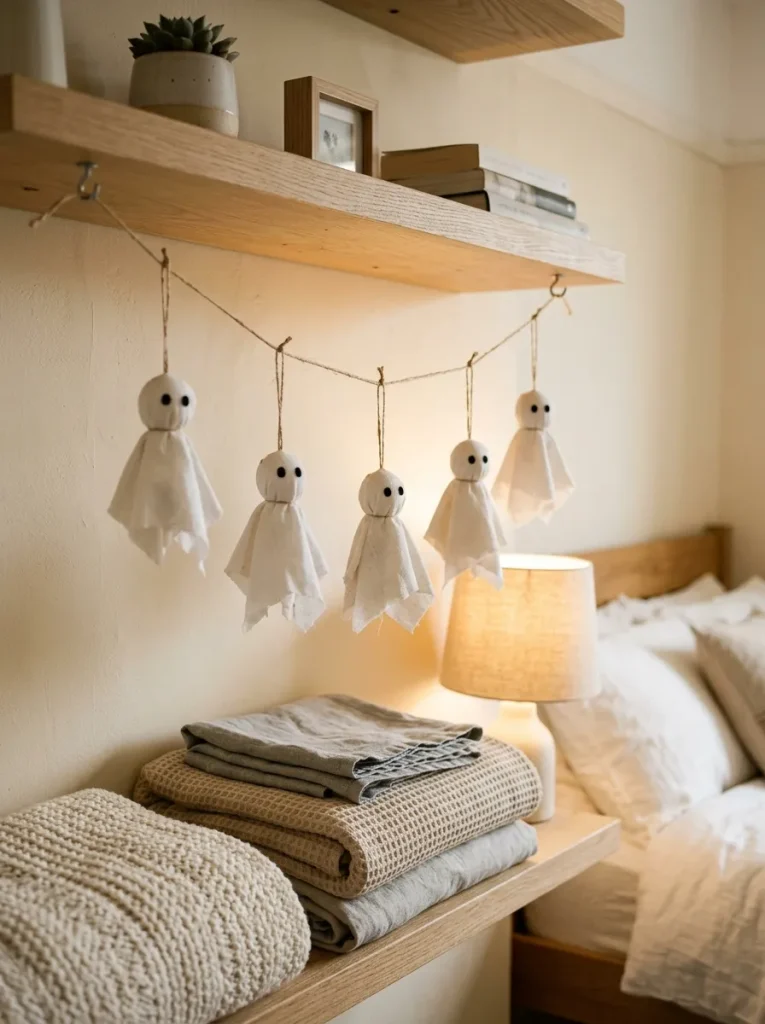
Skip the sewing kit: these little ghosts get their shape from fabric scraps and string. Cut five white cotton squares about eight inches wide, then place a small ball of scrap fabric in each center. Gather the cloth underneath and tie firmly to form the head.
Draw two eyes with a fabric marker, placing scrap cardboard underneath to prevent bleed-through. Tie each neck to a length of cotton twine, spacing the ghosts evenly across a shelf edge. Keep a $5 spending cap by reusing an old pillowcase, and hang beyond children’s or pets’ reach.
Crescent Moon Wall Art
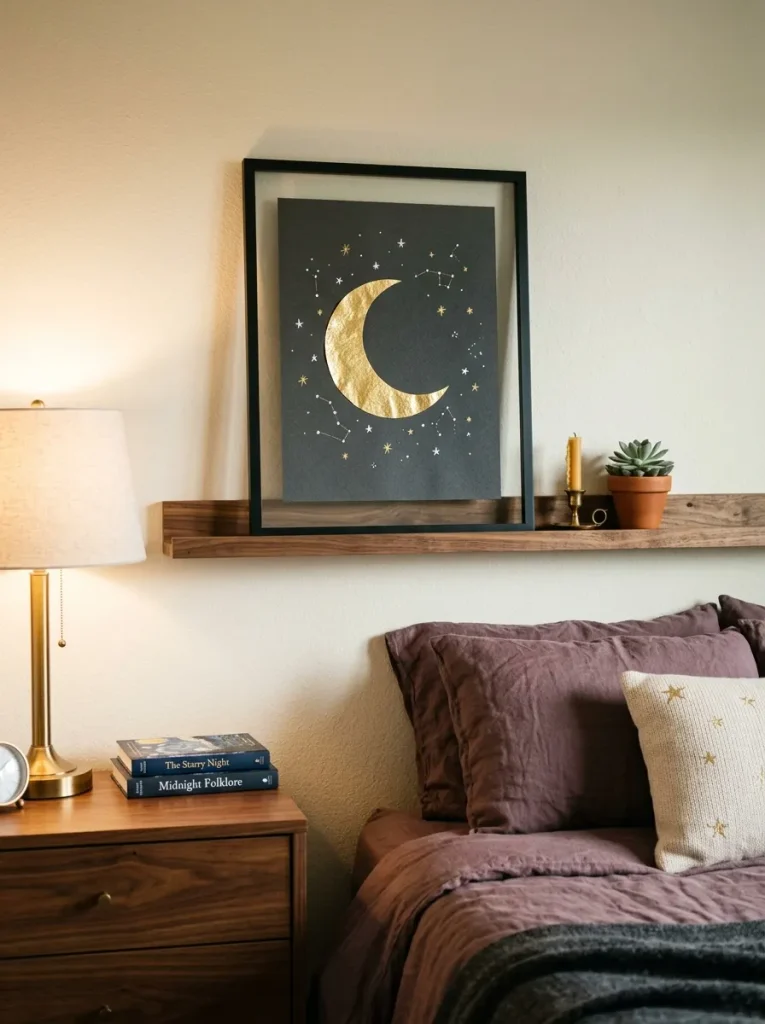
- A single gold crescent can give your bedroom a witchy focal point without filling the wall. Start with an unused frame and a piece of dark backing paper.
- Trace a saucer onto gold paper, then overlap a smaller circular outline to create the crescent. Cut along both curves for a clean shape.
- Glue the moon slightly above the center of the backing. Add five tiny stars with a white or metallic pen, leaving plenty of empty space.
- Place the finished artwork on an existing picture ledge. Keep a $5 materials limit by reusing the frame and choosing paper that fits without trimming the backing board.
For anyone searching “diy halloween bedroom decor cheap,” reusing a frame makes a practical starting point. Match the moon to one existing accent, such as a brass lamp or mustard cushion. The repeated color connects your Halloween artwork to the room, so you need fewer seasonal accessories.
Mummy Pencil Holder
Quick Tip:
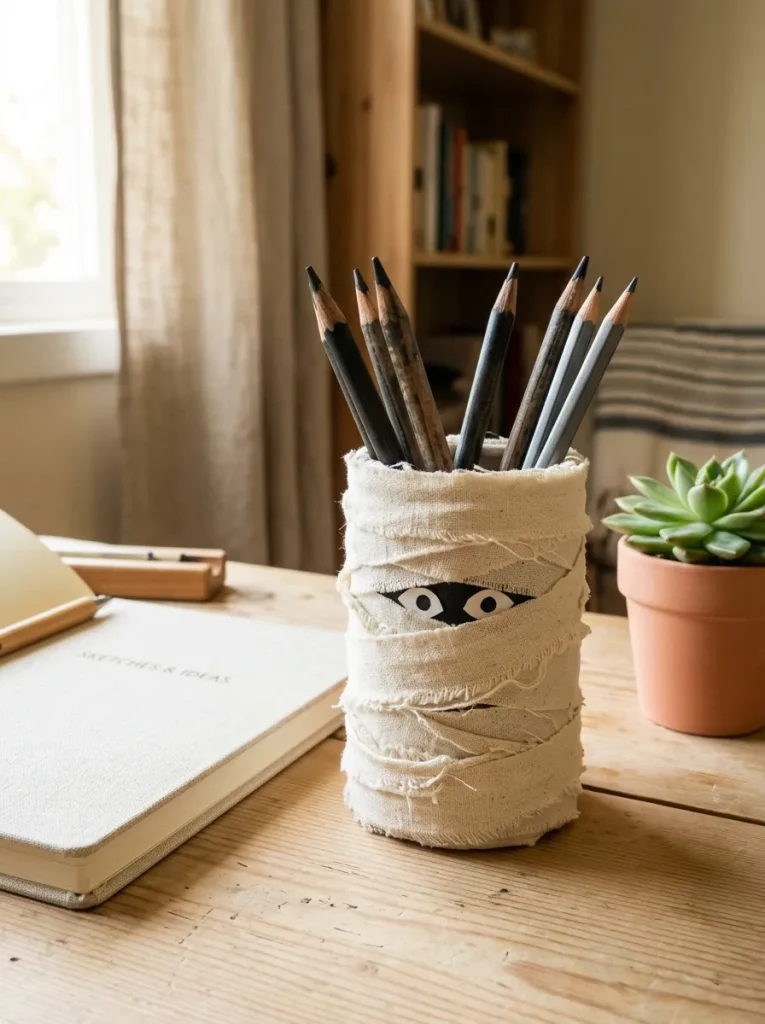
Rescue a tired pencil cup with a few crooked mummy wraps. Wind narrow strips from an old white T-shirt around the outside, securing the ends with craft glue. Leave a small gap near the top for two paper eyes, then overlap another strip across their lower edges.
Use a stable pencil holder you already own, keeping fabric below the rim so pens slide in easily. A $3 supply allowance covers a small refresh when glue and scraps are available. Uneven wrapping adds character, so there is no need to measure every strip or hide every overlap.
Halloween Pillow Sash
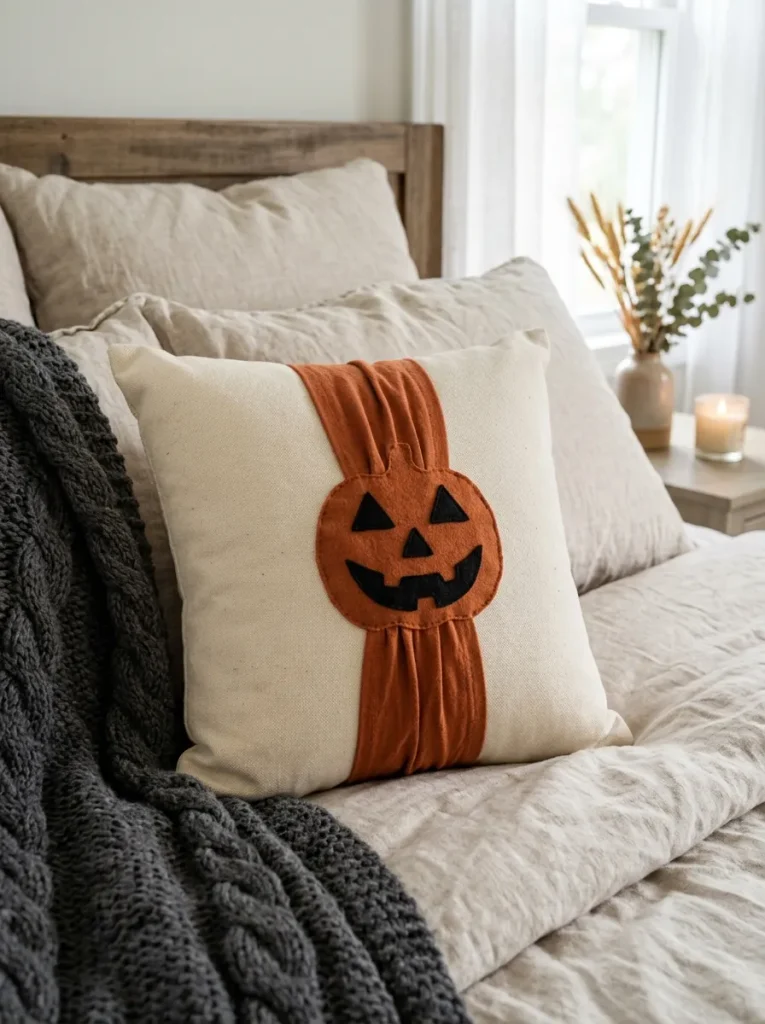
BEFORE: Your everyday cushions can join the Halloween scheme without a new set of covers. Their familiar colors already work with the bedding, but they lack a seasonal detail.
AFTER: A removable orange sash gives one cushion a jack-o’-lantern face. The original cover stays visible on either side, keeping the bed from feeling crowded with patterns.
Cut a broad strip from an old orange shirt, long enough to wrap around the cushion and tie behind it. Glue black felt features onto the front, letting them dry before fitting. Keep purchases below $5 by using scraps, and remove the decorative sash before sleeping or washing.
Cardboard Haunted House
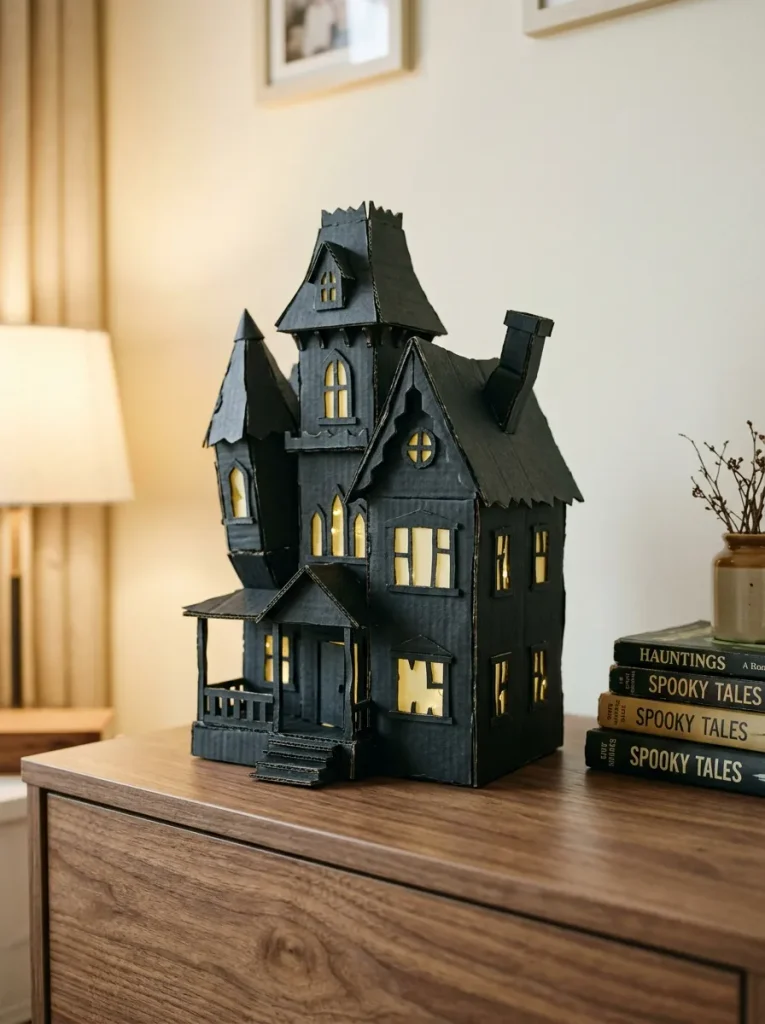
- Give an empty cereal box a second life as a miniature haunted house. Open it flat and draw a house front with a steep roof, chimney, and uneven windows.
- Cut out the outline, then paint the printed side charcoal or cover it with black paper. Let any paint dry fully before continuing.
- Glue small yellow paper rectangles onto the front for windows. Draw black window frames and add a narrow door with a round paper handle.
- Fold two cardboard triangles into supports and glue them behind the house. Space them apart so the silhouette stands securely on your dresser.
Keep the house around ten inches tall so it sits comfortably beneath a bedroom mirror or shelf. Reused packaging handles most of the construction, leaving a $5 allowance for missing paper or paint. Make the base supports deep enough to prevent tipping whenever you open the drawers.
Pressed Leaf Shadow Frame
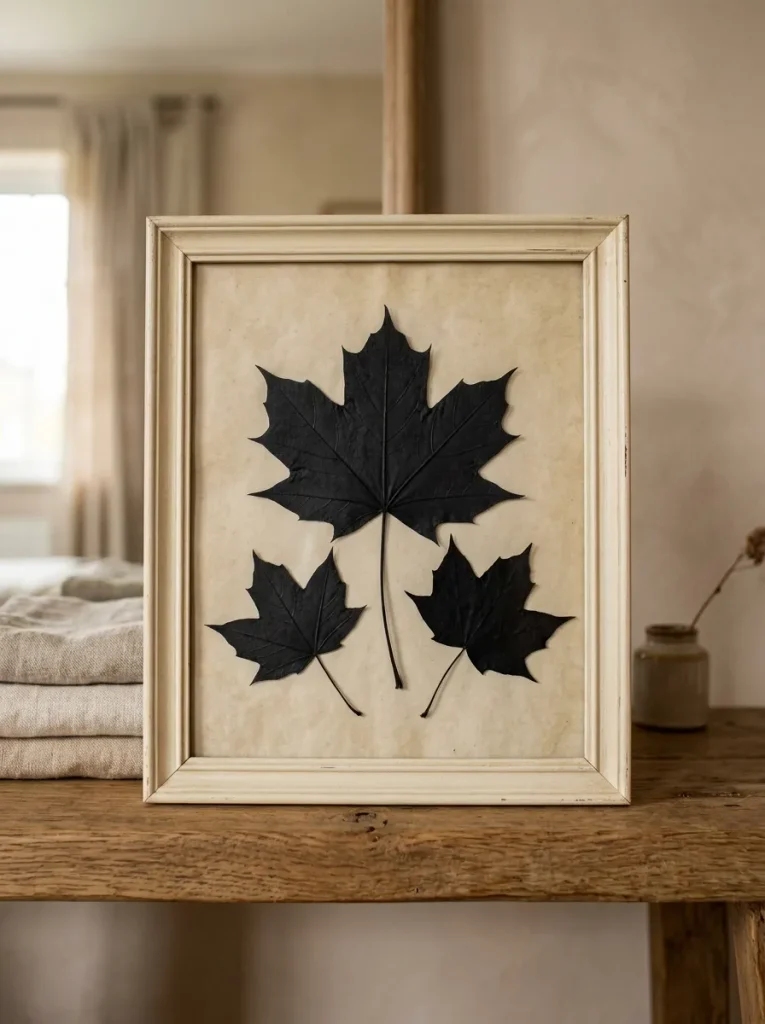
Dark leaves bring a woodland Halloween mood to a shelf without adding another pumpkin.
| Detail | Painted Real Leaves | Paper Leaf Cutouts |
| Starting material | Clean, dry fallen leaves | Leftover black paper |
| Preparation | Press flat, then paint gently | Trace a leaf and cut around it |
| Surface detail | Natural veins and irregular edges | Smooth shapes with optional drawn veins |
| Handling | Fragile once dry | Easier to reposition and store |
| Best placement | A frame with clearance behind the glass | A standard reused picture frame |
Choose three small leaves with different outlines, then arrange them on pale backing paper with space between each shape. Attach them with tiny dots of glue. Reuse a frame to keep new spending below $6, and avoid forcing thick stems beneath glass that will not close comfortably.
Rag Ribbon Door Wreath
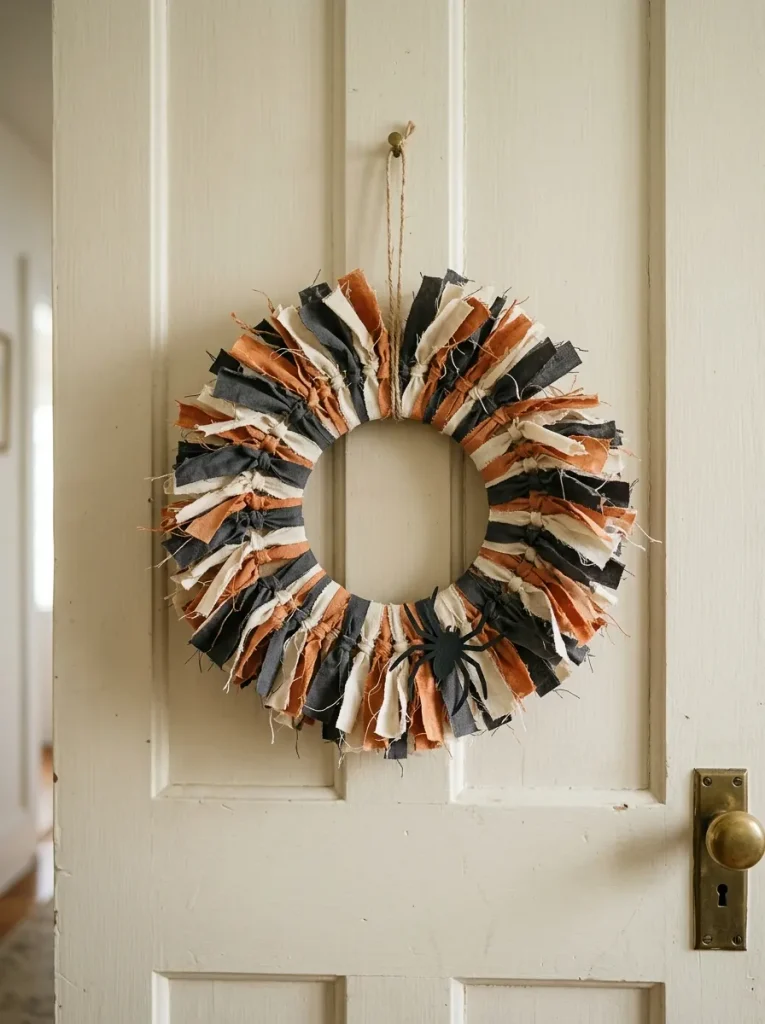
Save your shortest fabric scraps for a Halloween accent that greets you at the bedroom door.
DO
- Cut a ten-inch cardboard ring with a band about two inches wide.
- Use fabric strips roughly one inch wide and eight inches long.
- Tie strips gently around the ring, alternating colors as you work.
- Hang the lightweight wreath from a ribbon loop and a suitable door hook.
DON’T
- Pull knots so tightly that the cardboard bends.
- Leave long trailing strips near the latch or handle.
- Use damp fabric that could soften the cardboard.
- Attach the wreath where it prevents the door from closing.
Start with strips from worn clothing, choosing two neutral colors and one orange accent for a coordinated finish. Slide the knots together until the cardboard disappears. Keep a $5 allowance for missing materials, and store the finished wreath flat so its lightweight base holds its shape next October.
Cardboard Raven Perch
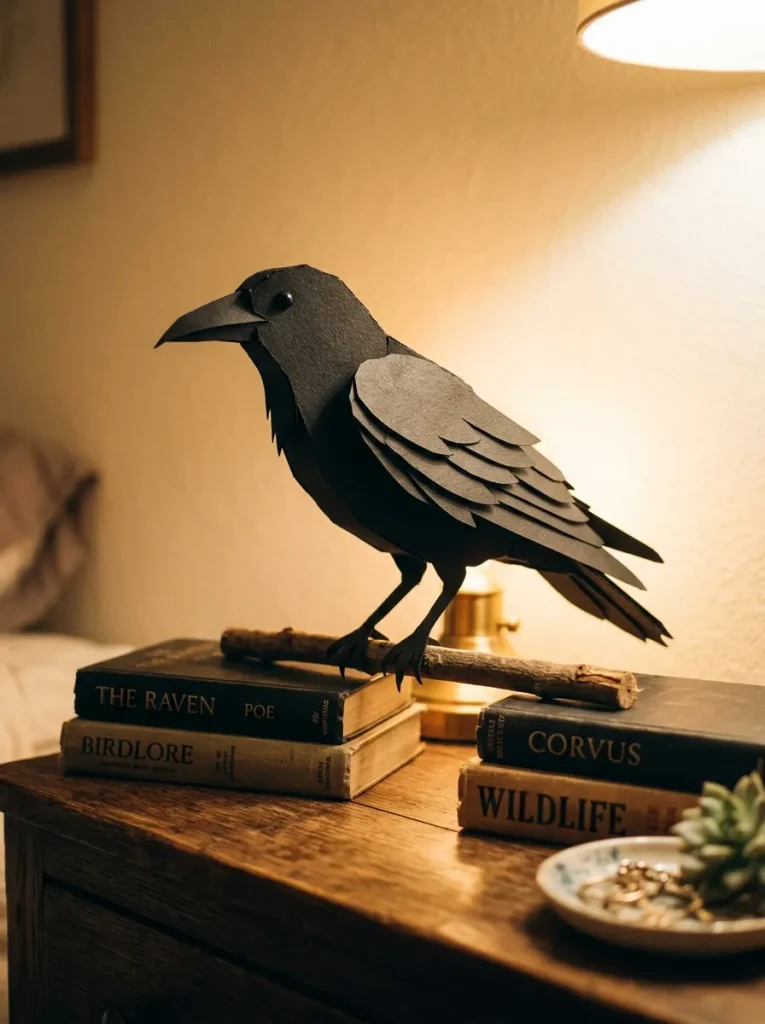
Your dresser only needs one watchful raven to feel a little more mysterious.
Budget: Set aside up to $4 for missing glue or black paper.
Time: About 30 minutes, plus drying time.
Skill Level: Beginner cutting and gluing.
Best For: A dresser or bookshelf with a plain background.
Trace a side-view raven onto cereal-box cardboard, cut it out, and cover both sides with black paper. Glue a separate wing onto the body for depth. Attach the feet to a clean, dry twig with glue, then secure the twig across two short book stacks with removable putty.
Tattered Dresser Runner
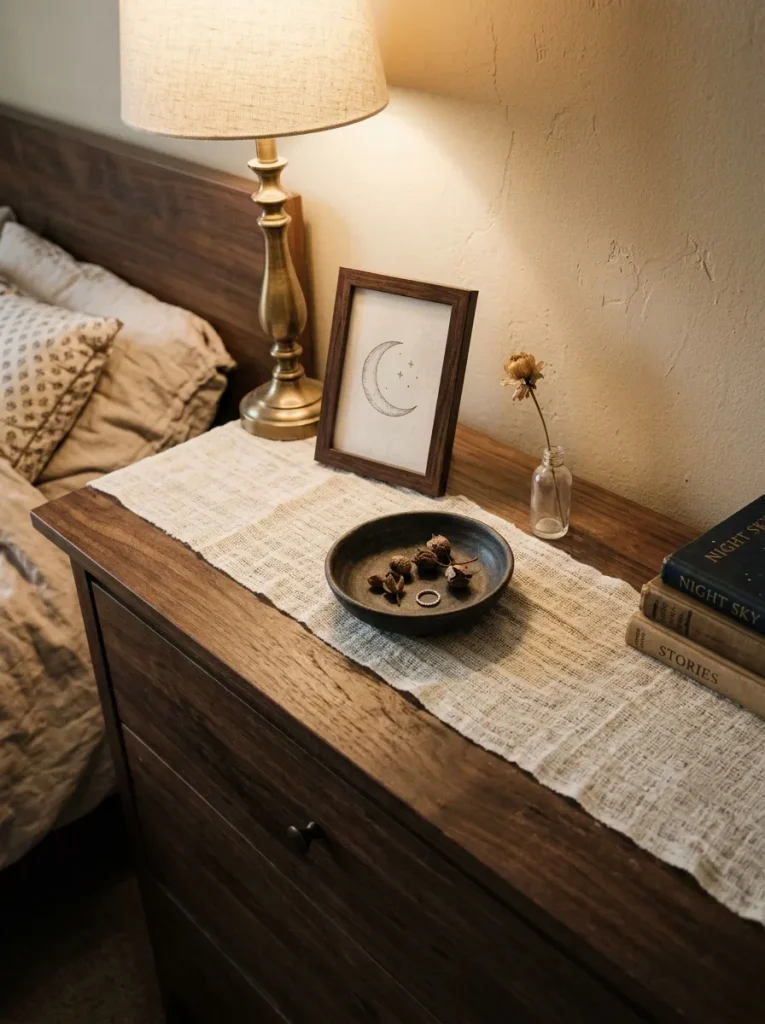
Leave the plastic cobwebs aside and give your dresser a softer haunted finish. Cut a strip of cheesecloth slightly longer than the surface, allowing just a few inches to hang at each end. Gently loosen threads along the edges for a worn appearance without creating large holes.
Layer the cloth over bare wood, then anchor it beneath a shallow tray or framed picture. Keep the middle relatively flat so everyday objects remain steady. Limit fabric spending to $5, measuring your dresser before buying, and trim dangling threads that could catch when drawers slide open.
Monster Drawer Faces
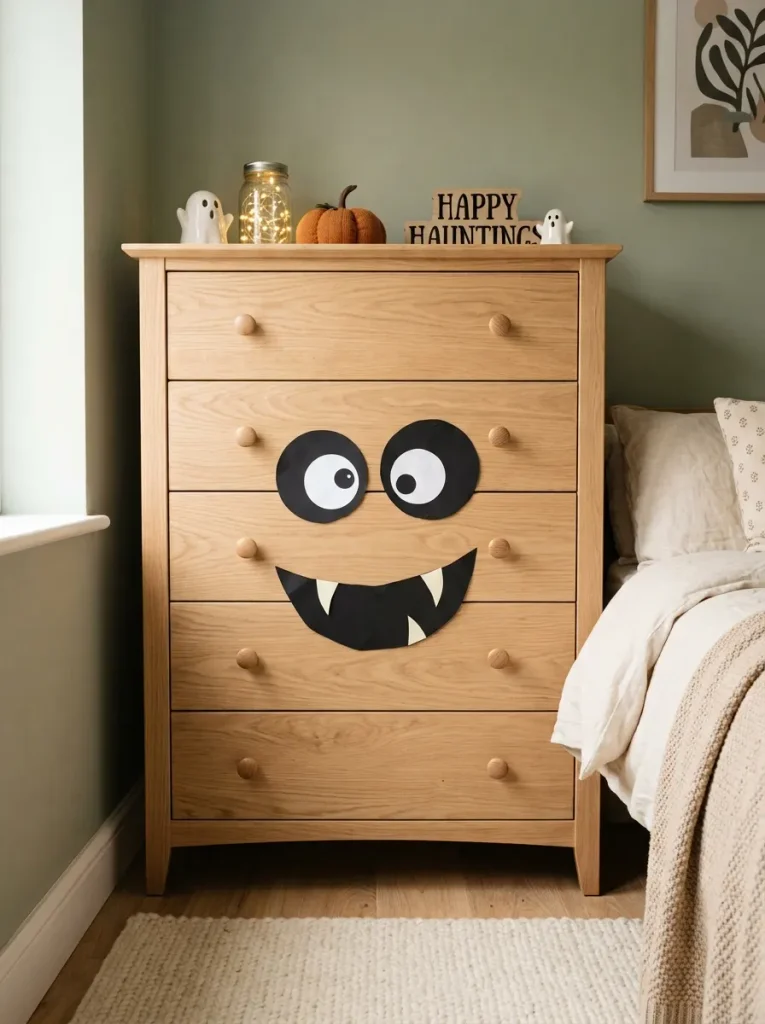
- Make one drawer grin back at you with oversized paper eyes and a toothy mouth. Choose a drawer with enough clear space around its handle.
- Cut two mismatched eyes from black and white paper. Give one a sleepy eyelid and the other a round pupil for a deliberately silly expression.
- Build the mouth from a black paper crescent and two white triangular fangs. Keep each piece on the same drawer so nothing crosses a moving gap.
- Attach the features with removable adhesive approved for the furniture finish, testing somewhere hidden first. Use scrap paper and a $3 supply limit for any missing materials.
For a playful answer to “diy halloween bedroom decor cheap,” decorate just one drawer and leave the others plain. The face stays easy to read from across the room, while the dresser remains usable. Photograph your layout before removing it so you can recreate the expression next year.
Eyeball Pebble Bowl
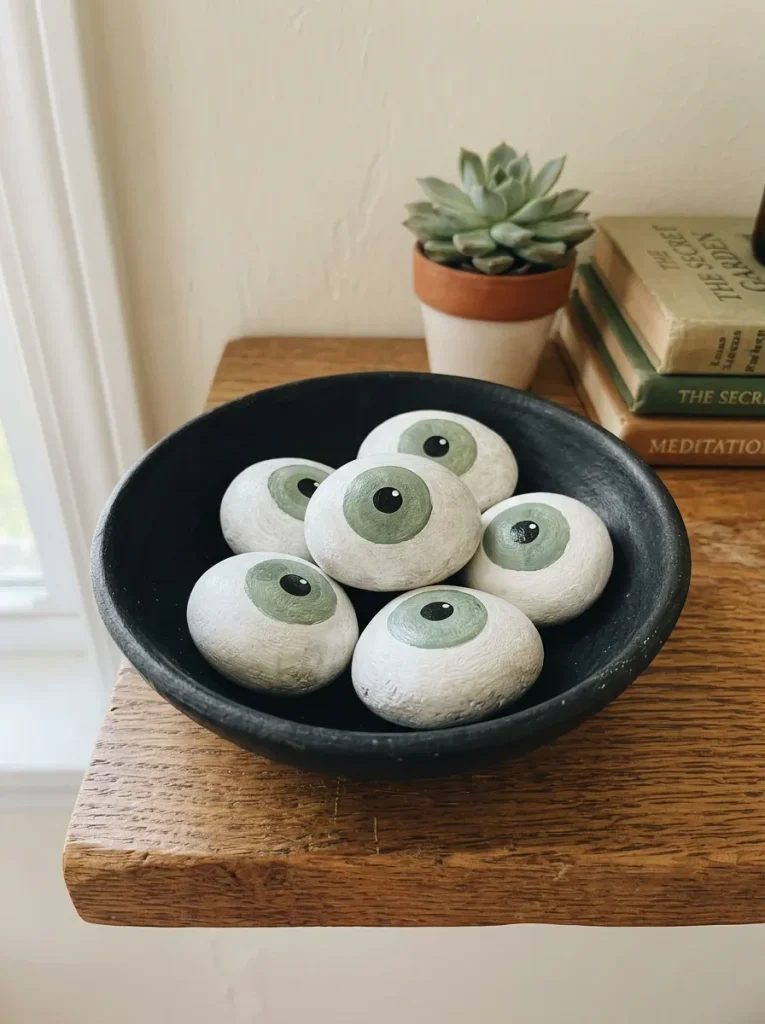
Quick Tip:
A tiny bowl of staring eyes makes an ordinary shelf unexpectedly spooky. Paint clean, dry pebbles white, let them dry, then add colored circles and smaller black pupils. Finish each pupil with a white highlight placed on the same side for a consistent look.
Choose smooth stones small enough to sit inside a dish you already own, and protect your work surface before painting. Keep a $5 allowance for missing craft paint. Three to five eyeballs give the display enough variety without crowding the bowl or making the shelf difficult to dust.
Striped Witch Legs
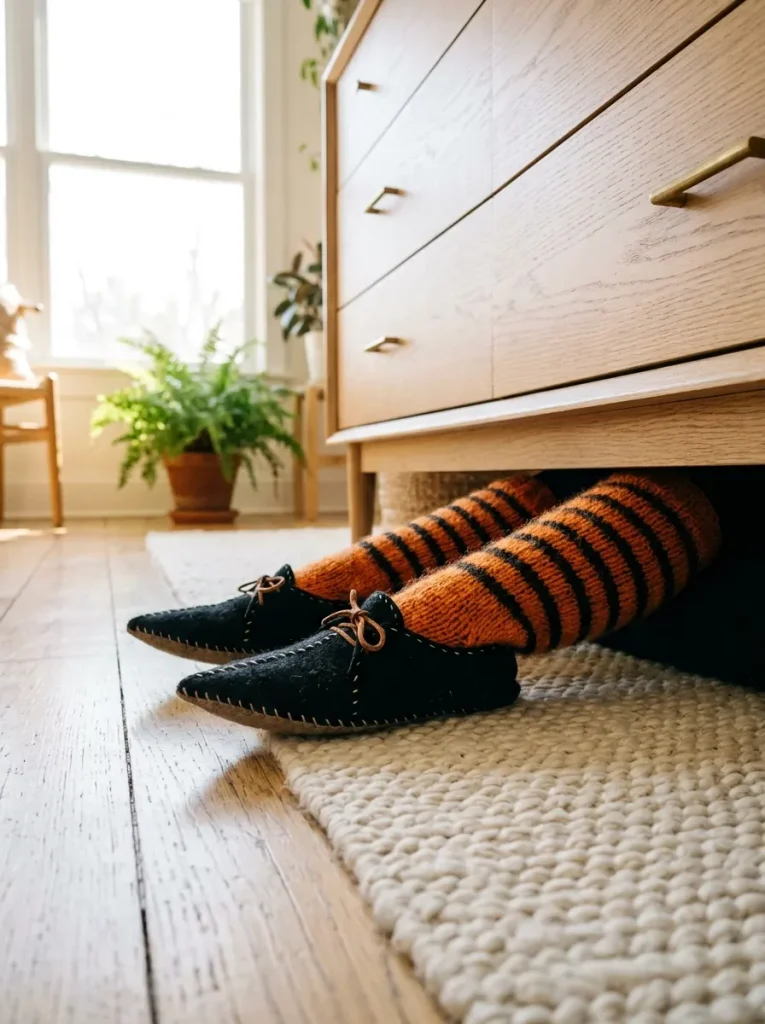
BEFORE: That empty gap beneath your dresser could hide a surprisingly funny Halloween detail. The furniture already provides the setting, so there is no need to build a separate display.
AFTER: Two stuffed striped socks become witch legs peeking from underneath. Pointed felt shoes complete the illusion while keeping the decoration small enough for a bedroom corner.
Stuff old striped socks with fabric scraps, then loosely stitch flattened black felt cones over the toes to suggest pointed shoes. Tuck the open sock ends beneath the dresser without lifting it. Use existing socks to keep spending below $5, and position both legs outside your usual walking path.
Coffin Trinket Tray
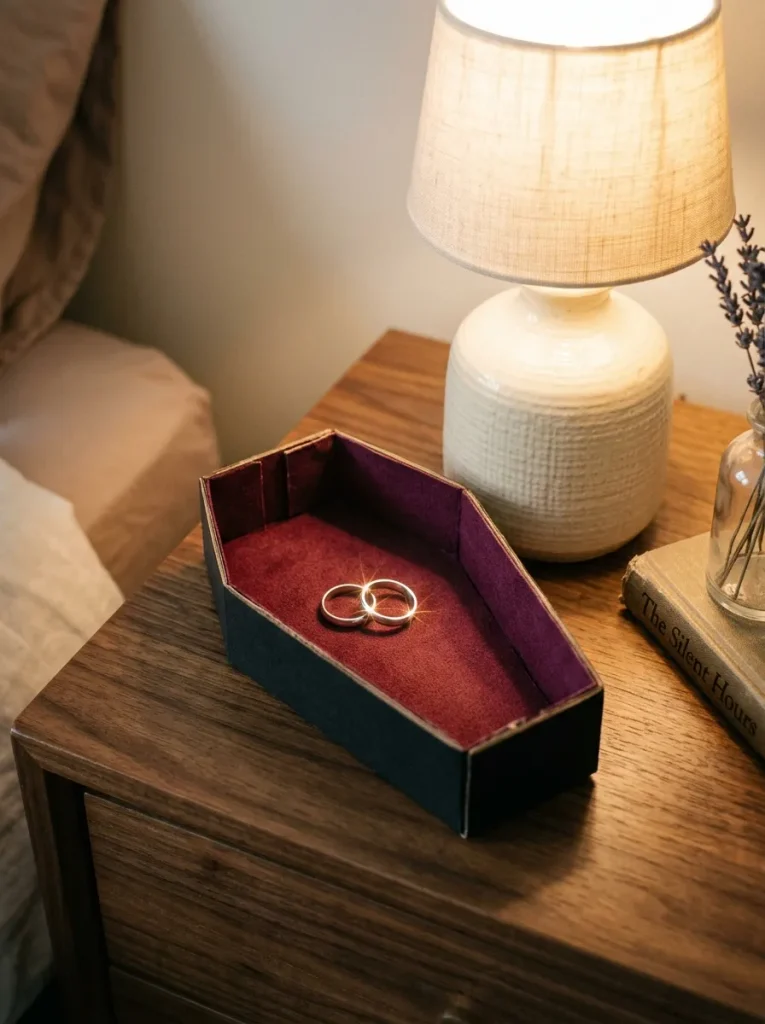
- Give your rings a tiny Halloween resting place with a cardboard coffin tray. Draw a six-inch coffin outline on cereal-box cardboard, with clipped upper corners and a narrower foot.
- Cut out the base and cover its upper surface with burgundy paper. Trace around it before cutting the lining so both shapes match.
- Cut cardboard strips one inch wide for the walls. Fold a quarter-inch flap along one long edge, then trim separate sections to match the coffin’s six sides.
- Glue each flap beneath the base, holding the walls upright until secure. Join the corners with small pieces of paper tape, then cover the outside with black paper.
- Let the tray dry fully before placing lightweight jewelry inside. Keep a $4 supply allowance by reusing packaging, glue, and leftover paper.
A shallow shape makes earrings and rings easier to retrieve than a deep decorative box. Keep the lining smooth, pressing down any lifted paper edges before use. This little coffin belongs on a dry nightstand or dresser, where its burgundy interior remains visible even when the tray is empty.