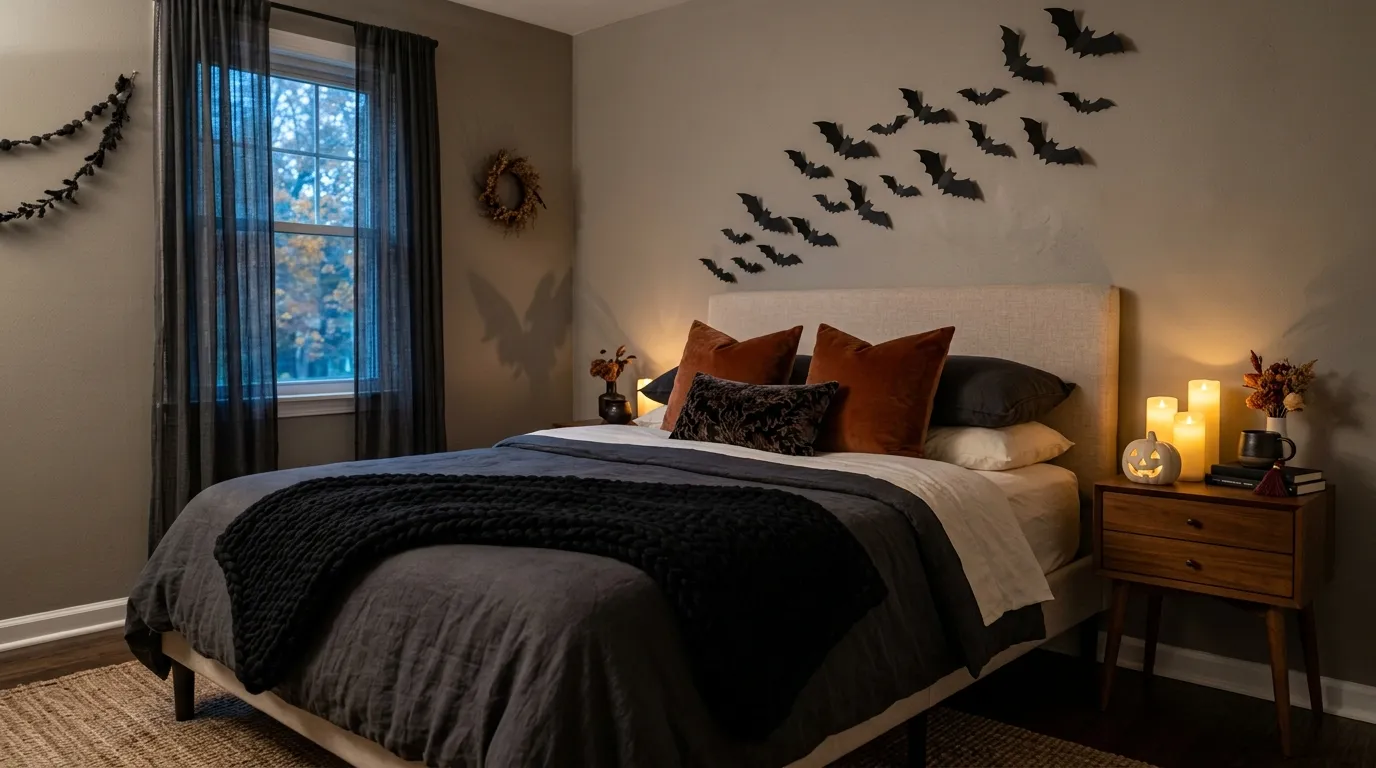
23 Spooky Halloween Bedroom Decor Ideas: Dare to Sleep?
A few paper bats above your pillow. An amber pumpkin glowing across the room. Want to make halloween bedroom decor spooky while keeping your favorite place to unwind comfortable?
You do not need new furniture or a cupboard full of seasonal decorations. These 23 ideas use simple crafts, darker fabrics, and carefully placed accents to bring Halloween into your bedroom without taking over every surface.
For renters and budget-conscious decorators, the challenge is finding decorations that fit around everyday life. Your nightstand still needs room for a water glass, and decorative pillows need somewhere to go at bedtime. From a ghost reading chair to a tiny potion display, you will find practical ways to balance spooky details with a usable room. Choose the corner that catches your eye first and start there.
Paper Bat Wall Swarm
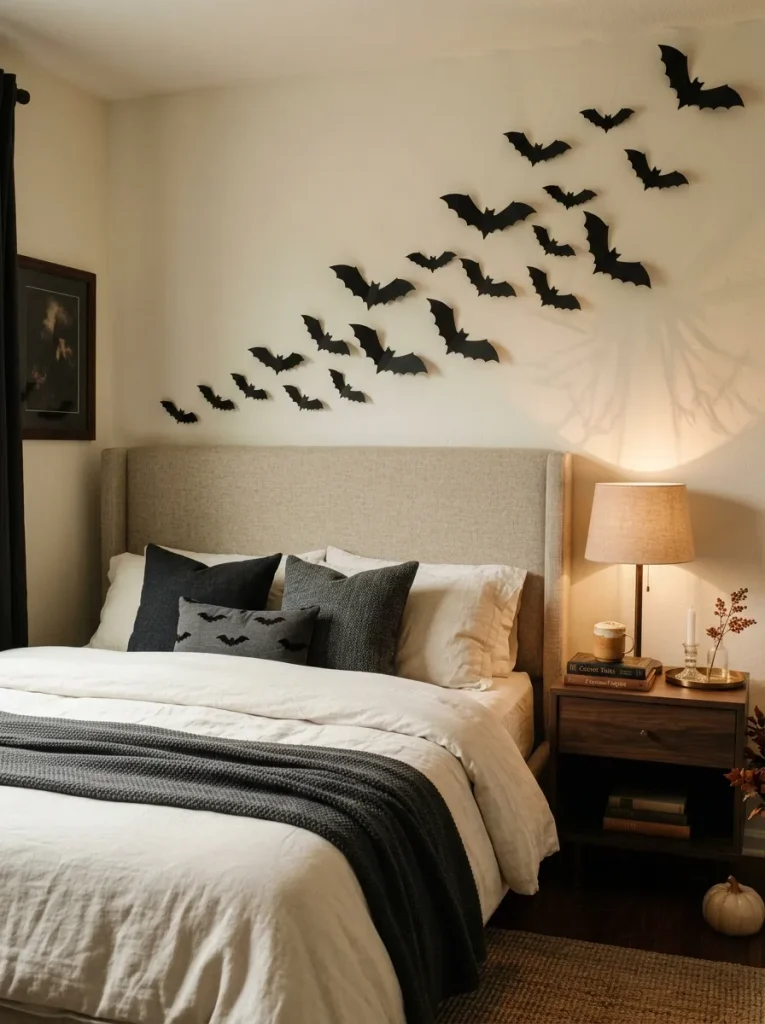
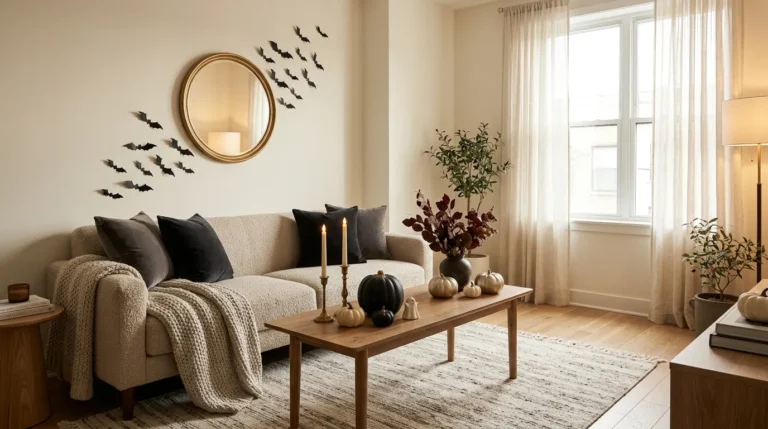
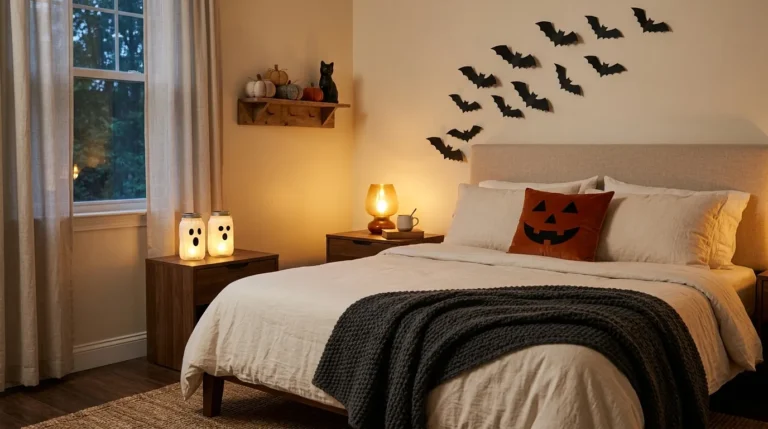
A small swarm of paper bats gives a plain bedroom wall an instant Halloween focal point. Cut three bat sizes from matte black cardstock, then fold each gently through the center. Arrange them diagonally from one side of the headboard toward an upper corner for visible movement.
Keep the smallest bats at the edges and cluster larger shapes near the middle. Leave some wall showing so the arrangement feels intentional instead of crowded. For painted walls, test a removable adhesive in a hidden spot first and follow its removal directions to reduce the risk of damage.
Charcoal and Rust Bedding
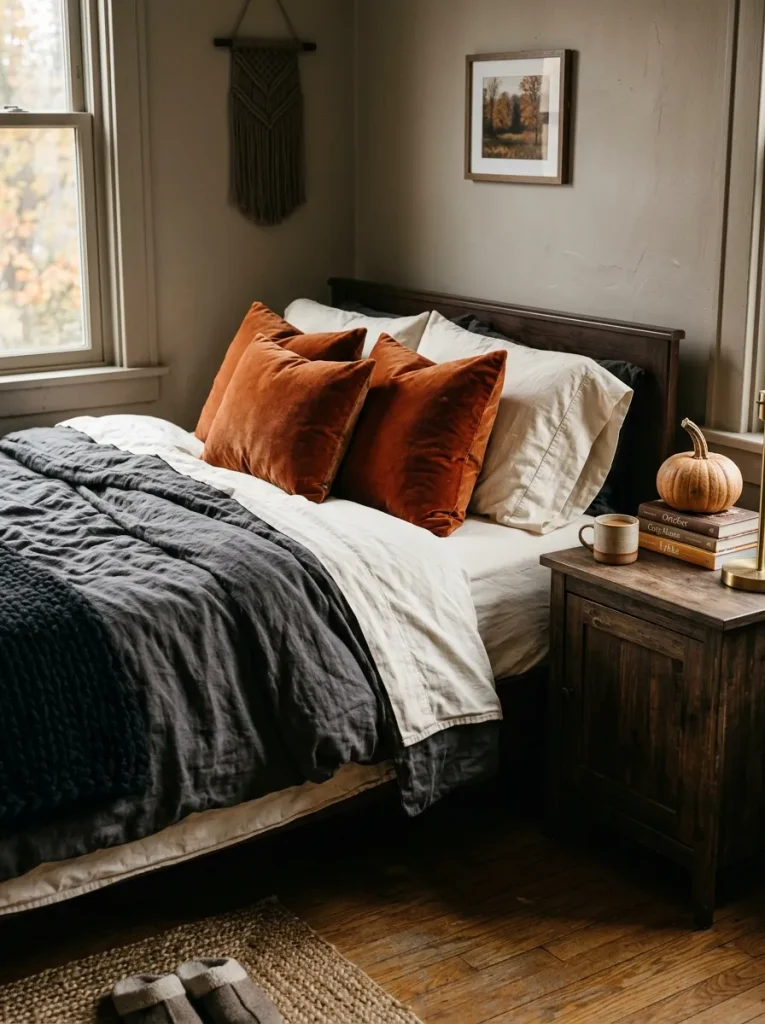
- Give your bed a darker Halloween mood with a charcoal duvet cover or a blanket you already own. Keep the sheets underneath for an affordable seasonal update.
- Fold back the duvet to reveal an ivory sheet border. That lighter strip breaks up the dark fabric and keeps the bed from looking like one solid block.
- Place two rust velvet cushion covers over existing inserts. Their orange undertone brings in Halloween color without relying on oversized novelty prints.
- Lay a black knitted throw across the bottom third of the mattress. Pairing knit with smooth cotton creates visible texture, even within a limited color palette.
Repeat one accent color elsewhere, such as a rust pumpkin on the dresser, to connect the bedding with the rest of the room. Keep decorative cushions limited to two or three so bedtime stays simple. The result feels seasonal without covering every surface in Halloween props.
Flameless Candle Nightstand
Quick Tip:
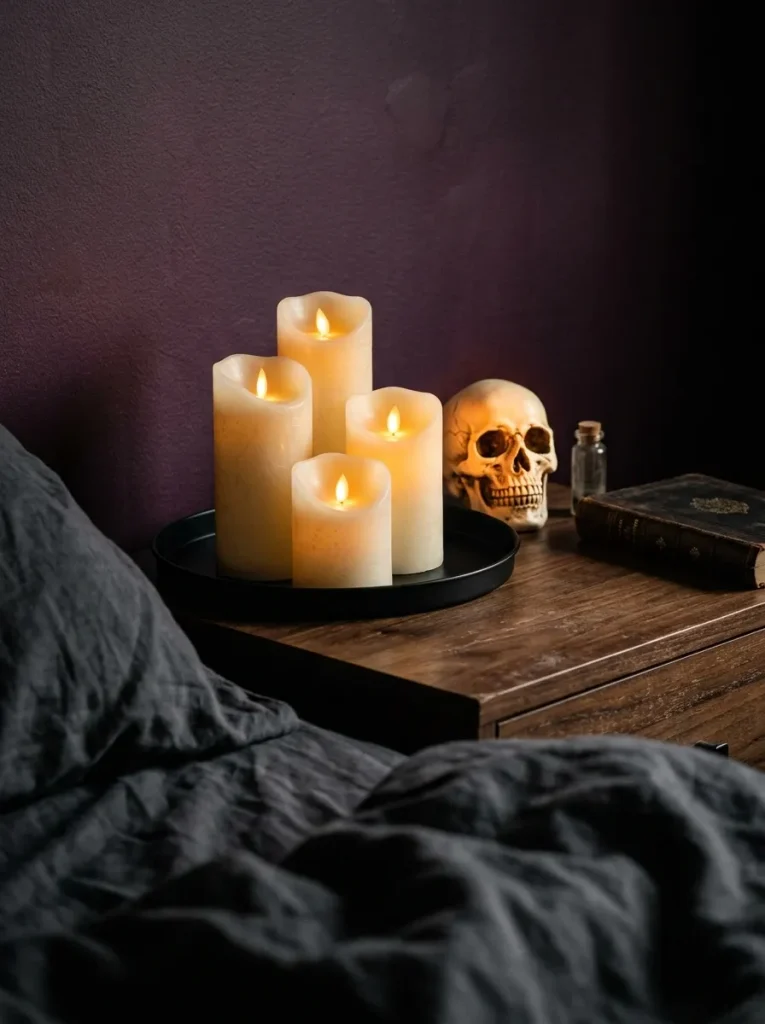
Want a haunted bedside glow without an open flame? Choose flickering LED candles and keep your regular reading lamp nearby, since decorative candlelight will not provide enough light for reading.
Group three flameless candles of different heights on a shallow tray, leaving room for your phone and water glass. Choose warm amber lights for a softer effect against black accessories. A timer keeps the display convenient at bedtime, while the tray makes the whole arrangement easy to move.
Black Lace Mirror
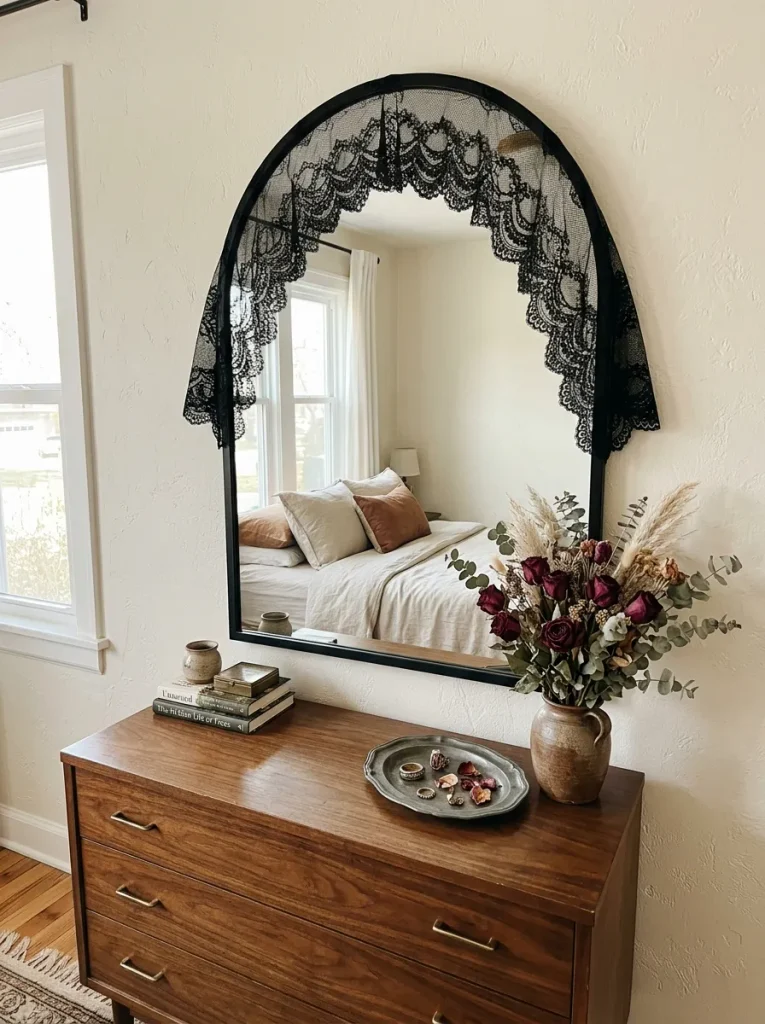
BEFORE: A plain mirror reflects the bedroom but adds little to its Halloween theme. Covering the entire glass with decorations would make getting ready inconvenient.
AFTER: Black lace framing the upper corners gives the mirror an antique, haunted-house feel. The center stays clear, so the mirror remains useful every morning.
Start with a narrow lace scarf or fabric remnant instead of buying a themed mirror. Secure it to the frame with suitable clips, keeping adhesive away from delicate finishes. Let one side hang slightly lower for an irregular silhouette, but stop above any dresser drawers to prevent snagging.
Potion Bottle Dresser
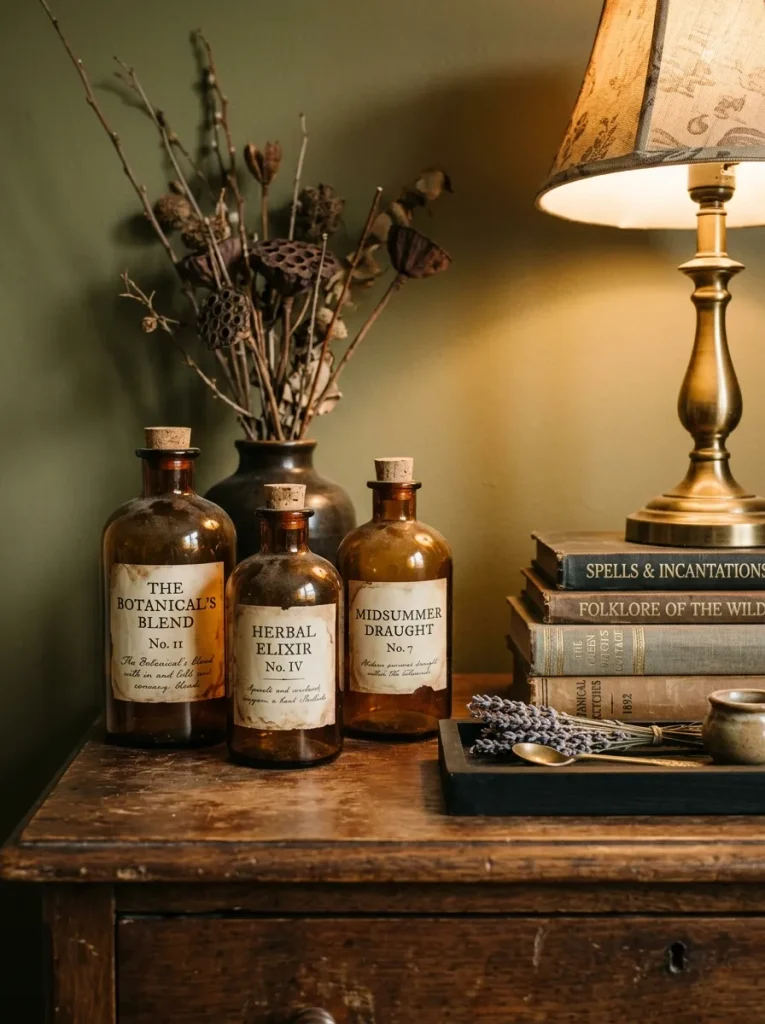
- Turn three empty bottles into a tiny witch’s collection. Choose different heights, wash them thoroughly, and let them dry completely.
- Cut small labels from cream paper and lightly shade their edges with a brown pencil. Write fictional names such as “Midnight Mist” or “Moon Dust.”
- Attach the labels with double-sided tape. Leave the bottles empty, allowing the amber glass and handwritten lettering to provide the detail.
- Arrange the bottles on a tray, with the tallest at the back. Place a closed secondhand book beneath the smallest bottle if the display needs extra height.
Keep the arrangement to one corner so your dresser still has room for everyday essentials. Amber bottles suit a warm bedroom palette, while clear bottles look sharper against dark walls. Avoid using medicine containers or storing unfamiliar liquids in decorative bottles, especially in rooms shared with children or pets.
Moonlit Window Silhouettes
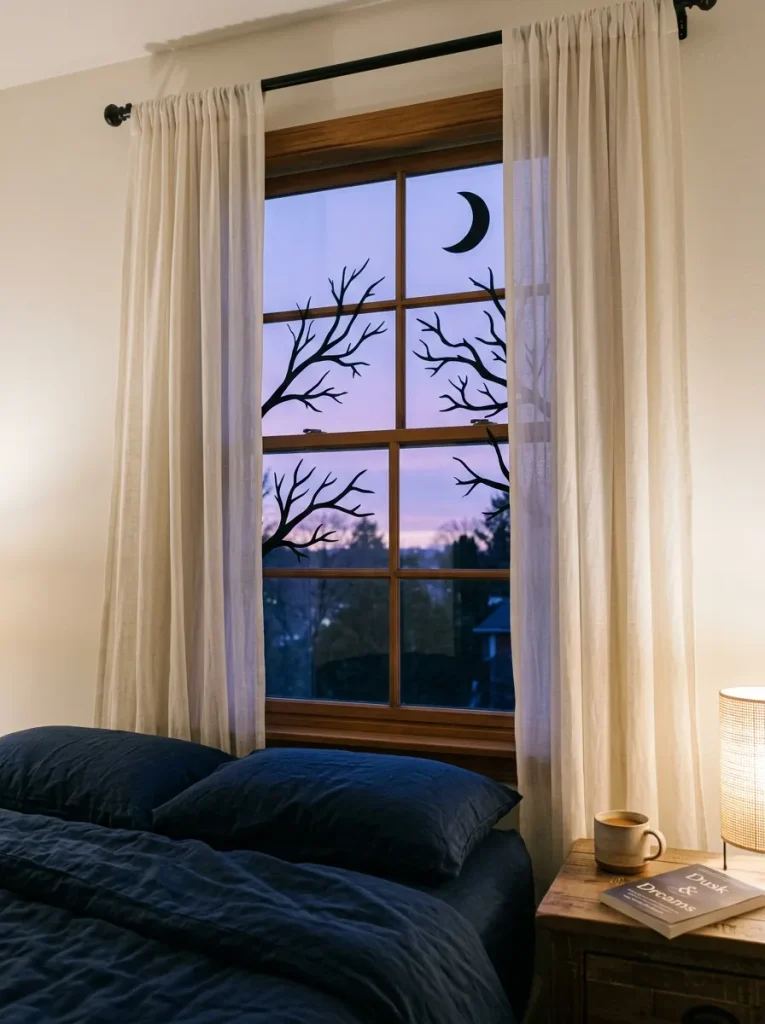
Let the window become part of the scene after sunset. Choose the silhouette style that suits your daylight needs and the amount of cutting you want to do.
| Detail | Crescent Moon Cutout | Bare Branch Cutouts |
| Visual effect | One clear celestial focal point | A crooked woodland outline |
| Placement | Upper corner of one pane | Along the lower and side edges |
| Cutting effort | One broad shape with curved edges | Several narrow, irregular shapes |
| Daylight coverage | Leaves most glass uncovered | Coverage increases with branch density |
Sketch your design on scrap paper before cutting black cardstock. Attach lightweight shapes with a product intended for your window surface, checking compatibility first. Keep handles, locks, and opening sections clear. For a small bedroom, decorate just one pane so the window still admits plenty of daylight.
Cobweb Bookshelf Corners
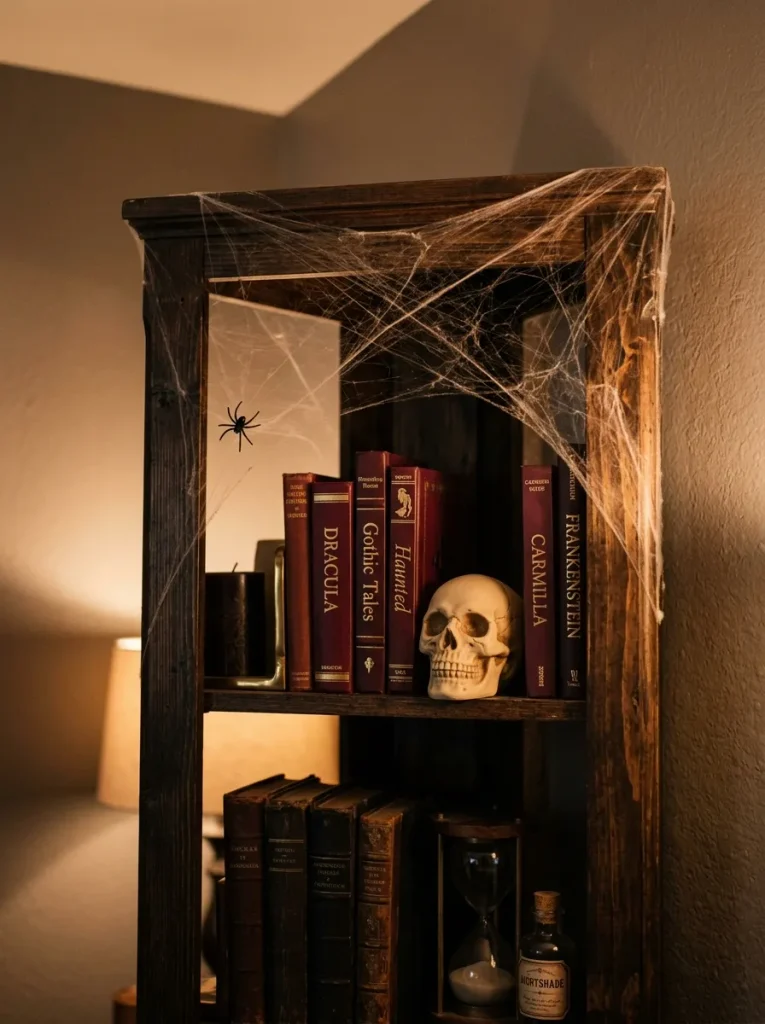
A few thin strands can make a tidy bookshelf look deliciously abandoned.
DO
- Stretch a small piece of artificial webbing until individual strands become visible.
- Concentrate the webbing in two upper corners, leaving most book spines exposed.
- Add one lightweight plastic spider where several strands meet.
- Keep decorations on a shelf you rarely reach for during the week.
DON’T
- Cover the entire bookshelf with thick clumps that hide its shape.
- Stretch strands across lamps, electrical outlets, or charging equipment.
- Attach webbing to fragile book jackets or peeling furniture finishes.
- Leave loose fibers within reach of pets or small children.
Dark shelving helps pale webbing stand out, so check the contrast before decorating every corner. On a white bookcase, position the strands in front of darker books. Pull the material gently and stop early; a sparse arrangement looks more like an old cobweb than a cotton blanket.
Ghost Reading Chair
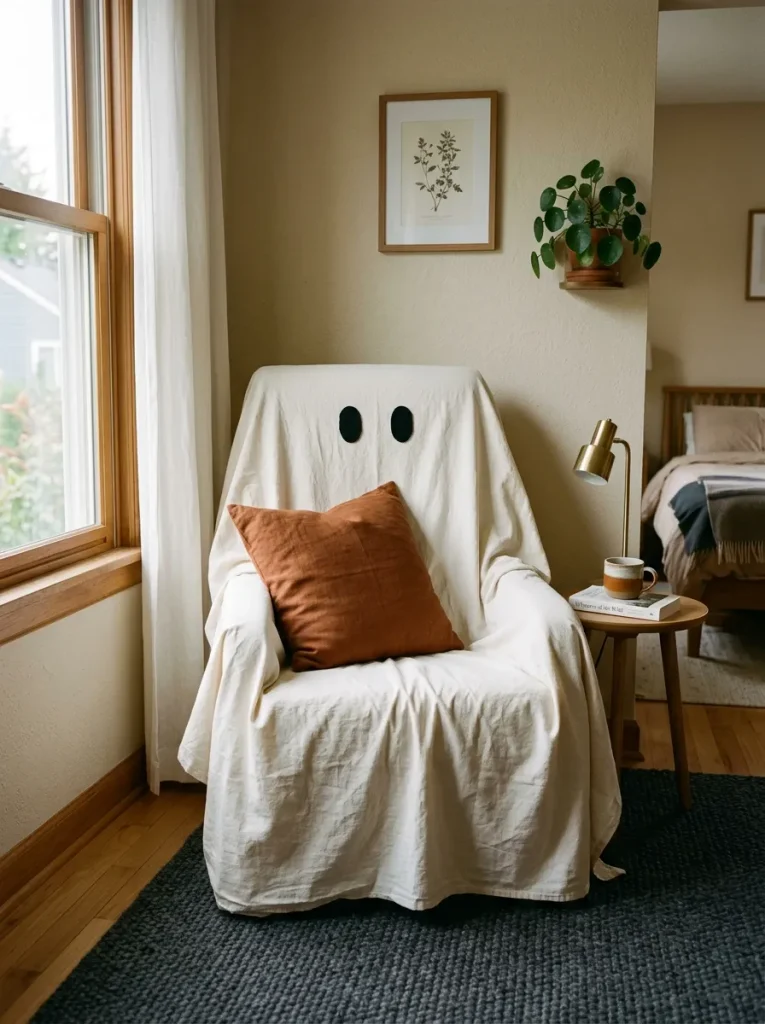
An unused reading chair can become the friendliest ghost in the room.
Materials: One spare ivory sheet and two black felt ovals.
Time: About 15 minutes once materials are ready.
Skill Level: Beginner, with no sewing required.
Best For: A bedroom corner with a chair used mainly for decoration.
Drape the sheet over the backrest and tuck excess fabric into the seat, keeping the hem off the floor. Attach felt eyes with removable fabric tape tested on a hidden area. For a chair you sit in daily, put the ghost face on a removable cushion cover instead.
Haunted Portrait Gallery
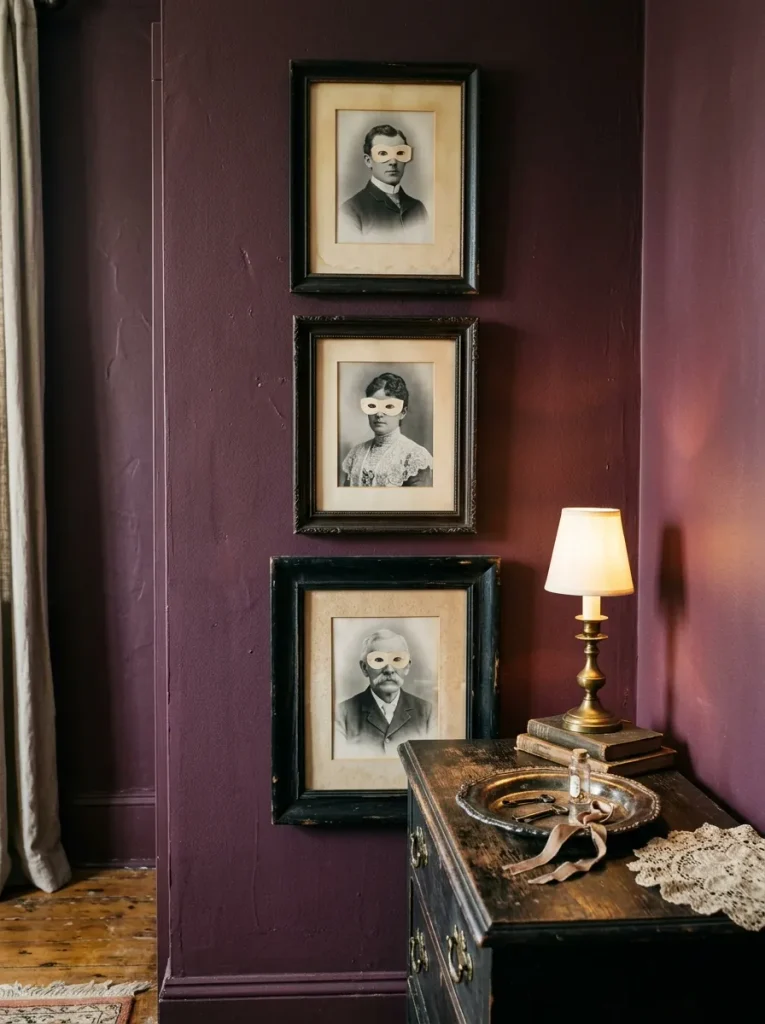
Ordinary portraits become unsettling when their faces hold one unexpected detail. Print public-domain portraits in grayscale, then add tiny black paper masks over the eyes. Fit them into thrifted frames with cream backing paper, keeping the alterations removable so you can reuse the frames after Halloween.
Arrange three frames together, with the largest in the center and the smaller pair slightly lower. Repeating black frames helps unrelated portraits feel connected, even when their shapes differ. Lay the grouping on your bed first to check spacing before choosing suitable hanging hardware for the wall.
Skeleton Bedside Guest
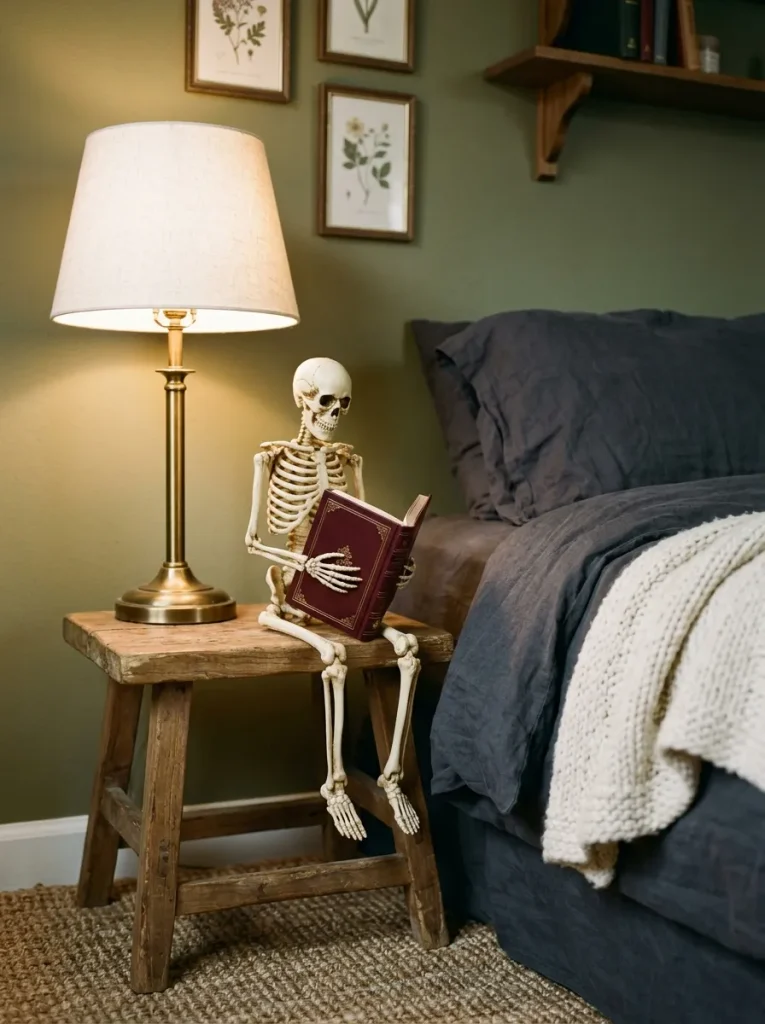
- Give a miniature skeleton the night shift on a spare bedside stool. Choose a seated size that leaves the stool stable and fits below your mattress height.
- Position its feet toward the bed and rest a small closed book across its lap. Support the book on the seat so the skeleton’s joints carry no weight.
- Tie a narrow burgundy ribbon loosely around its neck for a touch of color. Repeat a shade already present in your bedding.
- Keep the stool outside your usual walking route. Check that no hands or feet stick out where you might catch them in the dark.
The humor comes from giving the skeleton an ordinary bedtime activity, so resist surrounding it with extra props. One book makes the scene readable at a glance. In a tight room, seat a smaller figure on a dresser corner instead, keeping its limbs within the furniture’s edges.
Shadow Branch Corner
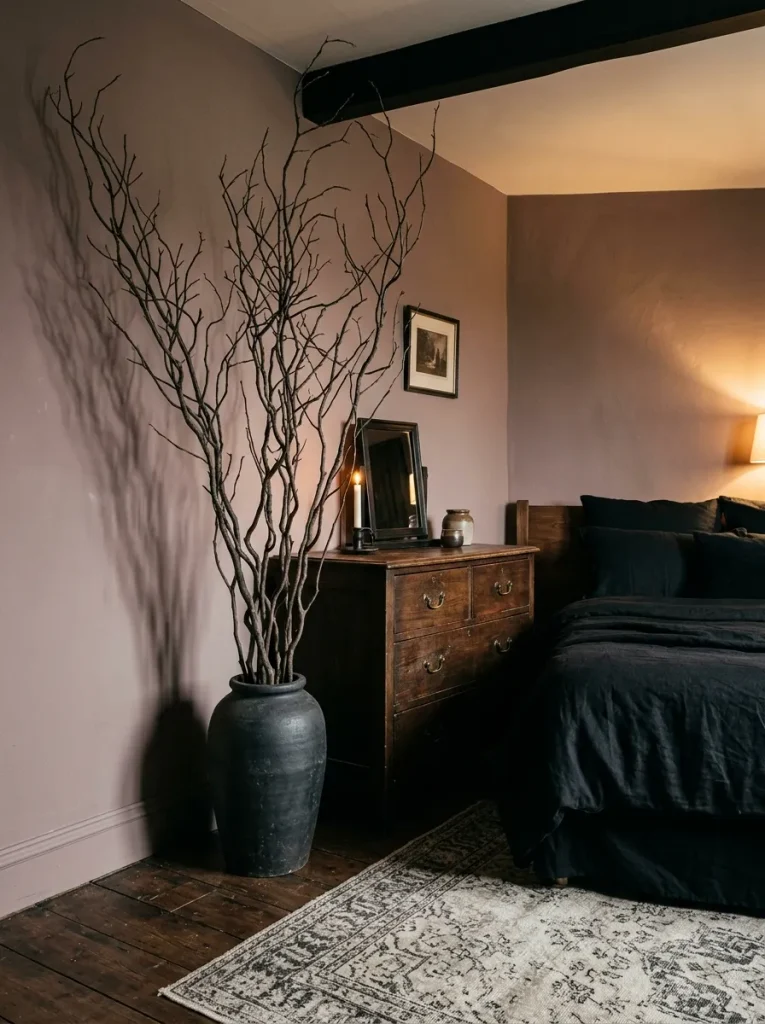
Quick Tip:
Make the shadow larger than the decoration itself. Set an adjustable LED spotlight a short distance from the branches, then change its angle until the outline falls across an empty wall rather than your pillow.
Choose lightweight artificial branches and a broad, weighted vase that will not tip easily. Keep the arrangement away from curtains and walking paths, with the light positioned according to its instructions. A few crooked stems create clearer shadows than a dense bundle, especially on a plain, pale wall.
Gothic Bedside Tray
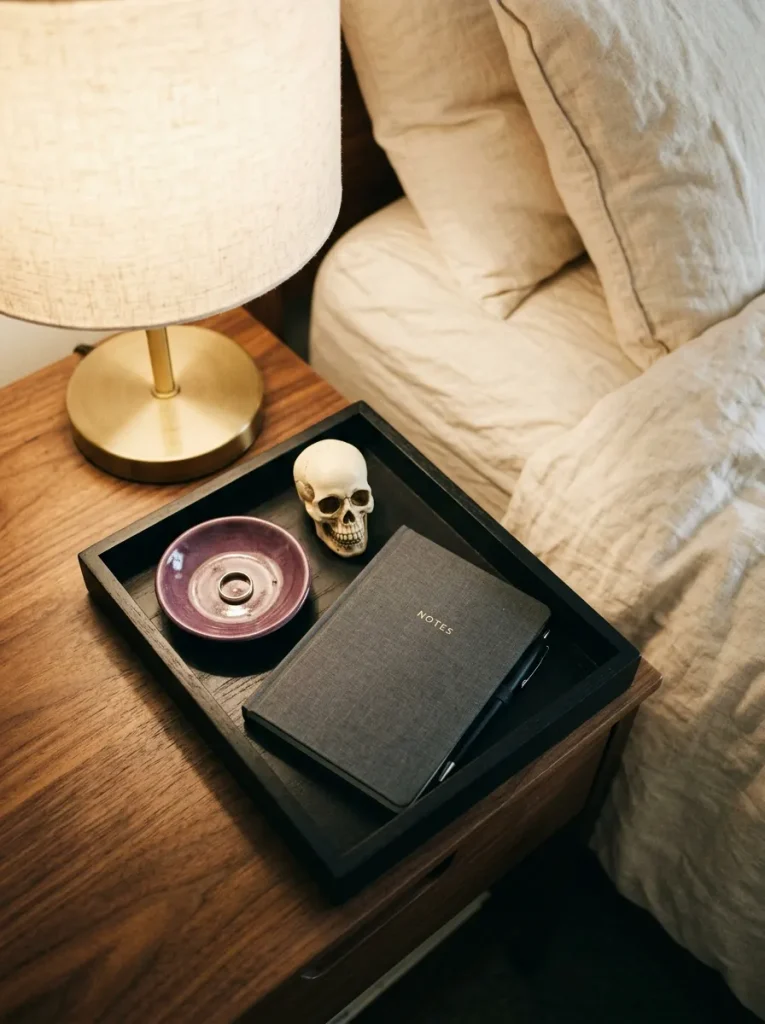
BEFORE: Halloween trinkets compete with your phone, glasses, and water on the nightstand. Small objects disappear behind the lamp, making the surface feel cluttered rather than styled.
AFTER: A shallow black tray gathers one skull accent and everyday accessories into a defined area. Open space around the tray keeps the nightstand useful and makes the seasonal detail easier to notice.
Measure the available surface before choosing a tray, leaving a separate spot for your water glass. Use a small dish for rings or earbuds, then add just one Halloween ornament. For anyone wondering how to make halloween bedroom decor spooky, black accents give familiar objects a darker mood.
Painted Pumpkin Cluster
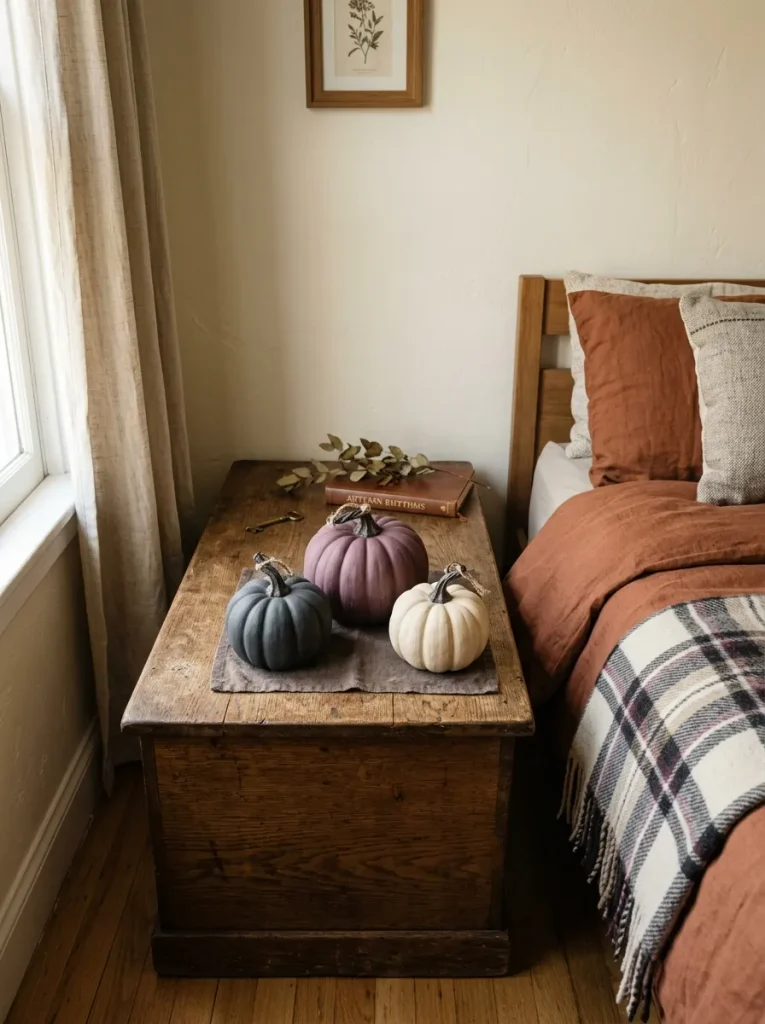
- Give leftover faux pumpkins a darker bedroom palette. Choose three small pumpkins with different shapes, then wipe them clean and let them dry.
- Select craft paint labeled for the pumpkin material. Test the underside first, using a compatible primer if the paint instructions require one.
- Paint one pumpkin charcoal, one muted plum, and one ivory. Apply thin coats and let each dry according to the product directions.
- Once the finish has fully dried, arrange the pumpkins in a loose triangle. Place the tallest behind the other two, with their stems turned at slightly different angles.
Limit the display to a chest or dresser with enough depth to keep every pumpkin away from the edge. Repeating colors from your bedding makes inexpensive decorations feel connected to the room. Store the pumpkins separately after Halloween so their painted surfaces do not rub against each other.
Spiderweb Accent Pillow
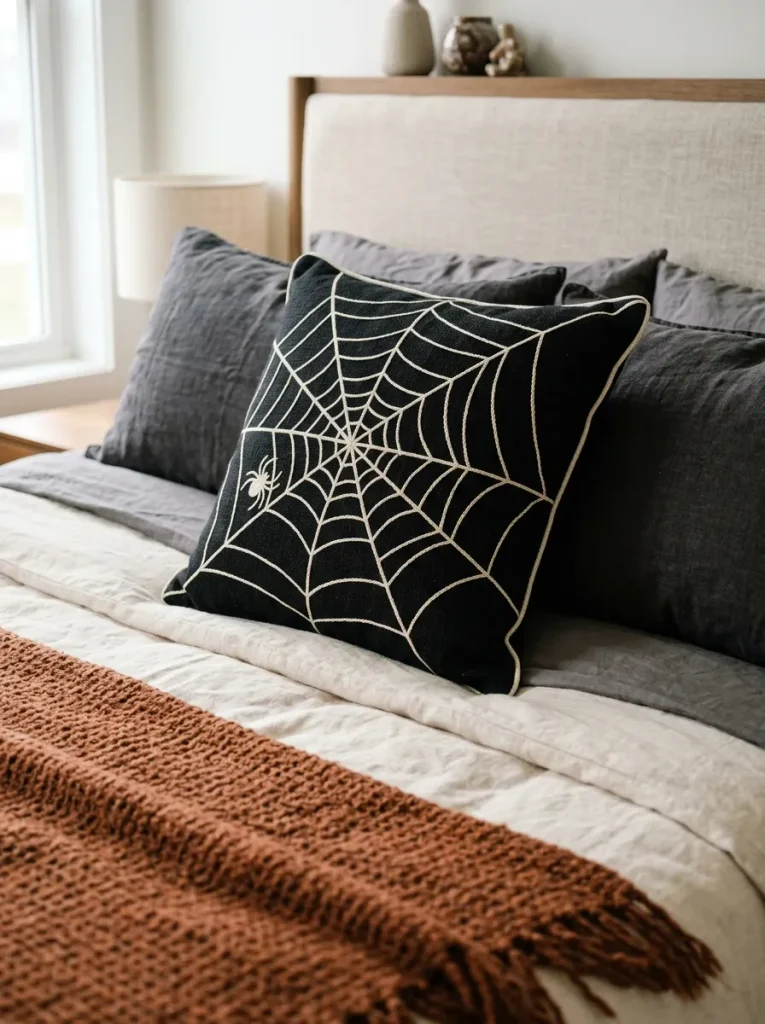
Which detail will stand out against your bedding: a crisp printed web or raised stitched lines?
| Detail | Printed Web Cover | Embroidered Web Cover |
| Surface texture | Smooth, with a flat graphic | Raised thread adds subtle depth |
| Visual effect | Bold when the print has strong contrast | Softer, with visible handcrafted detail |
| Care considerations | Check washing instructions to protect the print | Check care instructions and watch for snagged threads |
| Best pairing | Textured throws and chunky knits | Smooth cotton or plain linen bedding |
Choose a cover that matches an insert you already own, checking the measurements before ordering. One web cushion usually provides enough pattern beside plain pillowcases. For a softer Halloween bedroom, use an ivory background with black lines; reverse those colors when you want the bed to look darker.
Raven Door Wreath
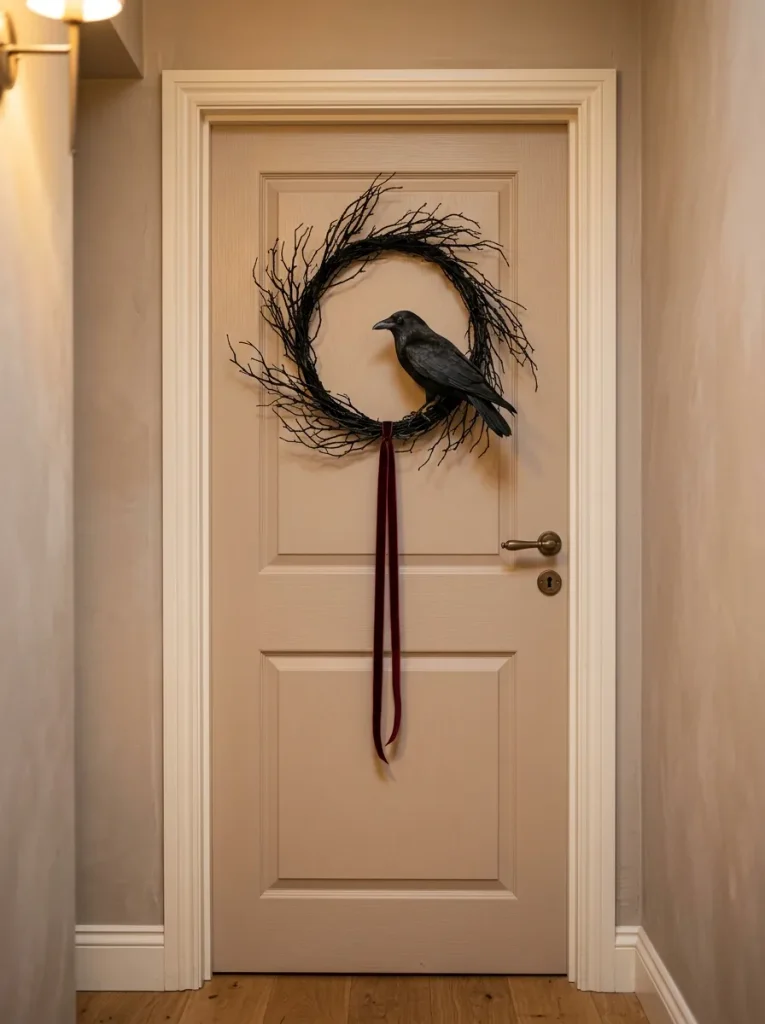
Let a single black raven greet you before you even enter the bedroom.
DO
- Choose a lightweight faux twig wreath scaled to the width of your door.
- Fasten one small decorative raven securely to the lower curve.
- Use a hanger compatible with your door and the wreath’s weight.
- Check that the door opens and closes freely after hanging.
DON’T
- Cover the handle, lock, or any glass panel needed for visibility.
- Leave sharp wire ends exposed on the back of the wreath.
- Add so many ornaments that the raven disappears among them.
- Use an over-door hanger that scrapes the frame or prevents closure.
Keep the wreath mostly bare so the bird’s outline stays visible from the hallway. A short burgundy ribbon adds color without brushing the handle. If a hanger does not fit your door, display the wreath on a suitable wall hook beside it, following the hook’s surface and weight guidance.
Spellbook Stack
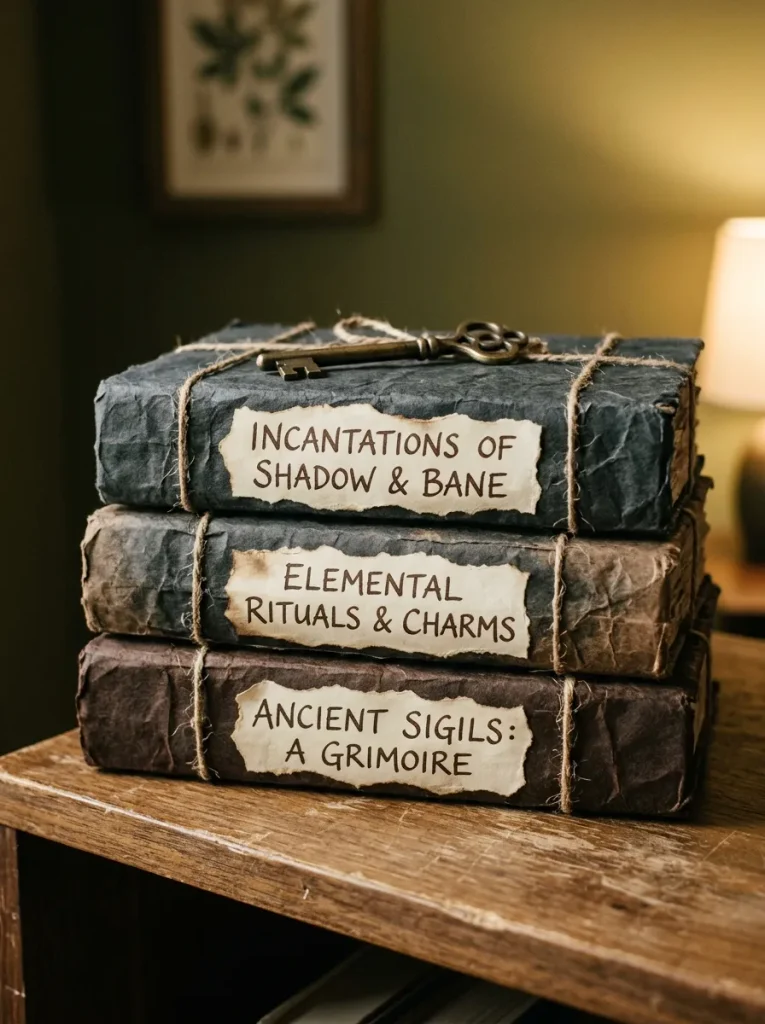
Your spare paperbacks already have the right shape for a witch’s bedside library.
Materials: Two or three books, wrapping paper, scissors, and a white pencil.
Time: About 20 minutes for three simple covers.
Skill Level: Beginner, with basic folding and lettering.
Best For: A narrow shelf or an open dresser corner.
Fold removable paper jackets around books you own, securing paper to paper rather than taping the original covers. Write fictional titles such as “Midnight Spells” along the spines. Vary the lettering size, but keep one color throughout so the stack looks connected without needing elaborate printed designs.
Floating Witch Hats
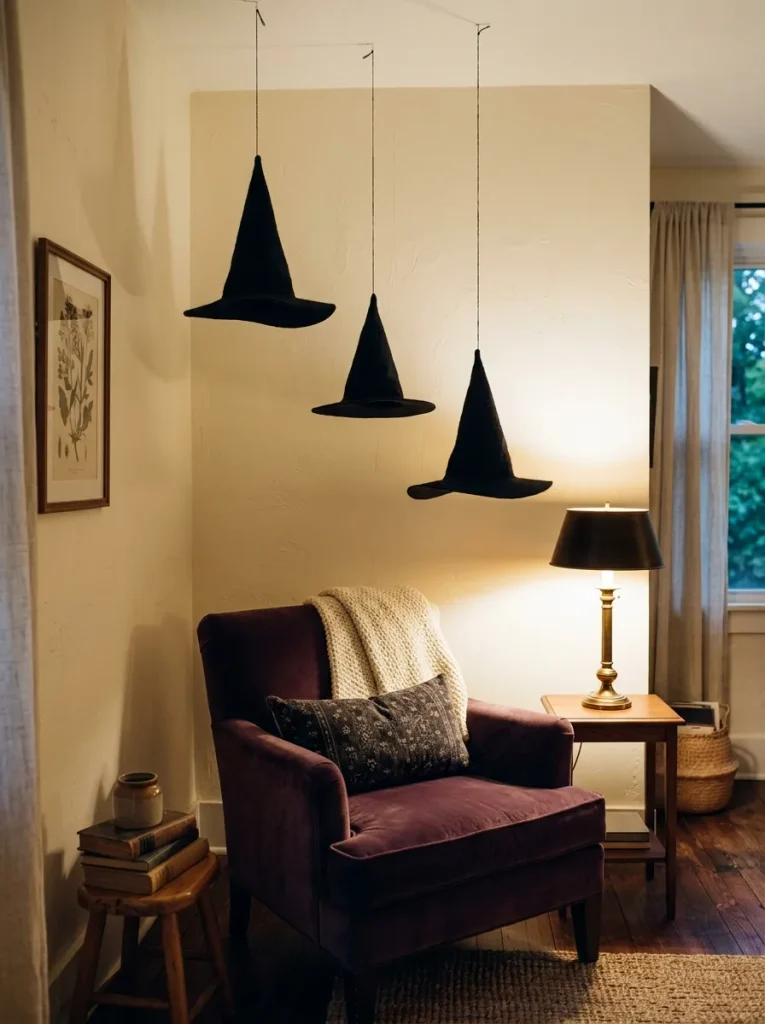
Three pointed silhouettes can turn an empty corner into a floating witch’s wardrobe. Choose lightweight fabric hats and suspend them at different heights with thread secured through their tips. Keep the grouping beside a dresser or above an unused corner, rather than directly over the bed.
Check your ceiling finish before selecting hooks, and follow their surface and weight limits. Keep hats and hanging threads well away from fans, lights, and walking routes. In a rental where ceiling attachments are unsuitable, mount the hats on existing wall hooks for a similar pointed arrangement.
Dried Rose Display
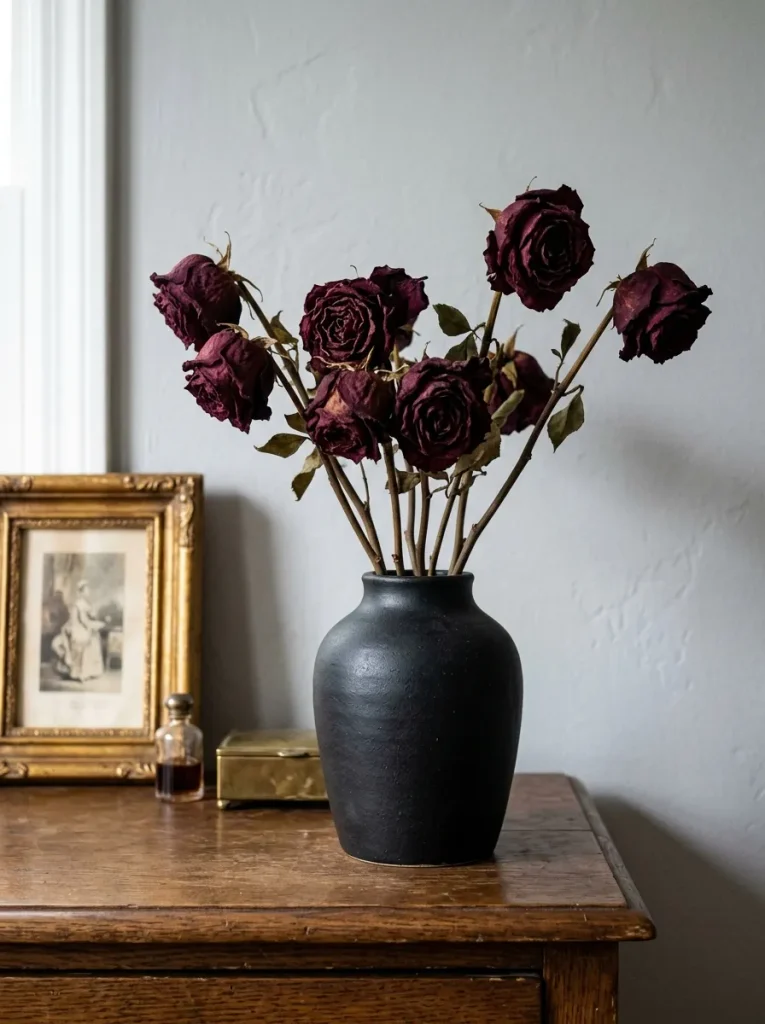
- Let faded flowers bring the eerie detail. Choose fully dried burgundy roses with intact heads, removing loose petals before arranging them.
- Place five to seven stems in an opaque vase with a narrow neck. The opening helps support the flowers without requiring a large bouquet.
- Trim the stems to slightly different lengths, keeping the tallest near the back. Turn a few flower heads outward so their curled petals remain visible.
- Set the vase against a light wall or pale framed print. That contrast keeps the dark flowers from disappearing into the background.
Keep dried stems away from damp windows and frequently handled surfaces, since brittle petals scatter easily. A small arrangement suits a bedroom better than a wide bouquet that crowds your toiletries. For a room shared with curious pets or children, choose fabric roses and skip loose botanical pieces.
Tattered Curtain Panels
Quick Tip:
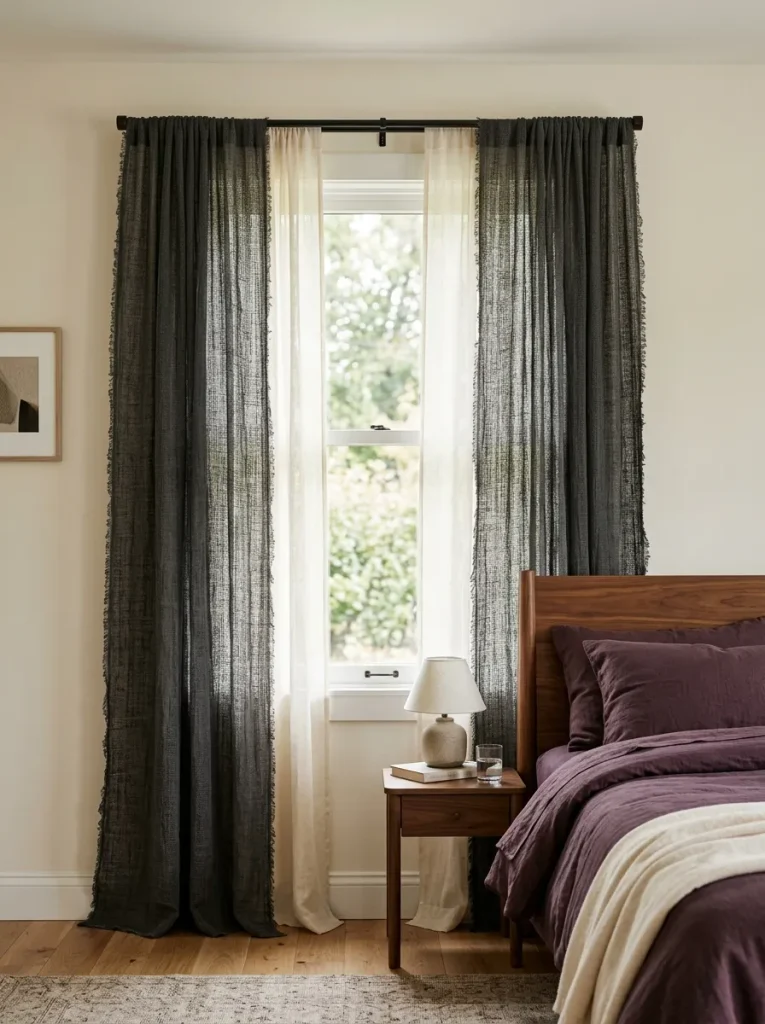
Give your curtains a haunted-house outline without darkening the whole room. Drape narrow gauze panels along the outer edges, leaving the center open and keeping every hem above the floor.
Use a spare curtain rod only if it can support the additional fabric, and secure panels with appropriate curtain clips. Cut uneven hems while the material lies flat, then remove loose threads. Keep gauze clear of heaters and window hardware, and avoid covering ventilation openings with hanging fabric.
Haunted Message Lightbox
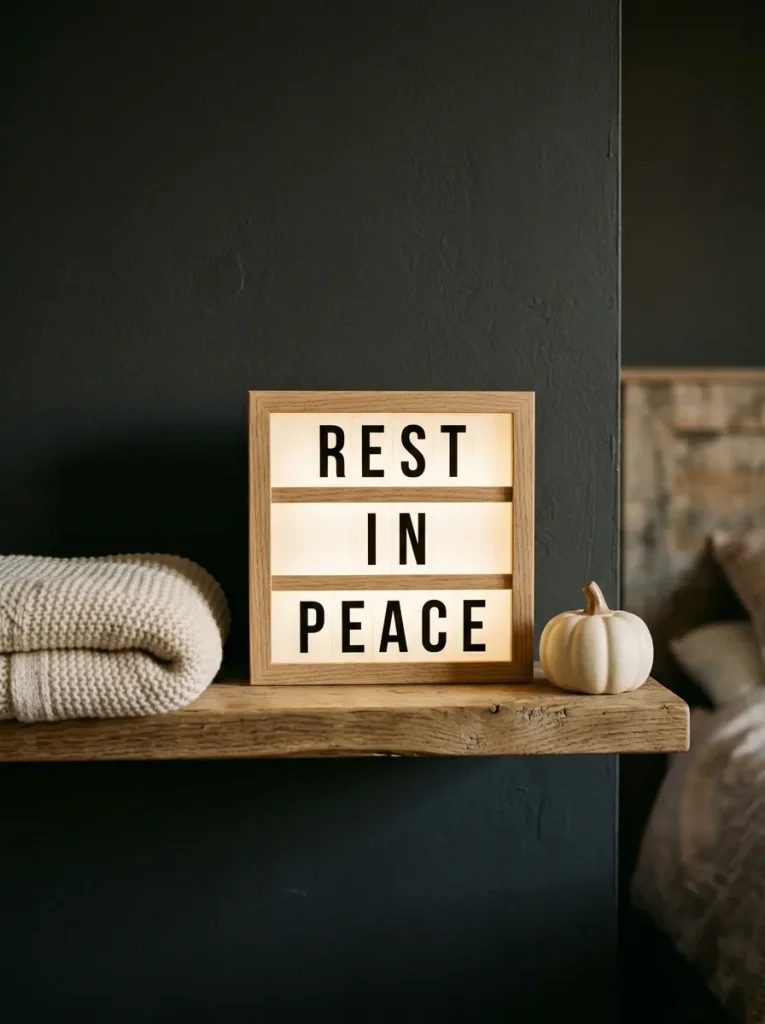
BEFORE: Small seasonal ornaments blend into a busy shelf, especially after dark. Their details are difficult to notice from the bedroom doorway.
AFTER: A lightbox displaying “REST IN PEACE” gives the shelf one readable focal point. The familiar phrase becomes a playful bedtime message beside your books and blankets.
To make halloween bedroom decor spooky without adding more clutter, replace an existing shelf ornament with the lightbox. Choose a compact model with adjustable brightness, and switch it off for sleep. Keep the surrounding objects low so the message remains visible, with its cable tucked behind the furniture.
Felt Ghost Garland
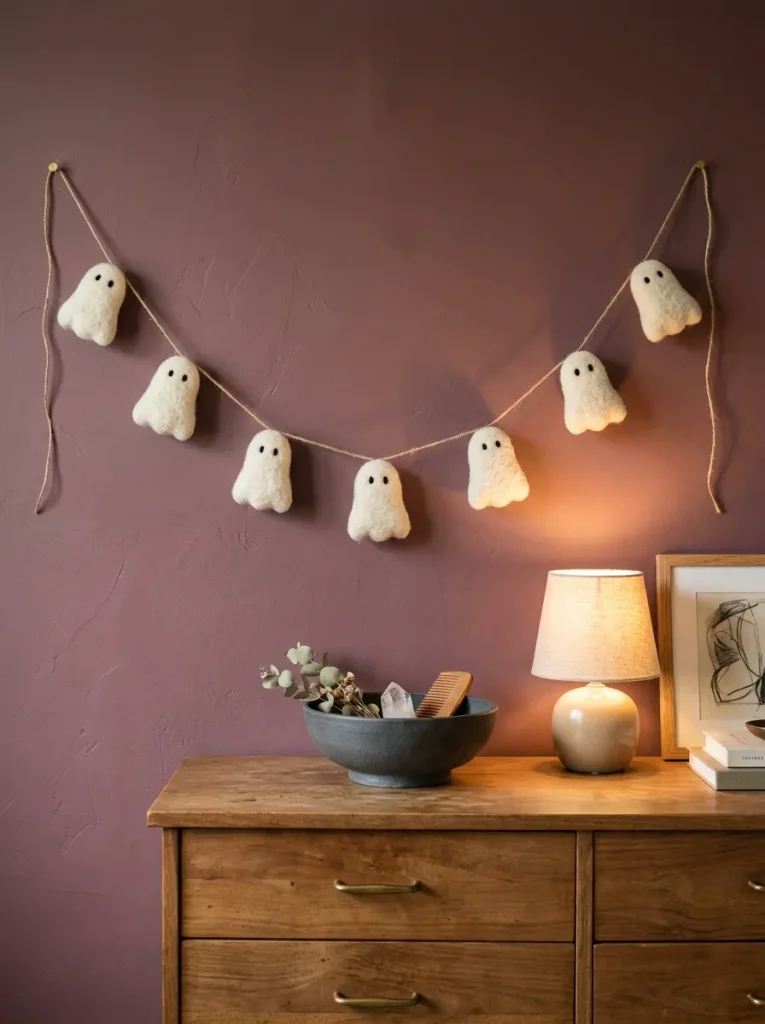
- Turn a sheet of ivory felt into a row of little ghosts. Draw one rounded ghost template on paper, then trace six matching shapes onto the felt.
- Cut out the shapes with fabric scissors. Give each ghost a broad base with shallow curves so the felt stays easy to handle.
- Add two eyes with a black fabric marker, testing it on a scrap first. Slide spare paper underneath to protect your work surface.
- Thread a blunt craft needle through two small holes near the top of each ghost. Space the shapes evenly along cotton cord so they face forward.
- Hang the garland from suitable hooks above a dresser, keeping it away from beds and out of reach of young children and pets.
Measure the intended display area before cutting the cord, allowing a little extra length for a shallow curve and end loops. Closely spaced ghosts create a fuller border; wider spacing leaves more wall visible. Pack the garland flat between sheets of paper to prevent tangles when the season ends.
Jack-o’-Lantern Glow
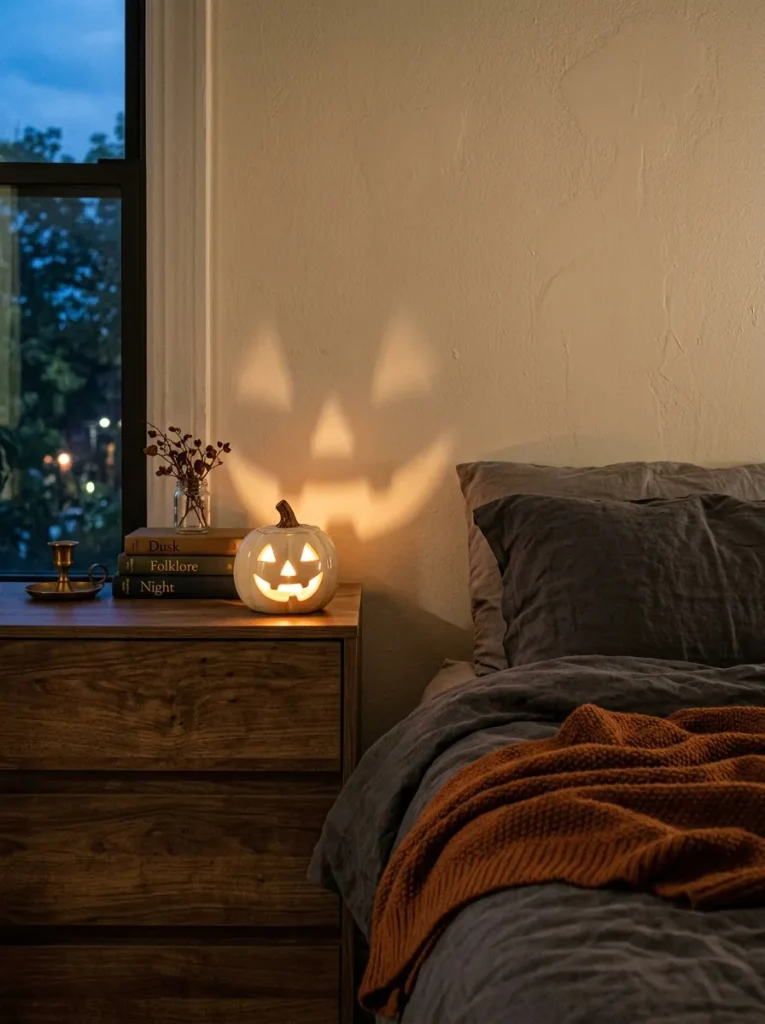
Choose your pumpkin by the glow you want: a defined face or a softly illuminated shape.
| Detail | Ceramic Pumpkin Lantern | Paper Pumpkin Lantern |
| Light effect | Light shines through facial cutouts | Light diffuses through the paper |
| Visual style | Sculptural, with a defined expression | Lightweight, with a softer outline |
| Placement | Stable dresser or shelf with adequate support | Dry surface away from bumps and snags |
| Storage | Needs padding to protect against chips | Some designs fold flat; check before packing |
Choose a lantern designed for battery-operated LED lighting and follow its instructions. Position it where you can see the face from the doorway, leaving nearby decor low. An ivory pumpkin blends with neutral bedrooms during daylight, then reveals its Halloween expression once the room gets darker.
Skeleton Hand Jewelry Stand
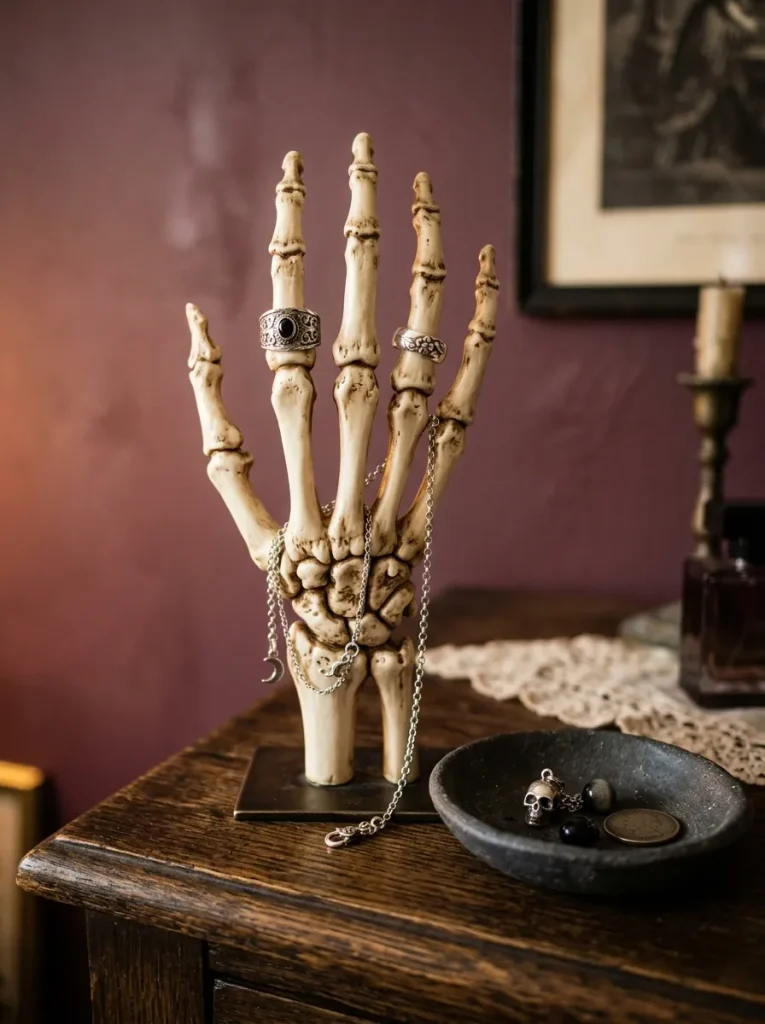
Put a skeletal hand to work holding the jewelry that usually disappears across your dresser.
DO
- Choose a jewelry stand with a broad, stable base and smooth finger joints.
- Hang only a few lightweight pieces so the bone shapes remain visible.
- Place a shallow dish beside the stand for earrings and smaller items.
- Position the display toward the back of the dresser, within comfortable reach.
DON’T
- Force tight rings over joints wider than their openings.
- Drape heavy necklaces over fingers that cannot support their weight.
- Use rough decorative skeleton parts that could scratch delicate jewelry.
- Overload one side until the stand becomes unbalanced.
Check the stand’s dimensions against the pieces you wear most often before buying. A hand with widely spaced fingers suits bracelets better than tiny rings. Keep sentimental or delicate jewelry in its usual protective storage, and use everyday costume pieces to give this functional Halloween accent its finishing detail.
Conclusion
A spooky bedroom starts with a few details you enjoy seeing every day. Paper bats, charcoal bedding, and a glowing pumpkin each bring something different, so choose a combination that suits your room and budget.
To make halloween bedroom decor spooky yet comfortable, keep everyday surfaces usable and build your display gradually. Start with one wall, one textile, or one bedside accent.
Save this post on Pinterest so your favorite ideas are easy to find. Try one project this weekend, and share the article with a friend who loves Halloween decorating. Your first little haunt is ready to take shape.