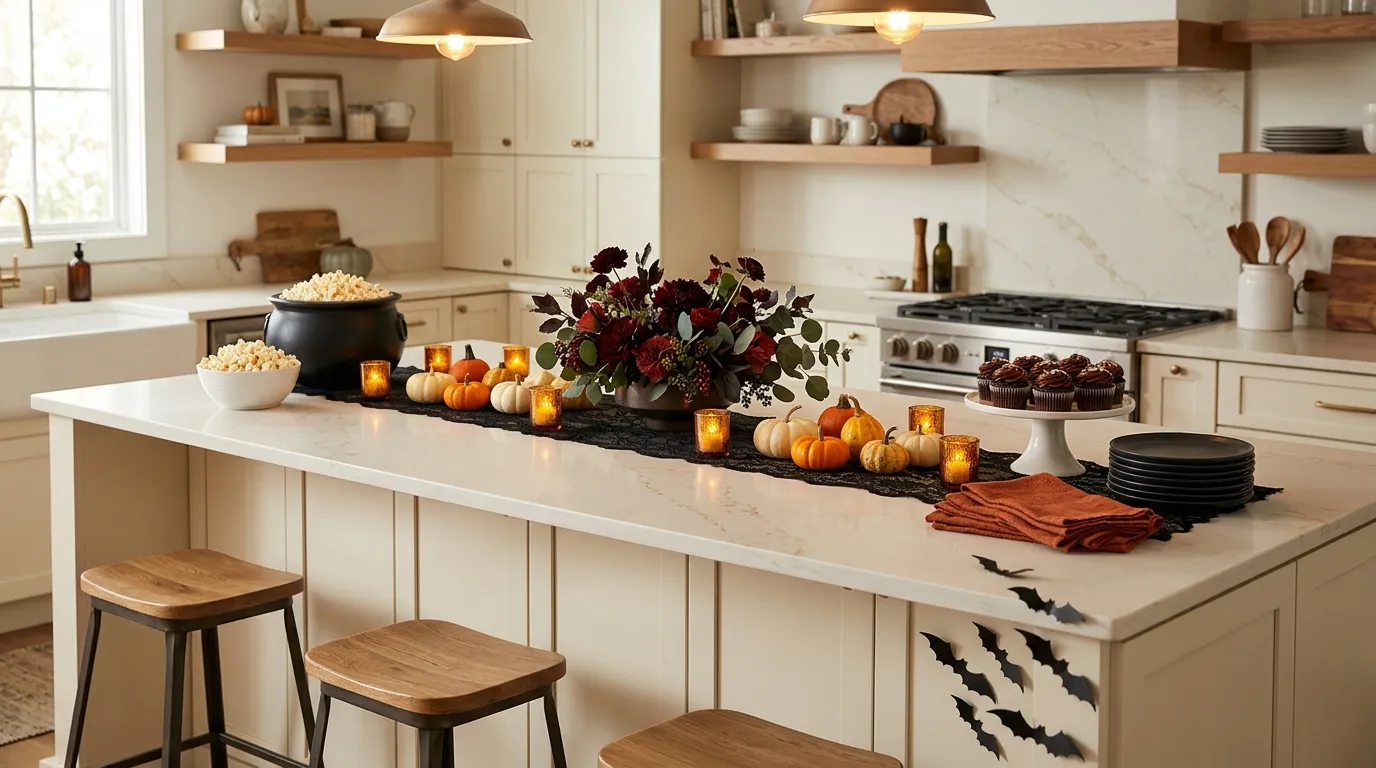
24 Halloween Kitchen Island Party Decor Ideas to Wow
Your kitchen island is where the snacks disappear, conversations start, and guests gather. Why not give it a little Halloween magic? Finding halloween kitchen island decor party guests will remember starts with a few playful details, not an overflowing shopping cart.
These 24 ideas combine pumpkins, glowing lanterns, spooky serving stations, and simple paper decorations with room for plates and drinks. Whether you rent a small apartment or have a roomy family kitchen, you can adapt the displays to your space and budget.
A decorated island still needs to work during a party. Guests need somewhere to set a glass, reach the snacks, and move around comfortably. You’ll find practical ways to balance those everyday needs with festive details worth photographing. Pick your favorite colors, reuse a few serving pieces, and start with the idea that makes you smile.
Pumpkin Runner Centerpiece
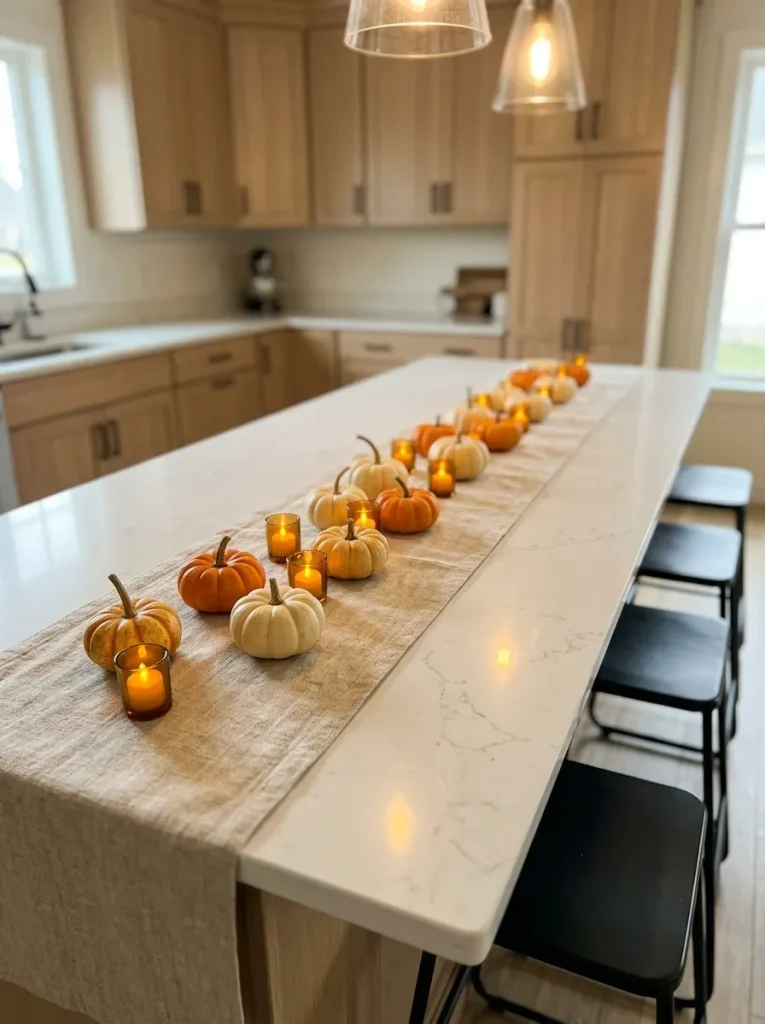
A line of miniature pumpkins gives your party island a focal point without swallowing the serving space. Lay a narrow washable runner down the center, then arrange five or seven pumpkins in alternating orange and ivory. Keep the tallest pumpkin below seated eye level for easy conversation.
Leave a generous strip of bare countertop along both sides for plates and glasses. Small LED votives between the pumpkins add warmth without exposed flames near sleeves or napkins. For a tighter budget, skip extra ornaments and repeat two pumpkin colors so the arrangement still feels intentional.
Witch Cauldron Snack Station
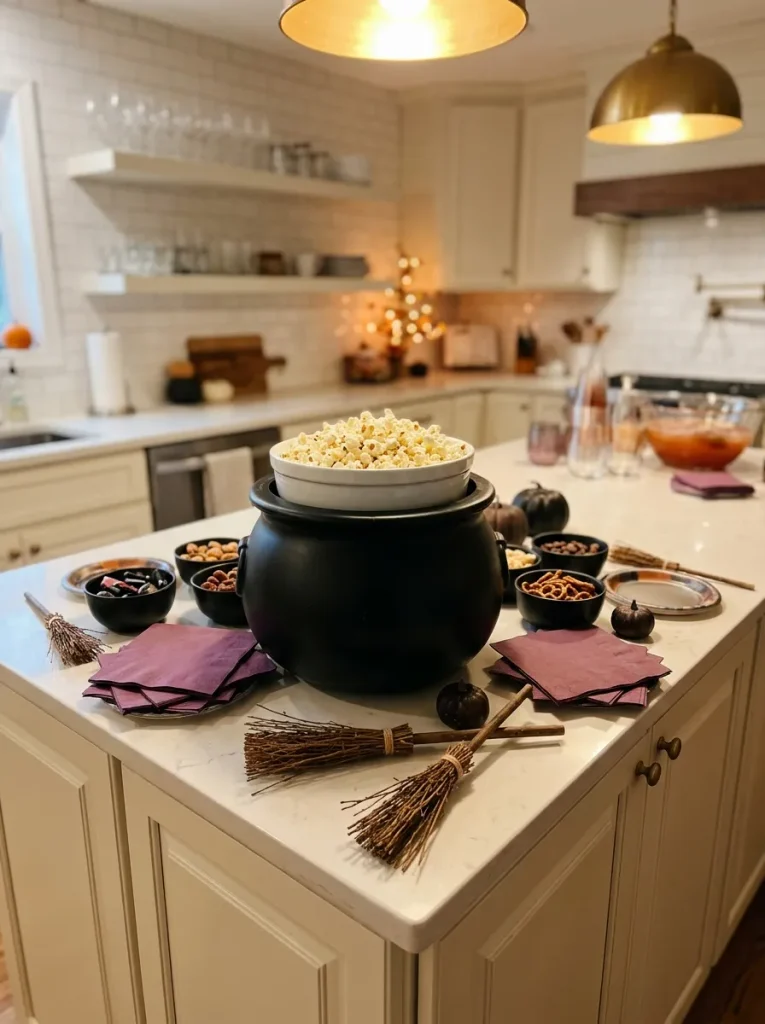
- Make the snack table part of the Halloween decor with a black cauldron as its centerpiece. Set it at one end of the island so guests can gather without blocking every serving dish.
- Fit a food safe bowl securely inside the decorative cauldron before filling it with popcorn or wrapped sweets. Keep food away from painted plastic surfaces.
- Group two smaller bowls beside it for pretzels and crackers. Place a separate scoop or pair of tongs with each snack.
- Tuck miniature broom decorations behind the bowls, away from food and reaching hands. Fold plum or orange napkins into a short stack beside the plates.
A snack station works best when guests can understand it at a glance. Keep plates at the approach side and napkins near the exit, with the cauldron between them. Refill from a separate container instead of displaying every snack at once, especially on a small kitchen island.
Floating Ghost Backdrop
Quick Tip:
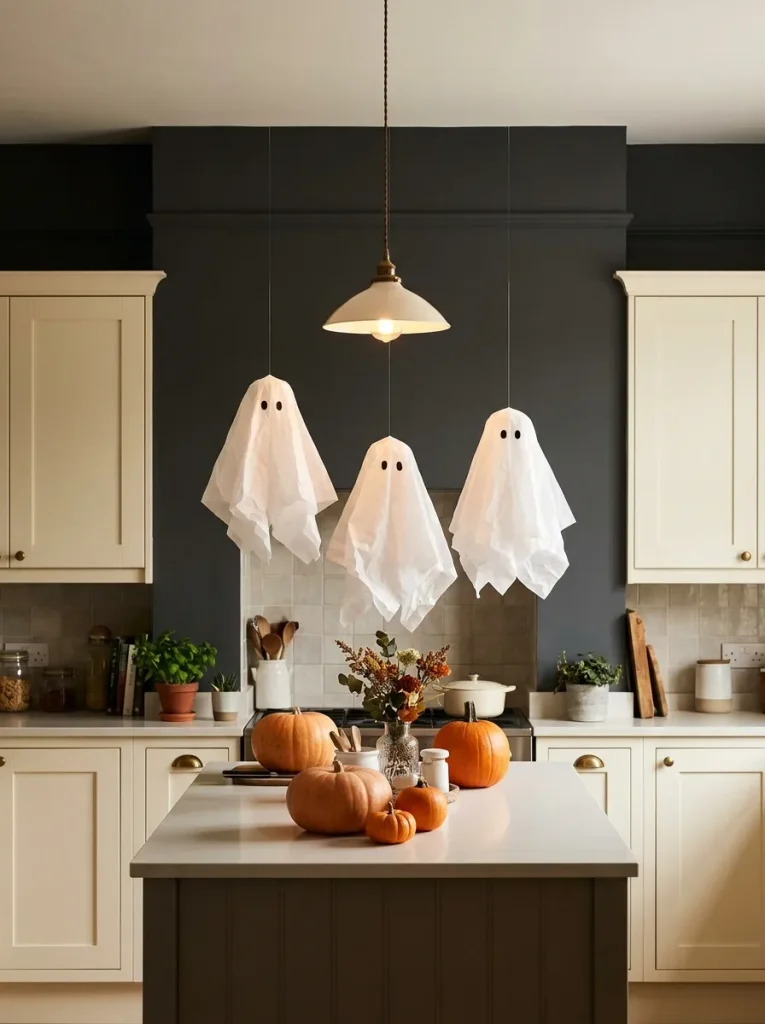
Want the spooky impact without losing a single inch of serving space? Suspend three lightweight tissue ghosts against the wall behind your island, using an existing picture rail or surface suitable removable hooks. Keep them clear of pendants, cooking areas, and the route guests use.
Cut black paper eyes large enough to read from across the room, then vary the hanging heights for a loose triangle. The backdrop gives party photos a recognizable Halloween detail while leaving the island available for food. Test removable hooks in a hidden spot first, particularly in rentals.
Spiderweb Serving Tray
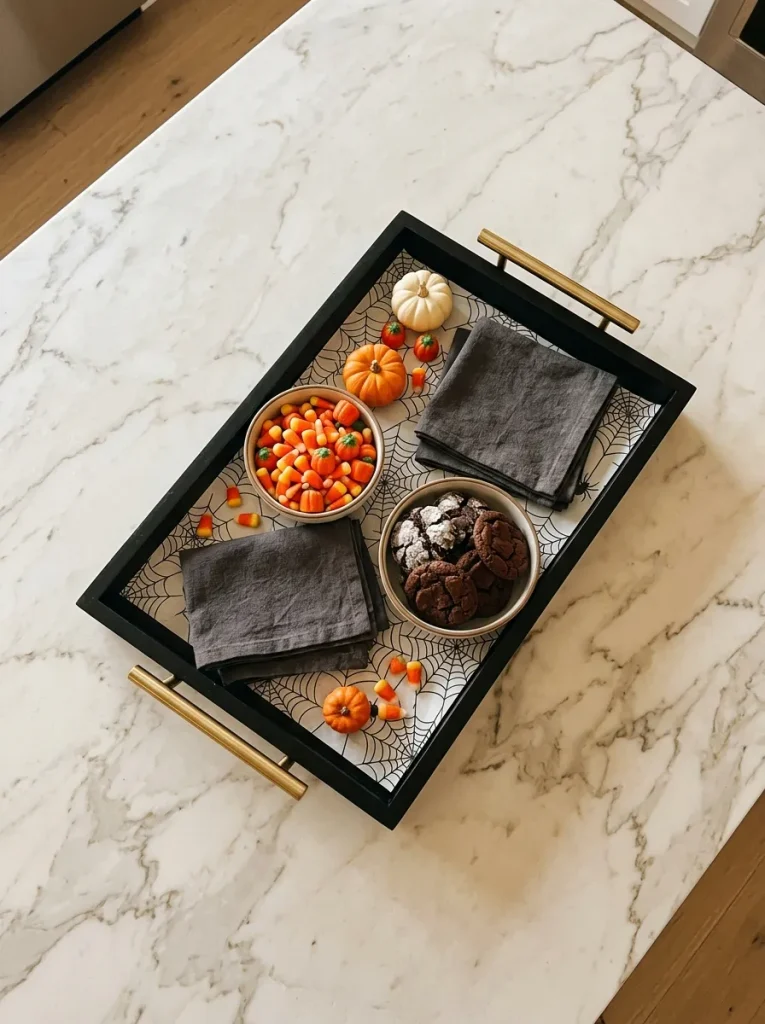
BEFORE: Scattered treat bowls can make a kitchen island feel crowded before the party even starts. Loose decorations between the dishes also make crumbs and spills harder to clear.
AFTER: A single spiderweb tray gathers the treats into one defined display. The bold pattern supplies the Halloween detail, leaving the surrounding countertop open for serving.
Choose a tray with handles so you can move the entire arrangement when dinner arrives. Place the patterned paper beneath bowls rather than directly against unwrapped food unless it is labeled food safe. Skip loose artificial webbing around snacks, where strands can catch on utensils or food.
Potion Bottle Drink Display
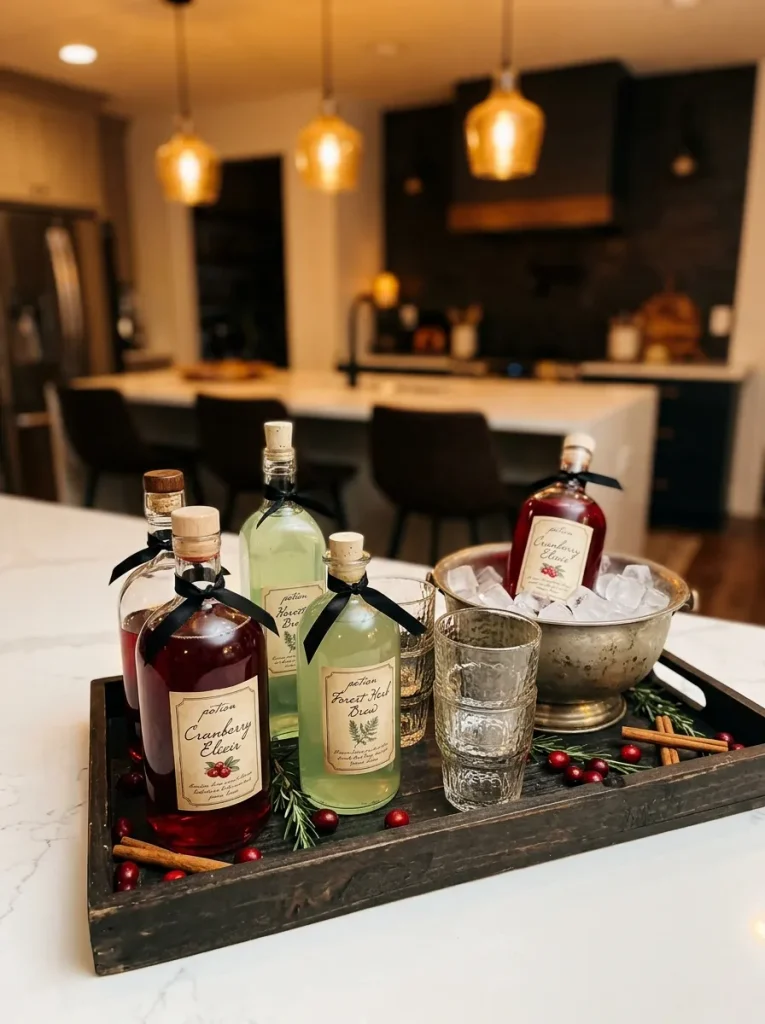
- Turn ordinary party drinks into a potion display with two clean bottles intended for beverages. Choose wide openings that are easy to fill and wash.
- Add paper labels with playful names such as “Vampire Punch” or “Goblin Fizz.” Write the actual drink name underneath so guests know what they are choosing.
- Tie short black ribbons around the bottle necks, below the pouring rims. Keep ribbon tails clear of the tray base to avoid wet fabric.
- Set the bottles on a rimmed tray beside glasses and napkins. Keep spare drinks chilled and bring out small refills as needed.
Keep the spooky names playful and the contents obvious, especially when serving children or guests with dietary restrictions. Clearly identify any alcoholic drinks and place them separately. Red cranberry juice and green lime soda provide color on their own, so decorative bottles do not need elaborate props around them.
Black Lace Island Runner
| Detail | Lace Across the Island | Lace Beneath a Center Tray |
| Visual effect | A long, dramatic pattern | A compact decorative accent |
| Serving space | Fabric occupies more countertop | Most countertop remains bare |
| Spill cleanup | The full runner may need washing | Lift the tray to reach spills |
| Best fit | An island mainly displaying decor | An island serving food and drinks |
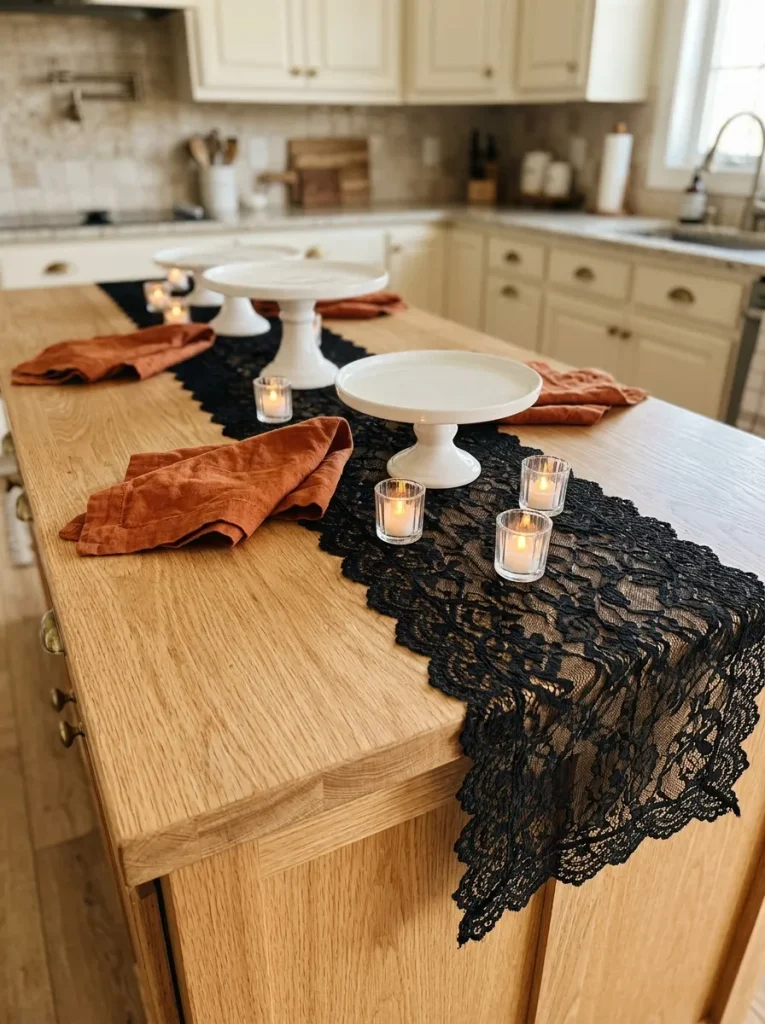
Black lace brings pattern to a plain island without another bulky centerpiece. Choose the smaller arrangement for a busy buffet, and keep fabric away from plate stacks and serving edges. Smooth it flat beneath a stable tray; dangling corners can catch on clothing as guests pass through the kitchen.
Bat Silhouette Island Front
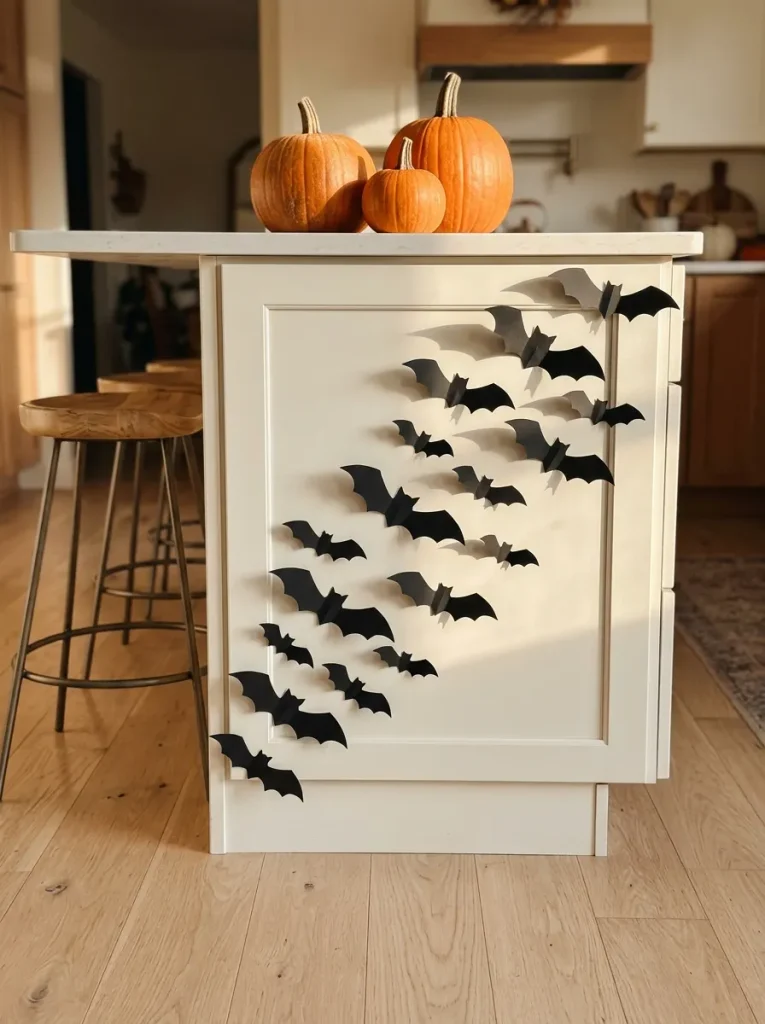
DO
- Give the island its own costume with a diagonal cluster of seven to nine paper bats.
- Cut two sizes from black cardstock and lightly fold the wings for dimension.
- Test a surface suitable removable adhesive on a hidden area before attaching the bats.
- Position the cluster on a panel away from knees, drawers, and cabinet handles.
DON’T
- Cover ventilation grilles, outlets, or appliance controls.
- Let paper wings project into a busy walkway.
- Attach bats to peeling paint or delicate finishes.
- Scatter silhouettes across every panel, which makes the arrangement harder to read.
Decorating the island front leaves the entire countertop available for party food. Start with a paper template and check the placement from the kitchen entrance before attaching anything. A loose upward sweep draws attention toward the buffet, while a clear border around the cluster keeps each silhouette visible.
Skeleton Dessert Stand
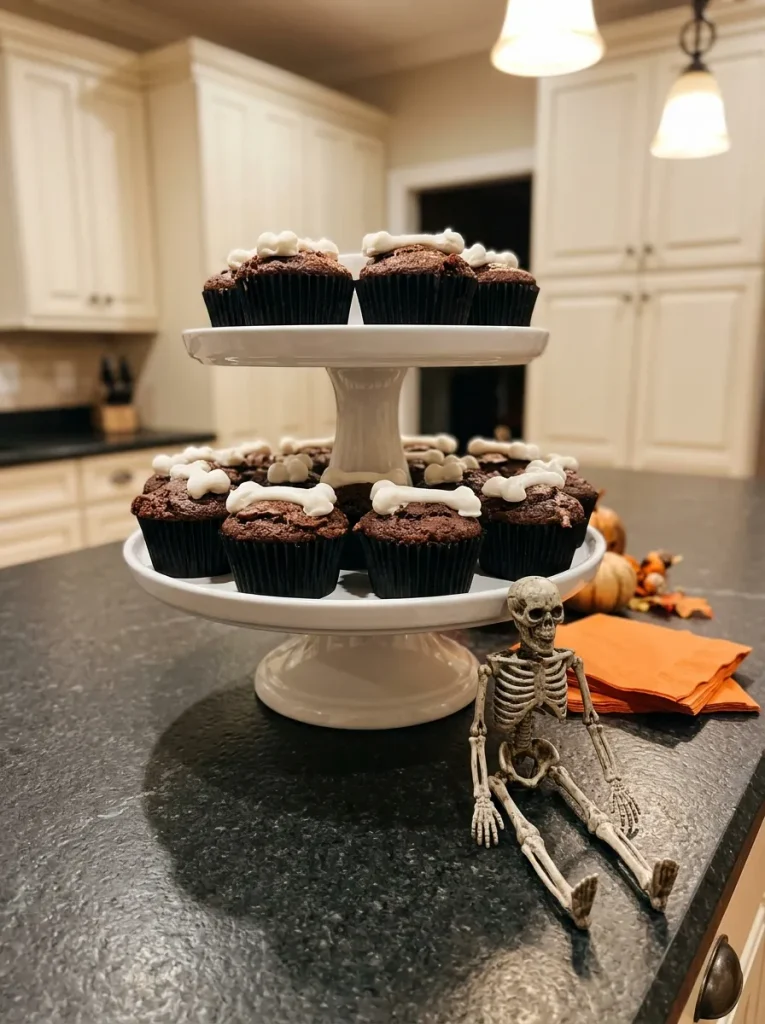
Visual Effect: A tiny skeleton gives an ordinary cupcake stand a mischievous party companion.
Materials: A stable dessert stand, cupcakes, edible bone decorations, and one small skeleton prop.
Skill Level: Beginner, with no baking required if you use ready made cupcakes.
Best Placement: An island corner that guests can reach without leaning over other dishes.
Let the skeleton lean against the outside of the stand, with its hands clear of the cupcakes. Use edible bones for the treats and keep craft decorations beside the display. Leave enough room between tiers for fingers to lift each cupcake without brushing the icing on the one above.
Burgundy Floral Centerpiece
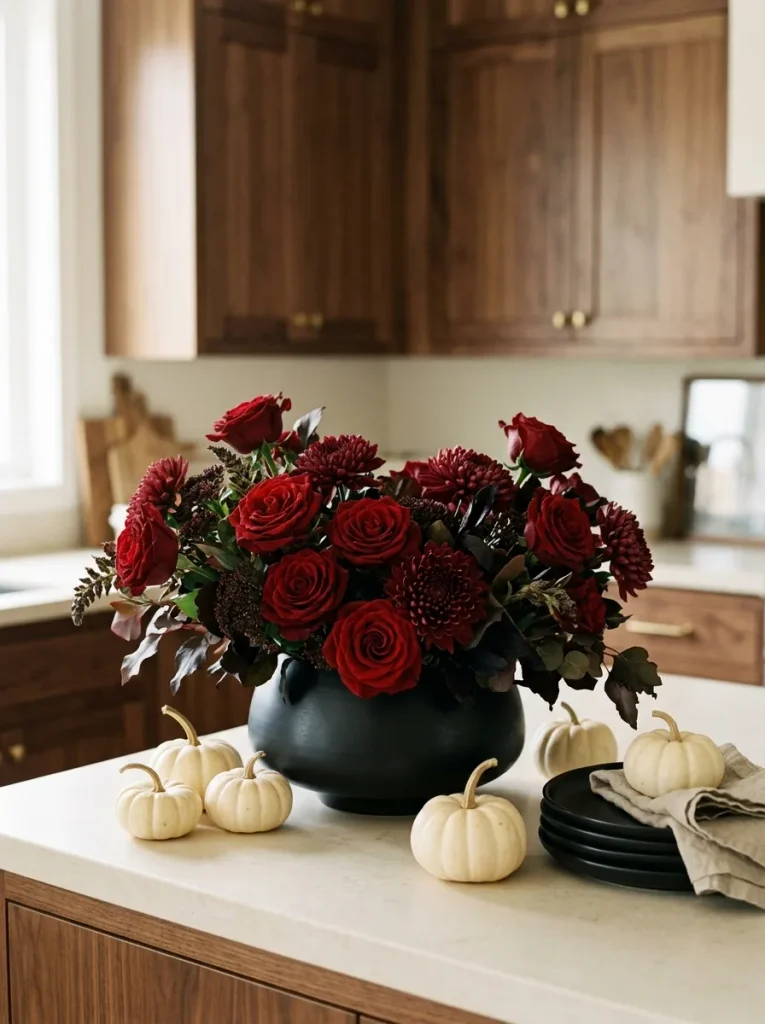
For a Halloween party with a moodier palette, deep burgundy flowers bring color without a countertop full of novelty props. Choose a low, heavy vase and trim the stems so the arrangement sits below eye level. Three ivory pumpkins around the base keep the seasonal connection clear.
Keep the flowers in a separate decorative zone, away from uncovered dishes and serving utensils. Remove any leaves below the waterline, and place a waterproof saucer beneath a porous vase. A compact bunch of one affordable flower variety can look more cohesive than several competing colors mixed together.
Vampire Napkin Rings
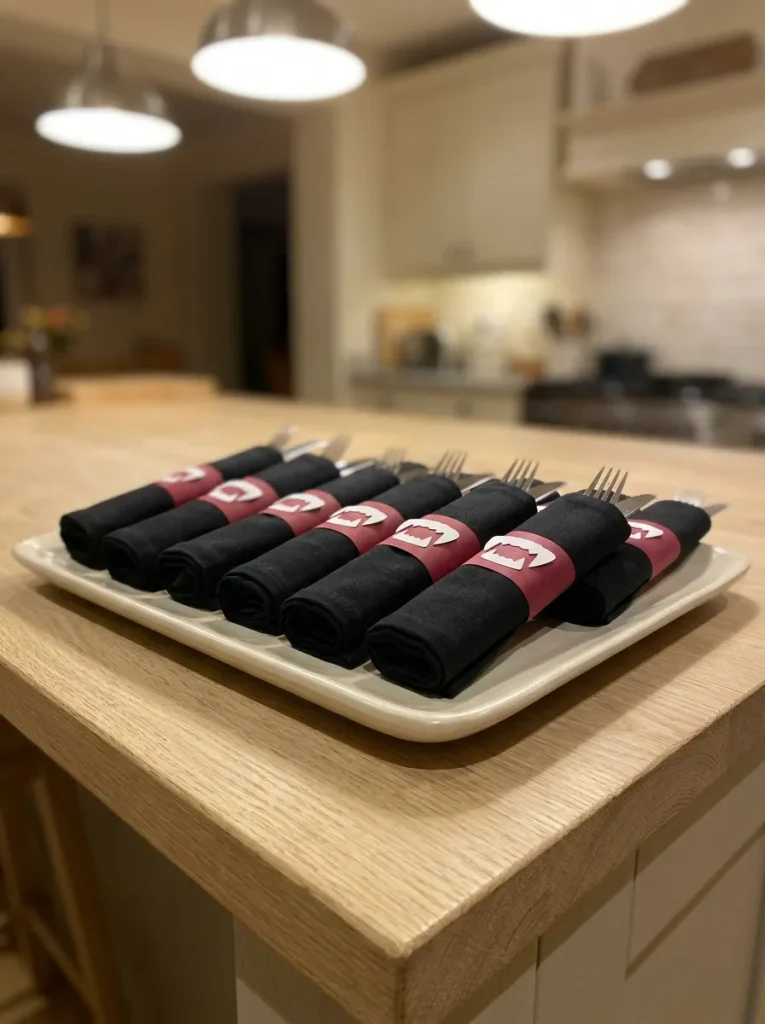
- Give each place setting a little bite with a vampire napkin ring. Cut red cardstock into strips about two inches wide.
- Roll a black napkin around a fork and spoon, leaving the handles visible. Wrap a cardstock strip loosely around the bundle to measure the fit.
- Remove the strip and tape its ends together with a small overlap. The finished ring should slide off without tearing.
- Cut two white paper fangs and attach them to the outside of the band. Let any glue dry completely before slipping the ring onto the napkin.
Arrange the finished bundles beside the plates so guests can collect everything in one stop. Paper bands cost little and let you repeat the party colors without buying themed tableware. Make one sample first to check the fit, then use that strip as the template for the remaining rings.
Candy Corn Color Blocks
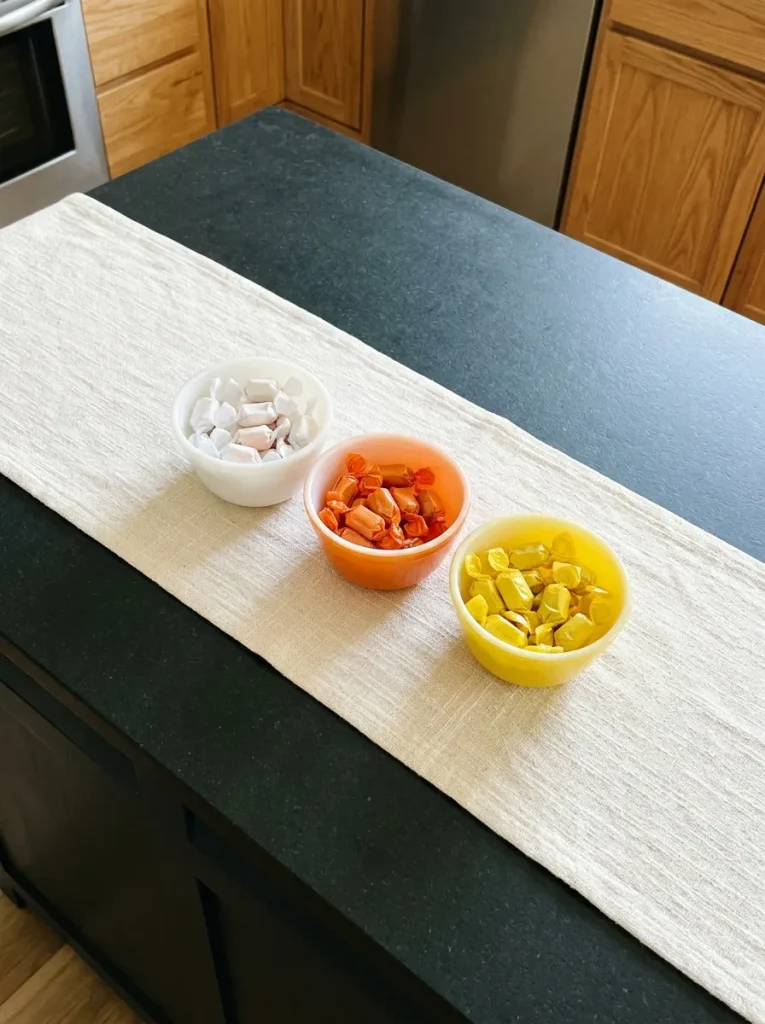
| Detail | Straight Color Row | Compact Color Triangle |
| Arrangement | White, orange, then yellow bowls | Three bowls grouped in a triangle |
| Countertop footprint | Long and narrow | Shorter and wider |
| Best location | Along the island’s center | Near one serving corner |
| Visual effect | Clear stripes of seasonal color | A concentrated burst of color |
Borrow candy corn’s white, orange, and yellow palette without buying another seasonal ornament. Use bowls you already own and let wrapped treats supply any missing colors. Keep the group within easy reach, with a small empty dish nearby for wrappers so they do not collect among the serving plates.
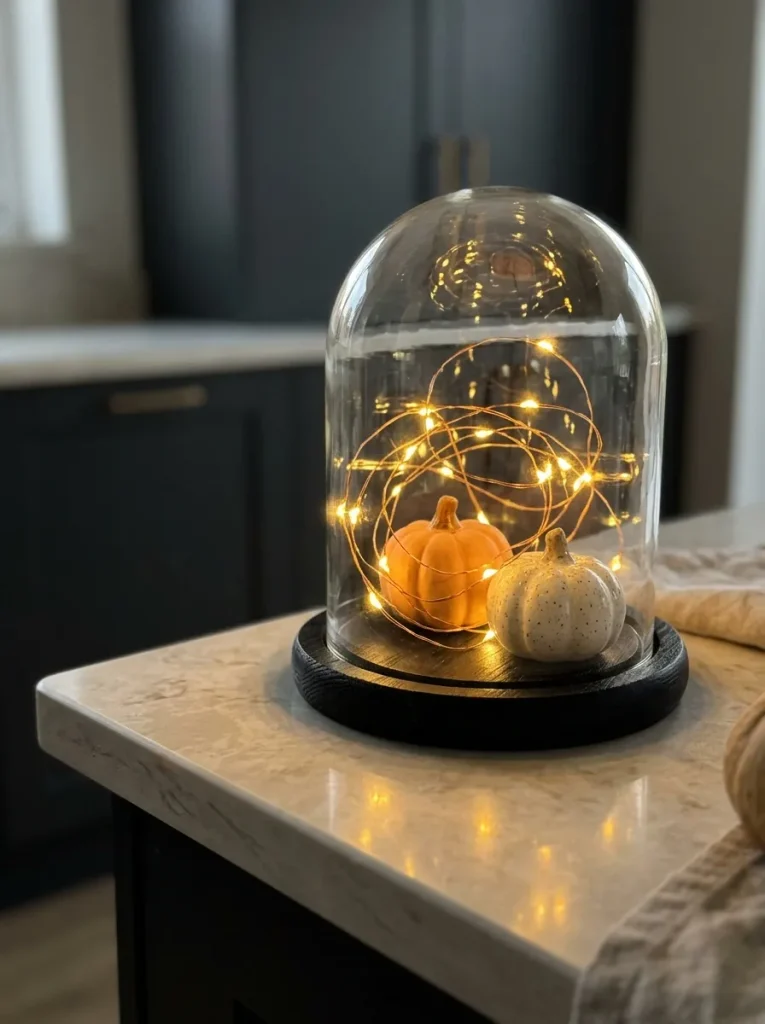
Glowing Cloche Display
DO
- Capture a pocket of Halloween glow beneath a clear cloche with a short strand of battery operated micro LED lights.
- Choose lights approved by their manufacturer for enclosed decorative displays.
- Leave the battery pack outside the dome, accessible behind the base.
- Position the display on a level surface beyond the main serving area.
DON’T
- Place real candles or burning materials beneath the glass.
- Pinch the light wire beneath a heavy rim.
- Pack the dome tightly with paper, fabric, or loose filler.
- Place a fragile cloche where guests might knock it while reaching for food.
Keep the contents simple: two miniature pumpkins and a loose coil of lights are enough. A base with a cable notch lets the dome sit properly without trapping the wire. Check the arrangement from standing height, since bright reflections can hide the pumpkins if the cloche sits directly beneath a pendant.
Mummy Utensil Jars
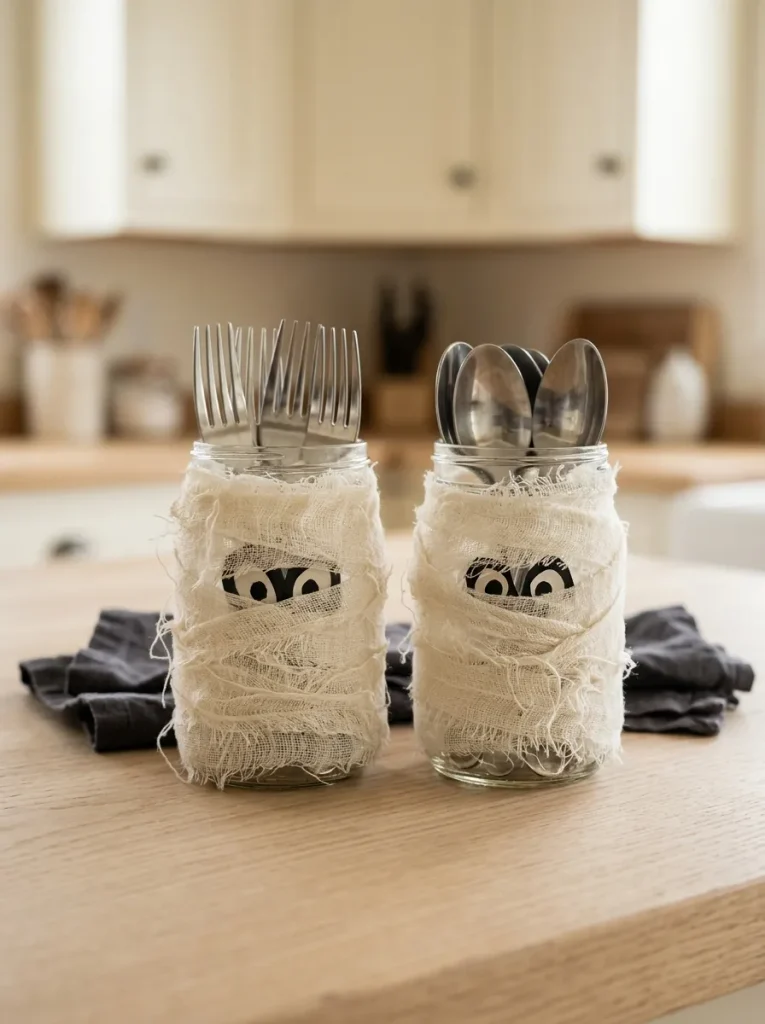
Visual Effect: Give everyday utensil jars a mummy disguise with ivory wrapping and two watchful eyes.
Materials: Clean jars, gauze strips, removable tape, and black paper circles.
Skill Level: Beginner, with no sewing required.
Best Placement: Beside the plate stack, with utensils separated by type.
Wrap only the outside of each jar, leaving the rim and opening clear of fabric. Secure loose ends so the gauze stays put when guests reach for cutlery. Save this setup to your “halloween kitchen island decor party” board as a budget detail that also keeps the buffet organized.
Crescent Moon Garland
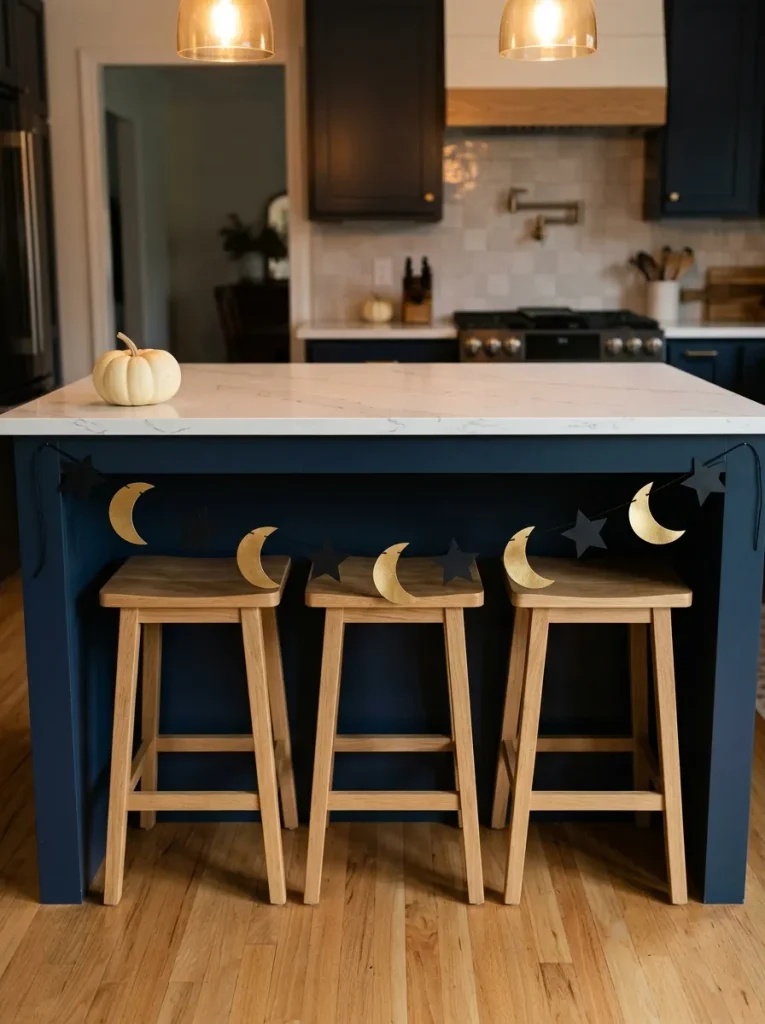
A crescent moon garland gives your Halloween island a celestial accent that pairs with black serving dishes and amber lighting. Cut five moons from gold cardstock, then add small black stars between them. Lay the shapes out before attaching them so the spacing looks balanced across the panel.
Hang the cord in a shallow curve against a fixed panel, keeping it away from cabinet doors, stools, and guests’ knees. On an island with seating across the front, decorate an exposed end panel instead. Leave the countertop above it fairly simple so the gold shapes remain noticeable.
Pumpkin Ice Bucket
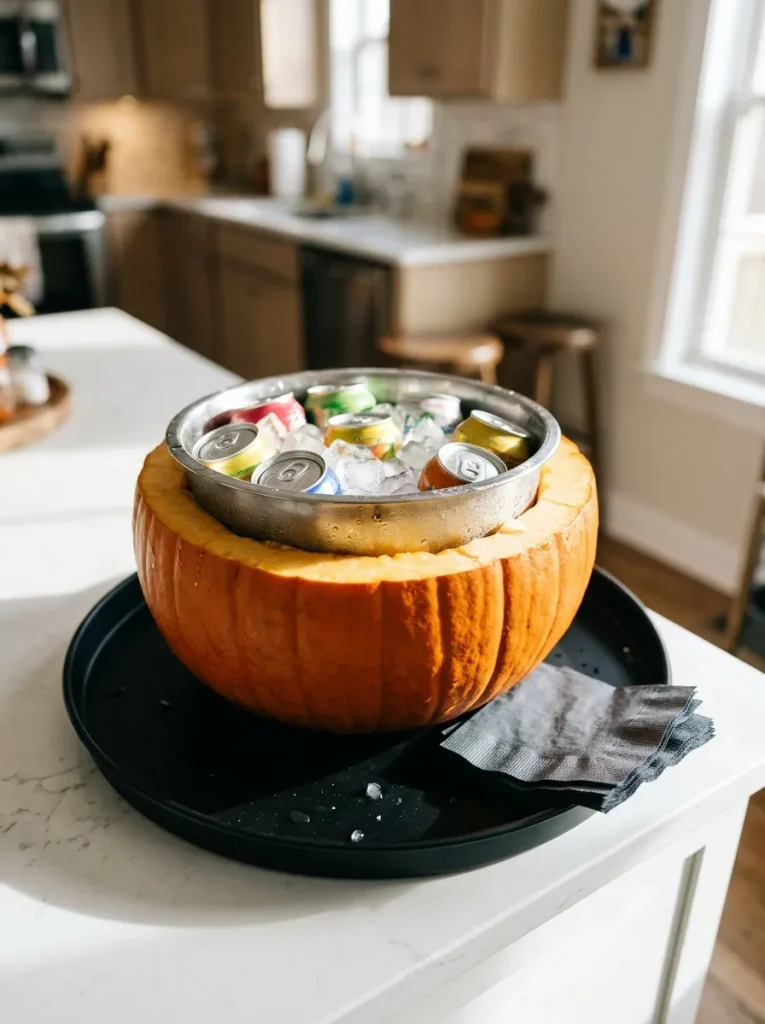
- Put a pumpkin to work as the party’s drink cooler. Choose a broad, squat pumpkin with a flat base that sits steadily without rocking.
- Select a stainless steel bowl before cutting the opening. Size the opening so the bowl fits securely, with its rim supported by the pumpkin.
- Scoop out the flesh and seeds, then wipe the cavity clean. Keep the ice and drinks inside the removable bowl rather than against the pumpkin.
- Place the pumpkin on a waterproof, rimmed tray before adding ice and sealed cans. Keep a towel nearby for drips during refills.
- Position the cooler at the island’s outer end, where guests can grab a drink without reaching across the buffet.
The orange shell supplies the decoration, so the surrounding area needs little more than napkins and a place for empty cans. Use a small batch of drinks and replenish from the fridge. Prepare the pumpkin close to party time, and retire it if the shell softens or begins to leak.
Poison Apple Platter
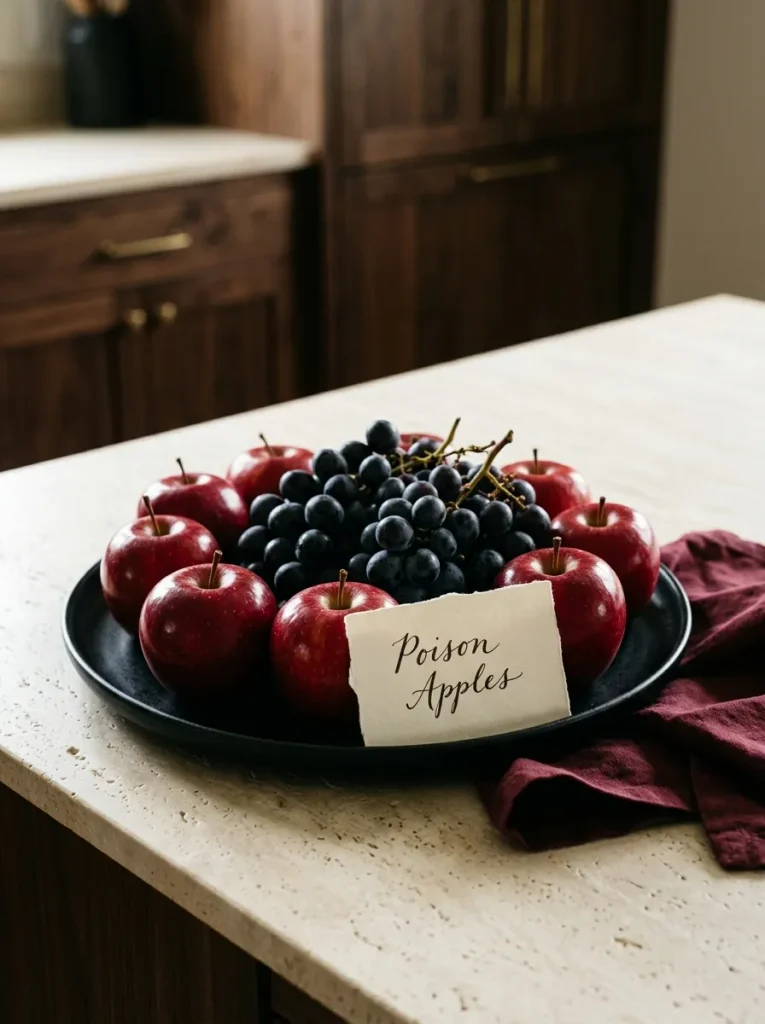
Quick Tip:
Let glossy red apples supply the drama for a fairy tale inspired fruit display. Wash and dry them, then arrange them around a small bowl of purple grapes on a dark platter. Add a playful “Poison Apples” card with “Fresh apples” written clearly underneath.
Choose smaller apples that guests can comfortably carry on a dessert plate. Keep the fruit uncoated for a simple alternative to sticky candy apples, and place napkins beside the platter. The contrast between red skins and a black serving dish provides plenty of Halloween character without adding decorations among the food.
Spellbook Serving Pedestal
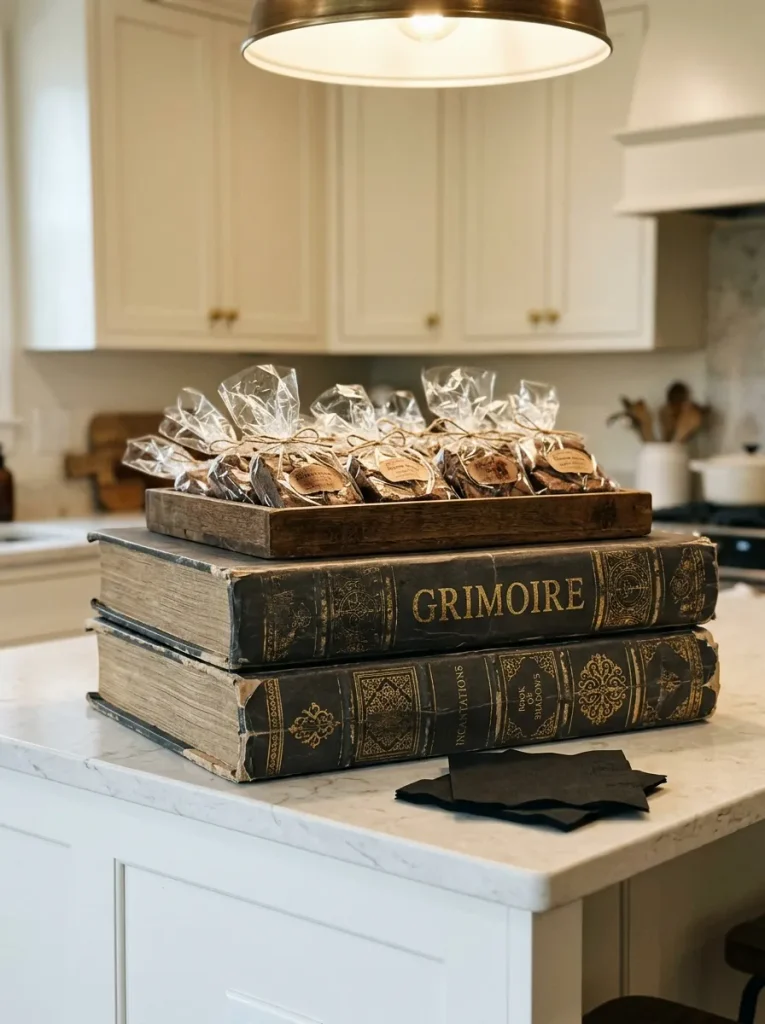
BEFORE: A flat row of dessert plates can disappear behind the dishes at the front of a buffet. Small treats become harder to spot, especially when every serving piece is the same height.
AFTER: Two broad books dressed as spellbooks lift one shallow tray above the surrounding plates. Gold lettering on their spines adds a witchy detail while making the dessert display more visible.
Use sturdy books you do not mind keeping near food, and cover them with removable paper jackets. Keep the stack low, with a tray that rests securely on the top book. Display wrapped treats here, and reserve heavy dishes or anything guests need to cut for the countertop itself.
Ghost Party Favor Bags
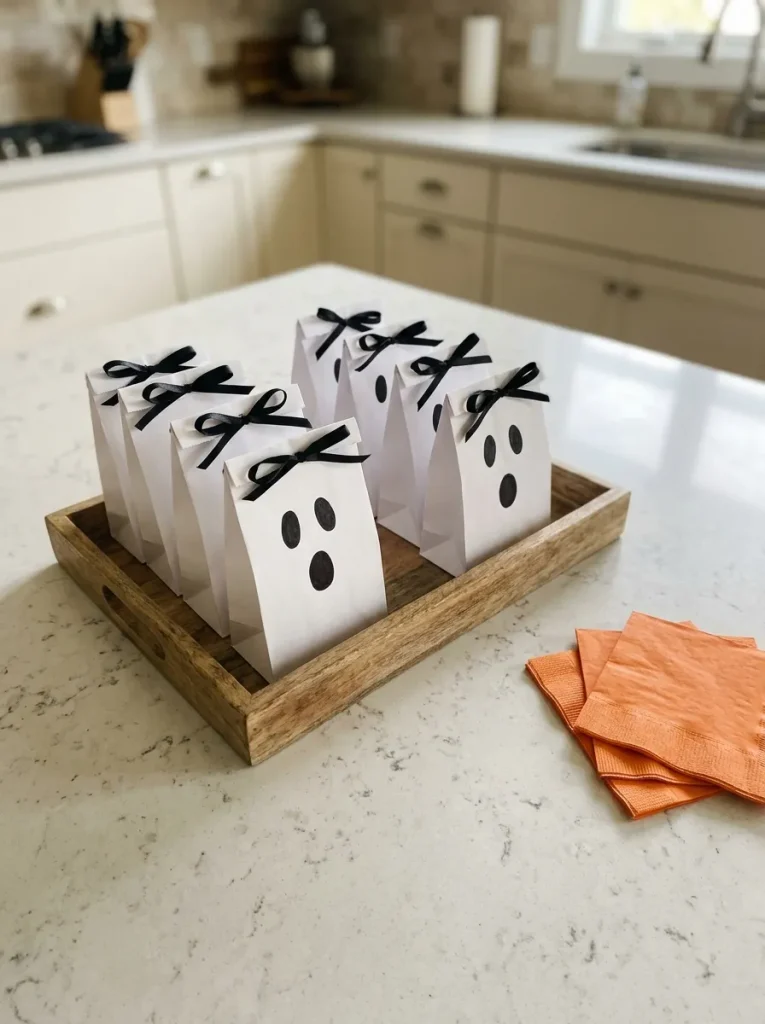
- Send a little Halloween character home with each guest in a ghost favor bag. Start with small white paper bags that have flat bases.
- Draw two oval eyes and an open mouth on each bag before filling it. Vary the expressions slightly while keeping the same simple black and white palette.
- Add individually wrapped treats, keeping ingredient labels intact. Use similar quantities so the bags stand at roughly the same height.
- Fold the tops, punch two holes through each fold, and tie them with short black ribbons. Arrange the finished ghosts upright on a shallow tray.
Set the tray at the island end closest to the room’s exit, away from the main food queue. A small “Take one home” card explains their purpose without a separate announcement. For a mixed group, mark bags containing nonfood favors so guests can choose without opening several packages.
Monster Face Cups
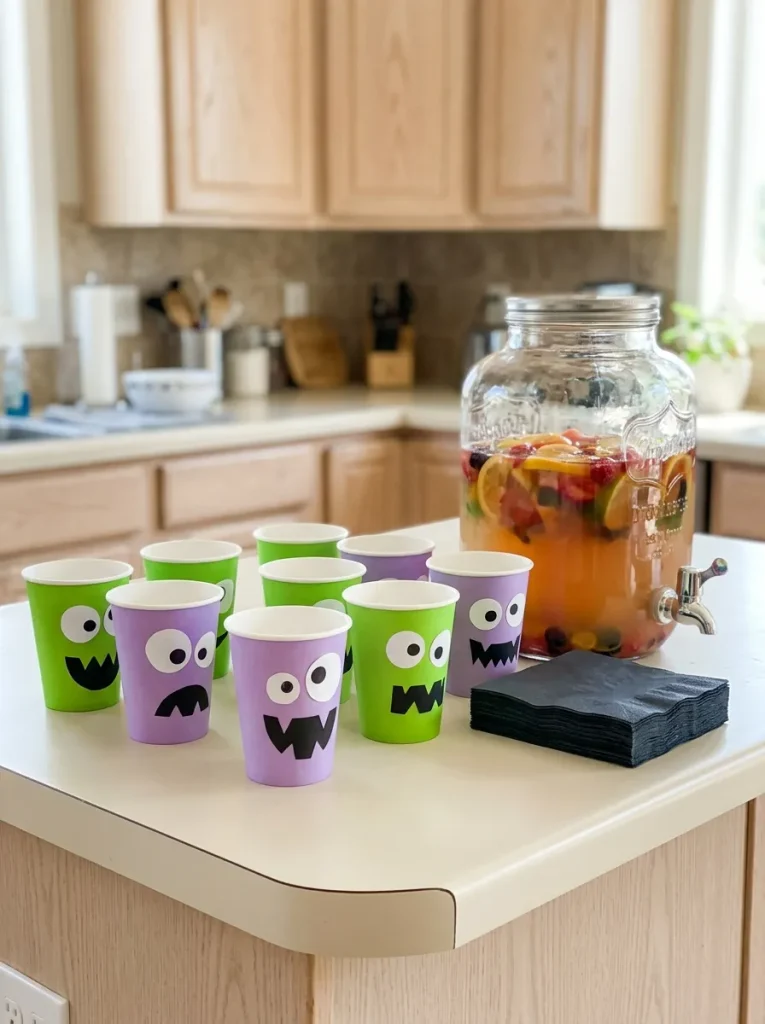
| Detail | Decorated Paper Cups | Decorated Reusable Cups |
| Face details | Draw faces before filling | Apply removable stickers outside |
| Color palette | Buy green or purple cups | Use existing cups with contrasting eyes |
| Guest identification | Write names on the back | Add removable name labels |
| After the party | Dispose of according to local guidance | Remove decorations and wash |
Let grinning monster faces turn the drink station into part of the decor. Keep ink and stickers on the outside, well below the drinking rim. Draw a different expression on each cup to help guests recognize theirs, and leave space for names so fewer half-finished drinks get abandoned.
Witch Broom Place Cards
DO
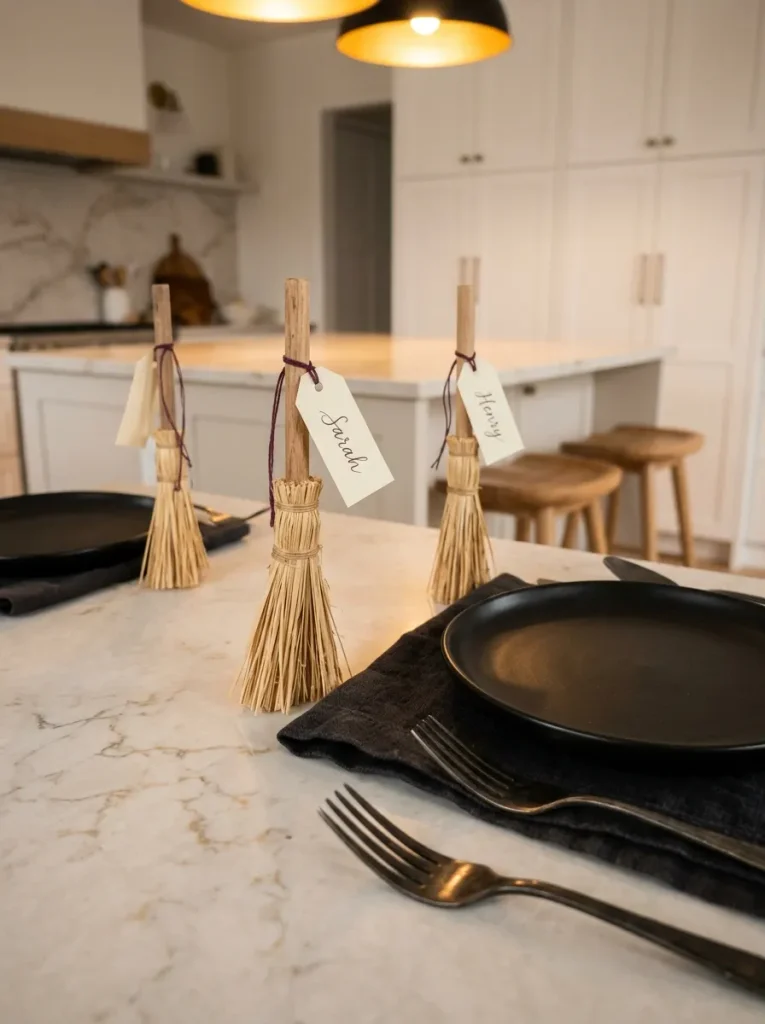
- Give each island seat a witchy welcome with a miniature broom carrying the guest’s name.
- Tie a short bundle of raffia around one end of a smooth craft dowel.
- Attach a cream name tag with contrasting thread so the lettering stays readable.
- Lay each broom beside the napkin, with the handle pointing away from the aisle.
DON’T
- Use sharp skewers or splintered twigs as handles.
- Let loose raffia strands overlap plates or cutlery.
- Make the broom so large that it crowds the place setting.
- Assign seats where guests’ knees would block an essential walkway.
These place cards suit a seated Halloween supper or a small gathering with stools around the island. Make the name tags large enough to read from standing height. For an open buffet, use the same broom design beside a framed menu instead of setting out seats guests will not use.
Orange Paper Fan Backdrop
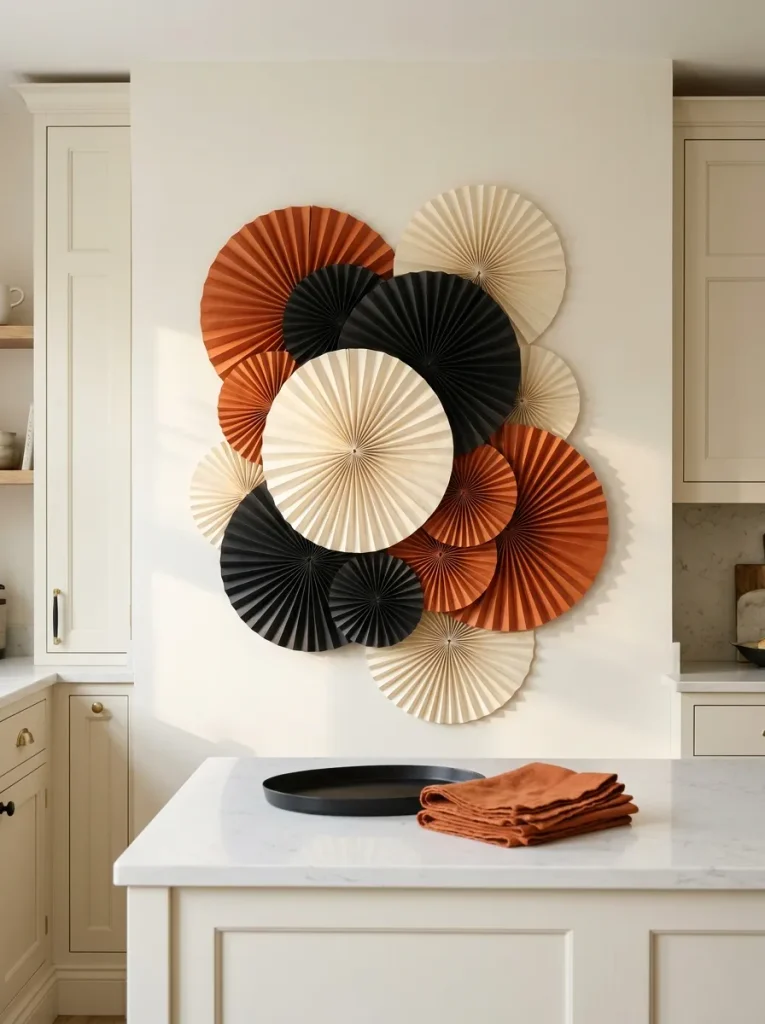
Visual Effect: Oversized paper fans give the party island a bold backdrop that reads clearly in photos.
Materials: Lightweight paper fans in three sizes, suitable removable hooks, and hanging thread.
Skill Level: Beginner, using ready made folding fans.
Best Placement: A clear wall behind the island, away from cooking heat and splashes.
Hang the largest fan first, then overlap smaller fans around its edges without covering cabinets or switches. For a “halloween kitchen island decor party” inspiration photo, frame the backdrop together with the serving area. Repeat one fan color in the napkins to connect the wall display with the countertop.
Tombstone Cheese Markers
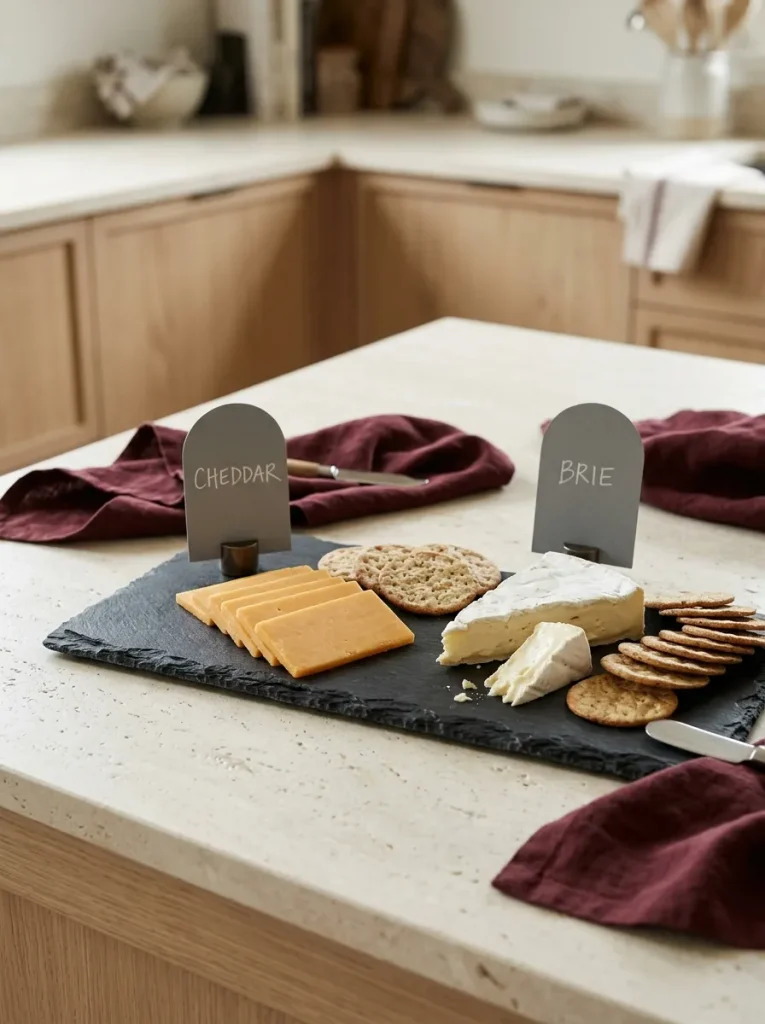
Tiny tombstone labels give a cheese board its Halloween character while helping guests identify each selection. Cut gray cardstock into rectangles with rounded tops, then add a thin black border. Write the cheese names in clear lettering and stand the cards in small holders behind the food.
Keep paper markers beside the cheese rather than pushing craft materials into it. Arrange crackers in a separate bowl so refilling them does not disturb the display. Two or three labeled cheeses are enough for a compact island, especially when other dishes need room on the counter.
Spider Balloon Cluster
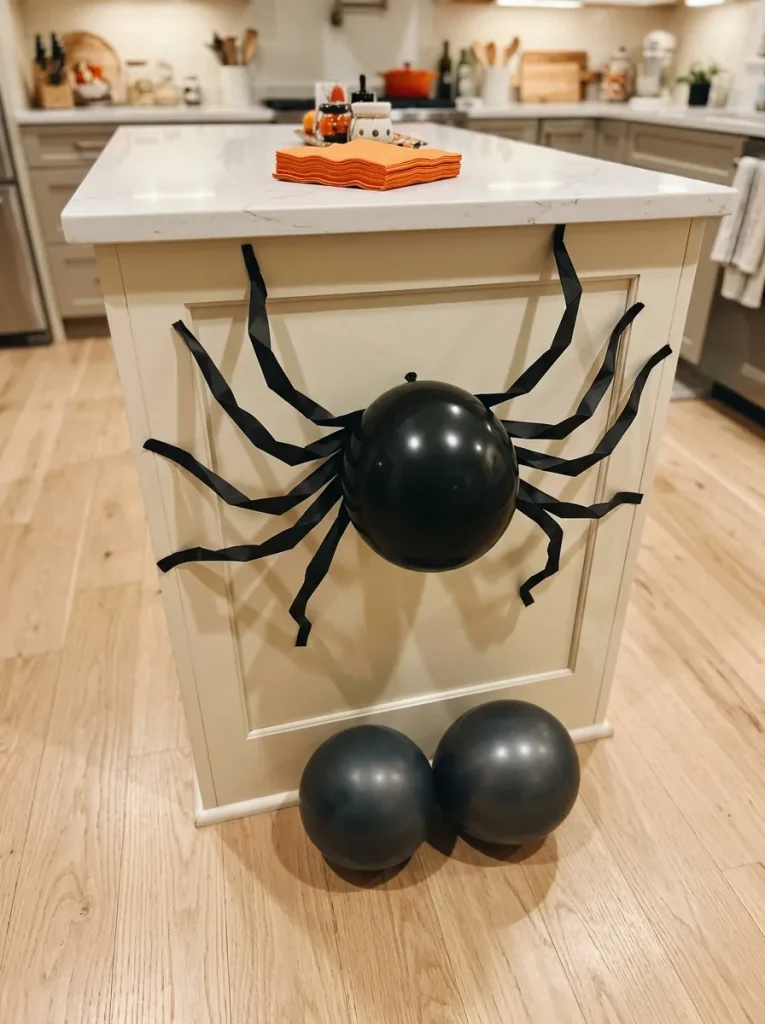
- Let one oversized spider steal the attention at the island’s end. Use an air filled black balloon as the body, positioned against a fixed panel.
- Fold eight strips of black construction paper into loose zigzags for the legs. Attach them to a separate cardstock backing so the balloon does not carry their weight.
- Secure the lightweight assembly with removable attachments suitable for the panel finish. Test the position before adding the smaller balloons.
- Keep the legs within the panel’s outline so they cannot brush guests walking past. Choose an end without stools, doors, or drawers.
An air filled balloon needs no helium and lets you position the spider exactly where it looks best. Assemble it shortly before the party and keep spare paper legs nearby for quick repairs. For gatherings with young children, keep balloons out of reach and promptly discard any broken pieces.
Striped Plate Station
Quick Tip:
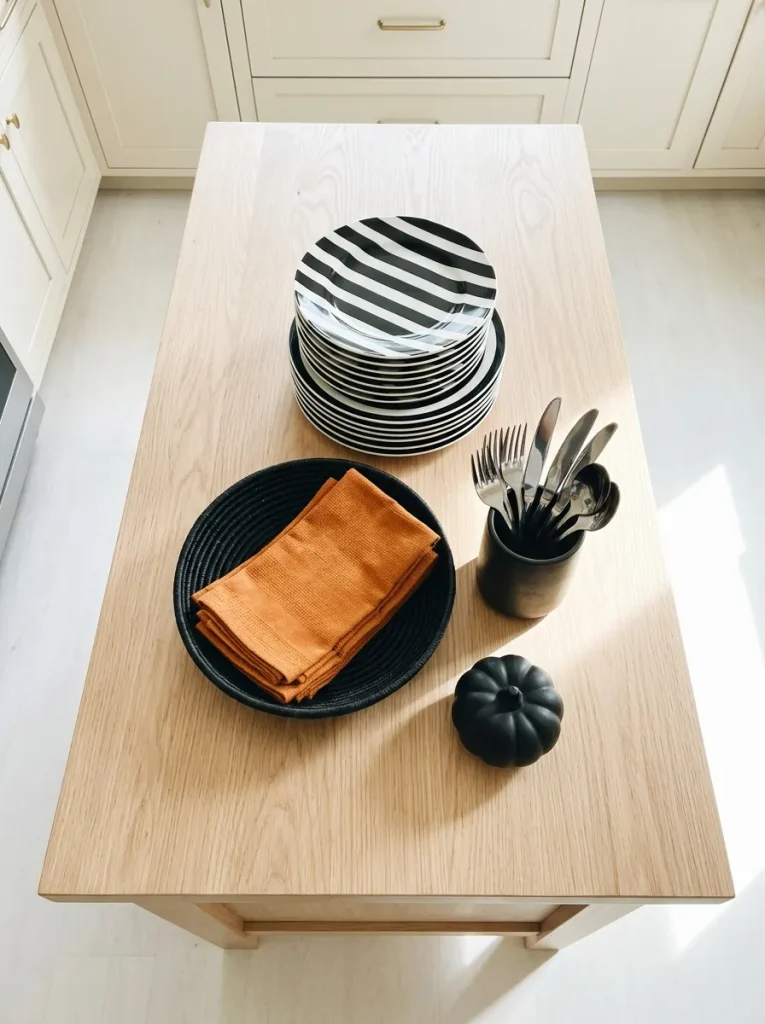
Start the buffet with bold stripes so even the plate stack contributes to the Halloween theme. Pair black and white plates with plain orange napkins, keeping the surrounding accessories solid colored. Place the stack before the food in the direction guests will naturally approach.
Choose sturdy plates that can handle the dishes you are serving, especially if the menu includes sauces. Keep a small stack on display and store extras underneath for refills. Repeating the same three colors across plates, napkins, and one nearby decoration makes everyday serving supplies feel deliberately coordinated.
Conclusion
A memorable Halloween gathering can start with a few pumpkins, warm lights, and a serving tray you already own. Choose halloween kitchen island decor party guests can enjoy while they snack, chat, and settle in. One focal point and a coordinated color palette can make even a small setup feel thoughtfully planned.
Start with one or two ideas that fit your budget and leave plenty of room for serving. Save this post on Pinterest so your favorites are easy to find, and share it with a friend planning a spooky gathering. Pick your first project and make the island party ready!